Burl Wood
![](/images/jcogs_img/cache/wood-shop-burlwood1_-_1260abdf69_-_70f00929a5952cba6b06b712a01536c8941a8d38.png)
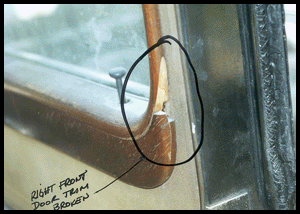
Often we have to repair existing wood that is irreplaceable, such as this Burl wood on a 1939 Caddy Limo. Notice the chunk missing from the interior glass garnish molding!
![](/images/jcogs_img/cache/wood-shop-burlwood2_-_1260abdf69_-_2da0c5dbe3ed288940ac50a53007eb1d9755164d.png)
The original burl wood needs a lot of work. It shows signs of flaking and clear exfoliation.
![](/images/jcogs_img/cache/wood-shop-burlwood3_-_1260abdf69_-_52ee517869c0aa263d79ee637207ec013d83890b.png)
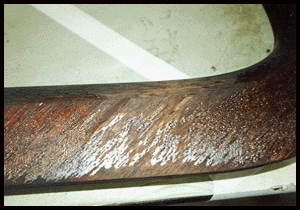
Checked and weathered.
![](/images/jcogs_img/cache/wood-shop-burlwood4_-_1260abdf69_-_518440a413109a5738d3c3e16090067c332c9df4.png)
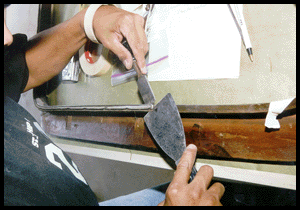
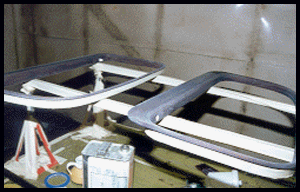
We start by removing all of The window fuzzies and overall dis-assembly of any thing not wood related.
![](/images/jcogs_img/cache/wood-shop-burlwood5_-_1260abdf69_-_920a5b4f962e30f559523cc729059e7295fa7332.png)
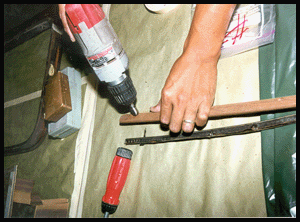
Cleaning out countersunk screw attaching holes is easy with the correct tools and slow rpm.
![](/images/jcogs_img/cache/wood-shop-burlwood6_-_1260abdf69_-_b7b7ebb68ca093425dd1a6e2a77becdaa0780ec9.png)
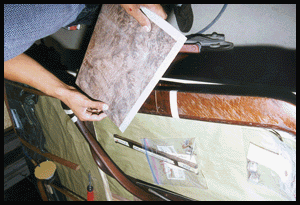
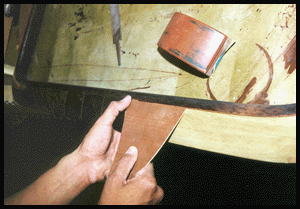
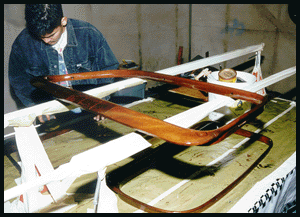
We located and purchased the correct Burl wood veneer and are fitting a template to be cut to size.
![](/images/jcogs_img/cache/wood-shop-burlwood7_-_1260abdf69_-_fd7e88bd39689ab324a3333b0a2d9c488adeafd8.png)
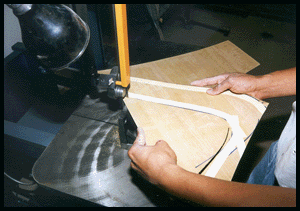
Using the band saw to trim out the initial template, we will then sand the edges by hand for the ultimate fit!
![](/images/jcogs_img/cache/wood-shop-burlwood8_-_1260abdf69_-_f474bbfc84461afd513b9c962f7da4b2f758d4fb.png)
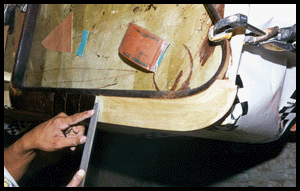
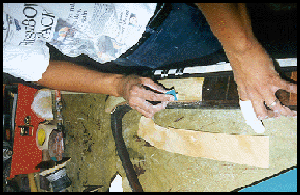
We hand file then sand it to fit in place like a precise jig saw puzzle!
![](/images/jcogs_img/cache/wood-shop-burlwood9_-_1260abdf69_-_6363e56c95bee6a3526f3d0b27467fc3bfb38dd5.png)
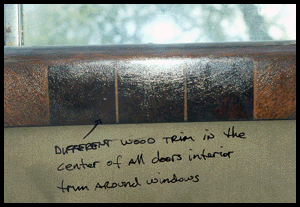
The next step is to fit the smaller and different color section the same as above.
![](/images/jcogs_img/cache/wood-shop-burlwood10_-_1260abdf69_-_c11f4b25953f230607829d7e1dc27b9b87c7f591.png)
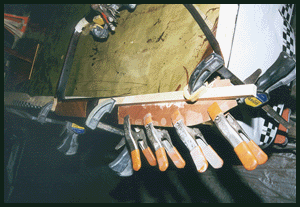
After fitting all panels we glue them in place with lots of clamps "extra hands."
![](/images/jcogs_img/cache/wood-shop-burlwood11_-_1260abdf69_-_d7ca23701d5885ebe9be435b3f8c449ebd2fe6d4.png)
Hand sand every thing level and to an exact tolerance!
![](/images/jcogs_img/cache/wood-shop-burlwood12_-_1260abdf69_-_0d2696bc520b6a140c98c80976974aeb49508a1d.png)
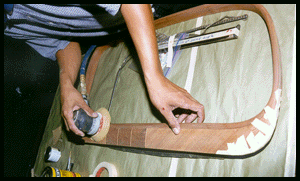
Smooth all pieces so they flow together at the same height etc.
![](/images/jcogs_img/cache/wood-shop-burlwood13_-_1260abdf69_-_840c71595bf4d2eace516e9940b68671b5c5be68.png)
We are now ready to clear. We prep the surface then apply Duratech 800A sealer for adhesion then three coats of Crystal Clear.
![](/images/jcogs_img/cache/wood-shop-burlwood14_-_1260abdf69_-_27023832fc203cc5c0fab6a957b135285d2290c2.png)
After a minimum 4 hours we then sand the clear with 180 grit then clear again 4 coats and re sand with 400 and clear 4 more coats. Then we sand 600-800-1000-1200-1500 and polish to a mirror finish.