Build Tips
Top Level Stereo
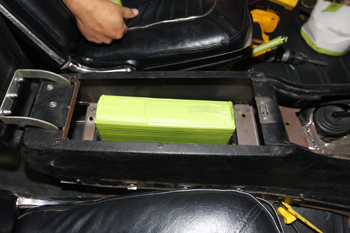
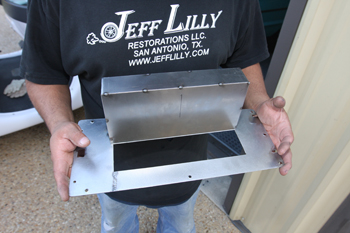
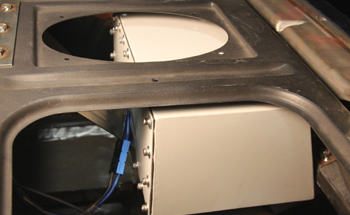
We start off by deciding where to put all the components. On many projects a customer will want the CD and or head unit out of view as is the case of this CD changer. It fits great down inside the original console so we fabbed some hold down brackets.
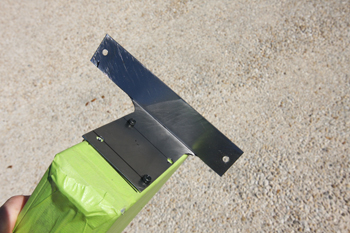
We pulled the unit out so you could see the simple T-Brackets that were made and bent to 90 degrees on the sheet metal brake. We then drilled holes to match the CD changer and original console mounting screws respectively.
We pulled the unit out so you could see the simple T-Brackets that were made and bent to 90 degrees on the sheet metal brake. We then drilled holes to match the CD changer and original console mounting screws respectively.
We took it out to show how we also added a box to use for papers, CD's , sun glasses or? Sort of like a mini glove box.
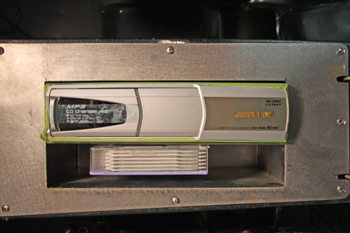
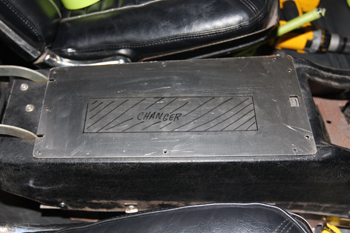
The unit is installed back in place and you can see it is trimmed out nice, we will blast, prime and paint the unit during final assembly.
The console lid clears the unit and goes undetected from any one's view.
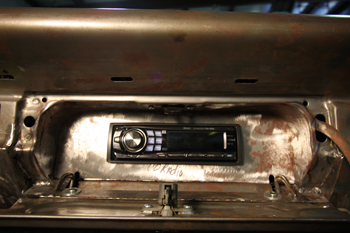
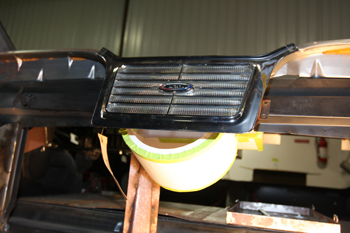
The head unit was installed behind the original glove box lid using 20 gauge metal.
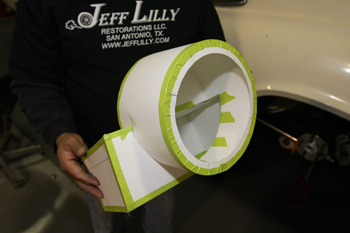
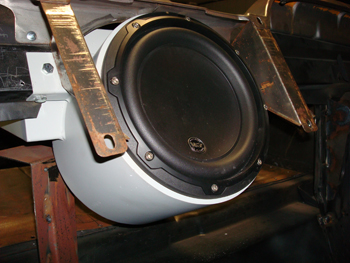
On this project we wanted to hide the sub woofer and this 1964 Galaxie XL had a great place to accomplish this. In the middle of the rear seat Ford had installed a speaker with a chrome bezel covering it. We chose that area because of the ample room but we wanted to upgrade to a much larger speaker so a mock up needed to be done. We designed it to hold the desired speaker while being sure the minimum air space required was met while holding it all in place. All major speakers MFG list their minimum air space requirements for any given speaker.
As seen we installed our mock up and she fits fine. The 8 inch sub sticks down a bit past the stock grille opening but it will not be seen behind the seat. A 6 inch would not make the sound we wanted so we chose the larger sub to power up the cockpit with good low notes.
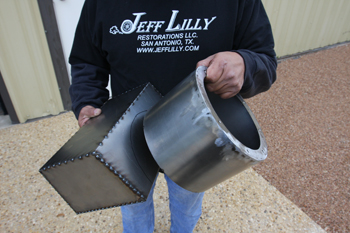
Luie started off by making the box in two separate sections and will now cut out the square section or the air box and weld the sub enclosure to it.
It is finished and installed, Notice the rear cover plate with access screws to remove for servicing and also to assist us in spraying the inside with snake skin sound deadener.
The JL audio sub is ready to fire up, as seen the support brackets were built on the side like ears and bolted to the rear deck solid. This will all be hidden behind the factory chrome trim.
Luie had to modify the rear seat a bit to allow the sub clearance and support the seat at the same time. This will not be seen once installed and the grille cover is in place.
We stuck the seat back in and as you can see the sub woofer is unseen but the sound fills the cockpit with never before sound waves of quality.
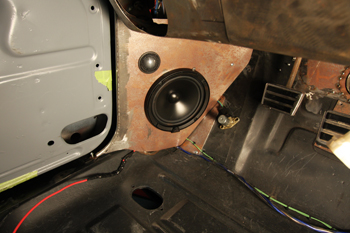
The kick panels are an excellent place for the front speakers, On this particular project we had to fabricate the kick panels on an angle to clear our hidden hood hinge gas shocks. This worked out well as the angle still allowed good foot room while the sound waves hit the opposite side front passenger directly for optimum sound.
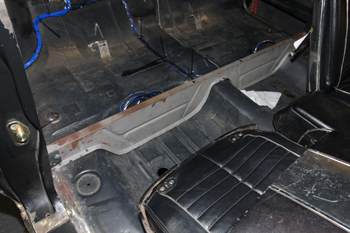
When installing sound systems we always look for what the vehicle will offer for locations that allow different alternatives such as places to hide speakers and natural sound boxes depending on the customers desires, As seen this rear seat riser is a great place to install mid's and a set of 6x9' s will work out fine. Once the rear lower seat is installed you have a natural enclosure.
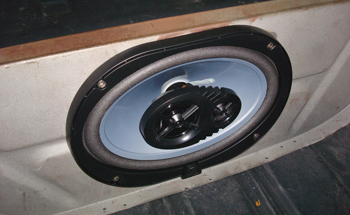
The 6x9 speakers fit great and the space under the seat acts as a nice sound box with ample air space for great sound. The customer wants them hidden so we will cover them with a black mesh across the entire panel.
If your looking for first row, front seat sound then this Torino system is the ticket. Notice the floor speaker cut outs which house 8 inch Dyn-Audio mid range speakers. They are pointed directly at the front seat passengers ear for max sound. Under the dash we installed Image Dynamic Horns for the highs/tweeters for super crisp vocals and the lead guitars comes to life. This system sounds like an entire band is sitting on the hood of the car with unreal clarity and 0 distortion detected by any humans ear.
When building systems such as this Torino, high power is needed so the front speakers are powered by a JL 450/4v2. 1 gauge power leads and crossovers with separate equalization is also needed. This is not the entire system of power and control, only the lower section.
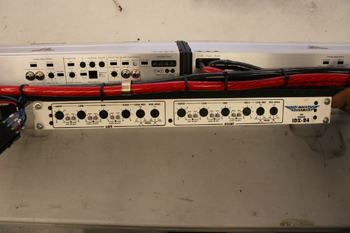
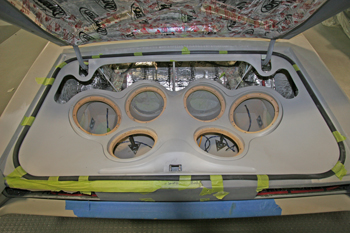
The upper section houses a qty of 2-1000 watt JL amps to provide power for a qty of 6 -10 inch W6 JL drivers in the trunk. The Image Dynamics EQ hanging below the amps allow complete adjusting to the system.
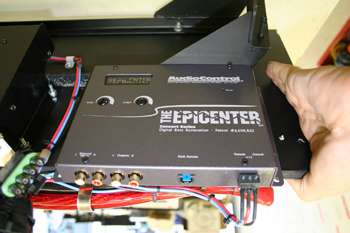
This EPICENTER by Audio Control is a nice component that allows you to bring out more bass in older music then it originally had. We installed the dial rotation in between the console and the drivers bucket seat.
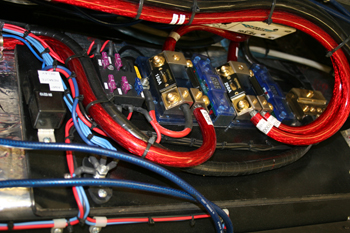
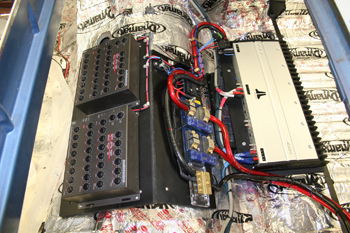
The fuse block has massive 1-0 wires and relays to keep everything powered up safely.
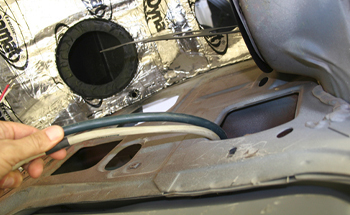
Hiding wiring where carpet can cover over them and away from heat sources like exhaust systems is very important.
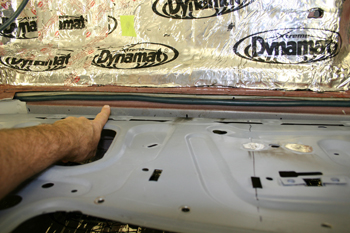
As seen this door step plate channel is an excellent way to run the wires front to back.

We go on to the juice or batteries that will keep the power coming. The Kicker fuse is an added benefit to protect the expensive amps from surges.
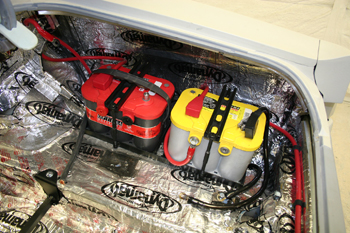
On each side of the speaker box we have two batteries for a total of 4. These are our mock up batteries and as seen they are gel type Optimas for no acid residue. Yellow Red and or Blue top are built for marine use for extra reserve capacity.
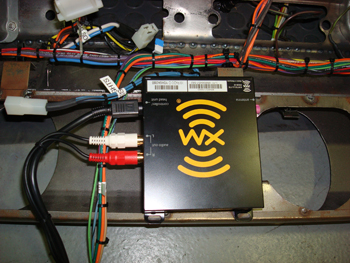
XM satelite radio is another nice touch as seen we mounted the brain to the back side of the dash for easy access to the plugs etc.
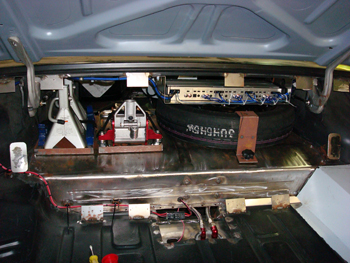
On tight projects where other components are taking up space you have to improvise. Notice the amp rack hanging from the rear deck. Just enough clearance for the space saver tire under it and the floor jack system to the left while still allowing a large 450/4v2 amp unit !
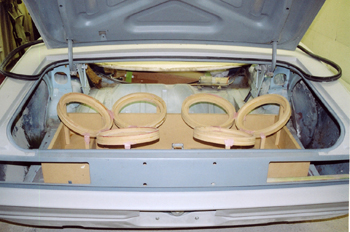
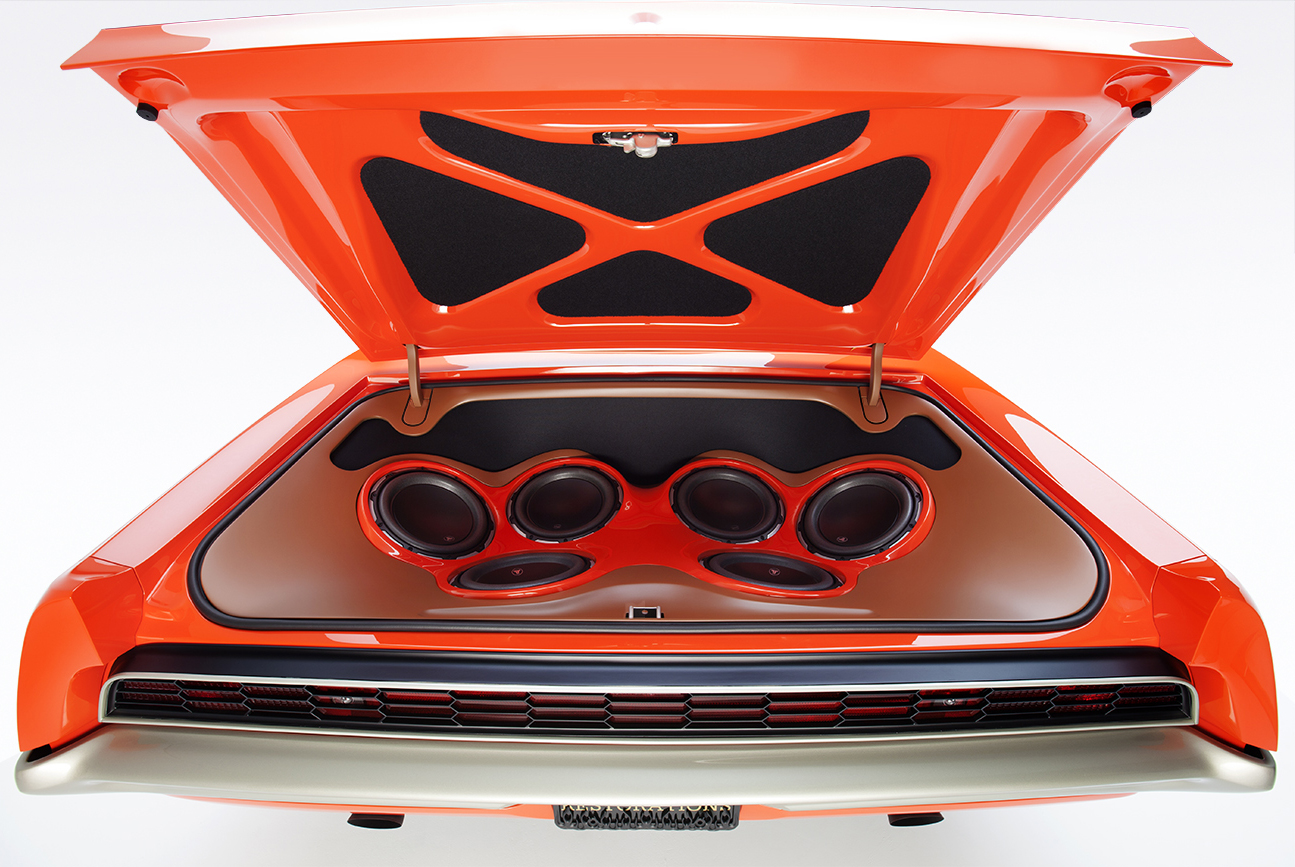
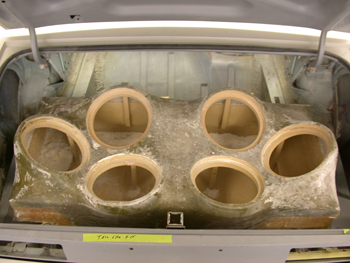
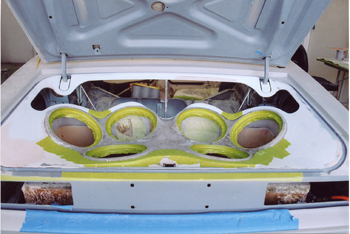
Custom work is in order when you just can not deal with the norm. As seen in this Torino system we start with 6 MDF rings we cut out on a router to accept the W6 speakers we chose. We mounted/glued them in the right matching angles and are ready to start covering them.
We take fleece and cover them tight using a staple gun they are wrapped and ready for some fiberglass resin work.
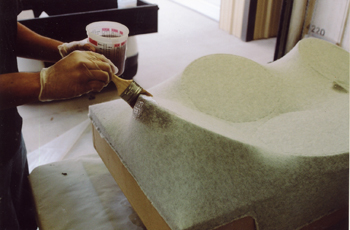
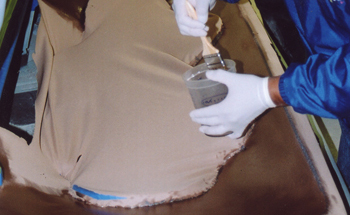
We mix up and coat them with resin saturating all materials to get a strong first layer to support thicker matting later.
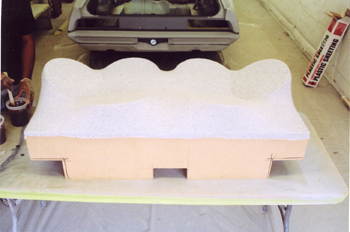
Once dried you can see the box starting to take shape.
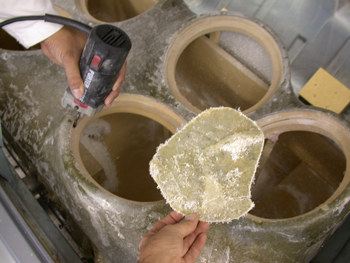
We use a porter cable tool and buzz out the speaker sections.
Looking good and taking on its own personality we will call her 6PAK
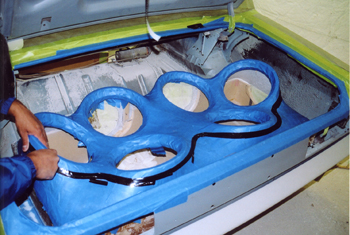
Next step we tape her off to get ready for the outer cover.
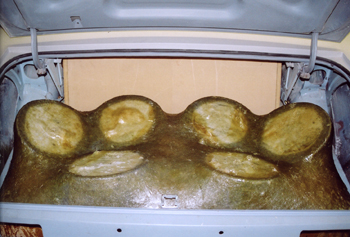
We wrap her much in the same way but use polyester cloth. We tape the edges around the cars trunk perimeter.
We trim her out much in the same way and also cut out a shaped hole in the back section to allow the sound to come toward the front of the car.
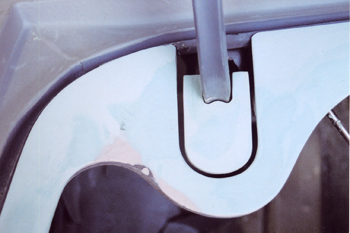
The trunk hinges get a U. pad treatment that stays with the hinge and fits with a small gap when up, just behind it we will add a trim piece to finish it out.
We sanded her down and applied some hi build primer and she is coming around looking good.
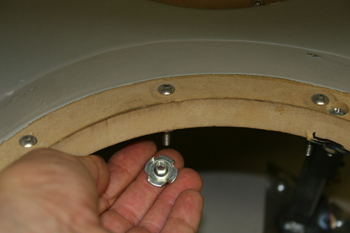
We will mount the speakers with T-nuts that have teeth which pull in to the MDF wood when tightened.