

Build Tips
Stainless Trim Fit
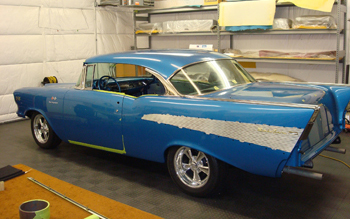
The infamous 57 Chevy, she is painted buffed and waiting for her trim. The techniques you are about to learn can be used on any make or model car or truck.
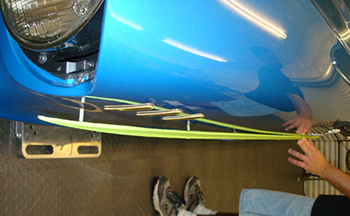
It is rare for stainless trim to fit dead on to a body panel. The heat that is generated from a buffing wheel transfers to the stainless which relaxes the molecules and in turn distorts the molding some. The trim fits flat near the fender but way off at the end. Most people would simply bolt it up and tighten it down. The problem is it would distort the body panel because of the pressure generated by the molding and the mounting studs. You will then see small ripples above and or below the molding on the bodies painted surface. You must make the molding fit exact in a relaxed state against the surface.
As seen when Eric pushes in the center the ends come off. The diagnosis on this part is that it needs more "ARC as it is too flat overall.
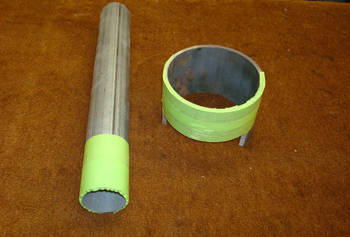
Tools of the trade. 6 inch round tubing and 2 inch. Taped for added protection-cushion
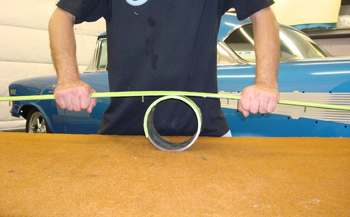
Using a "little" 1-2 lbs of pressure to start with Eric rolls the molding back and forth a bit at a time in between the fasteners.
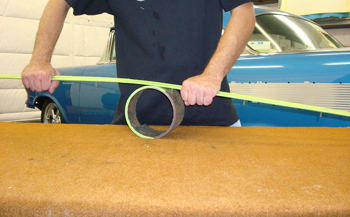
Then on to the next section. You may want to remove the clips during this phase if you do not have much experience " tweaking" parts to fit. For shorter moldings and stubborn areas he uses the smaller diameter pipe.
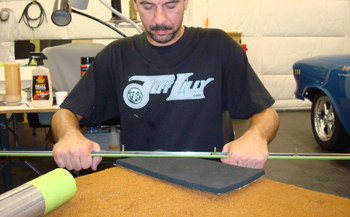
In some cases you will encounter a slight twist in the molding. We use 5/8 thick closed cell foam. Eric applies a bit of pressure while twist- tweaking to get it to conform to his liking.
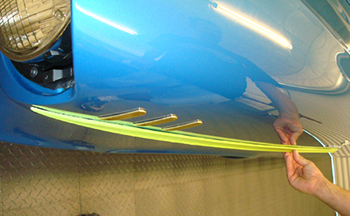
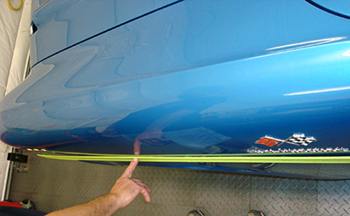
As seen she fits like an isotoner glove. At this point we remove the tape then "finger tighten only" the serrated locking nuts. Just tight enough to keep it from coming loose but not enough to distort the body panel.