

Build Tips
Foam It Fab
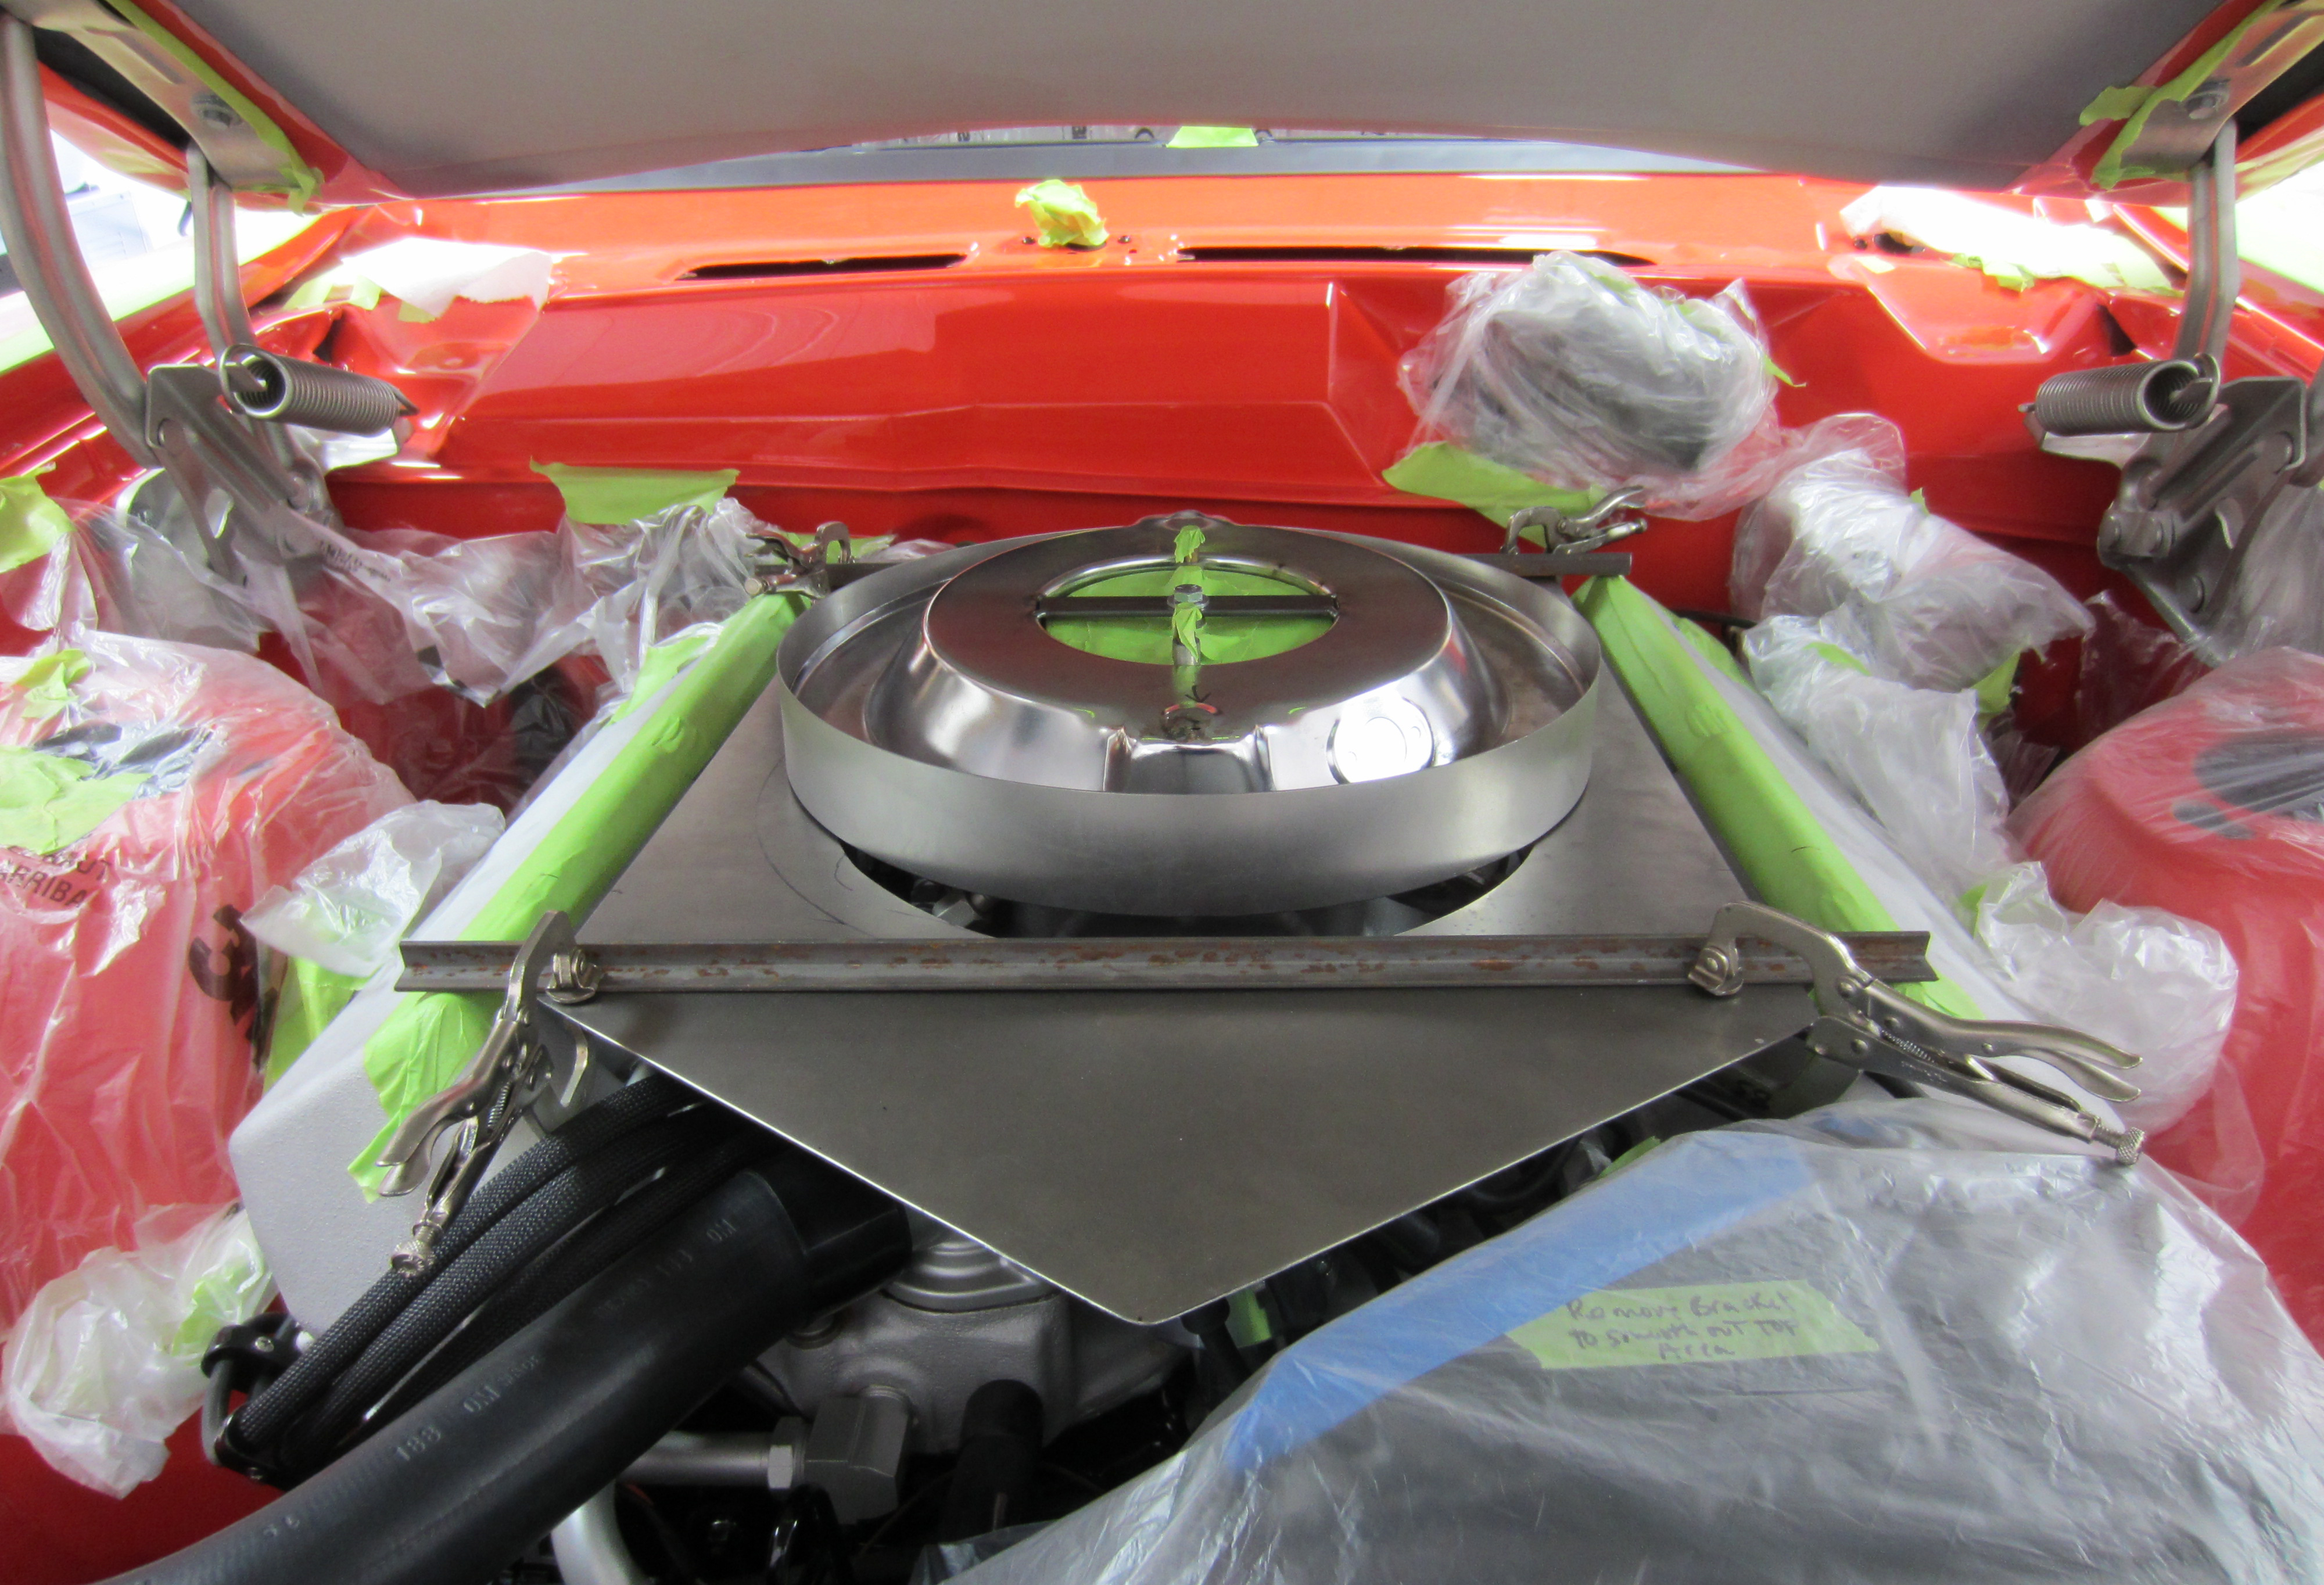
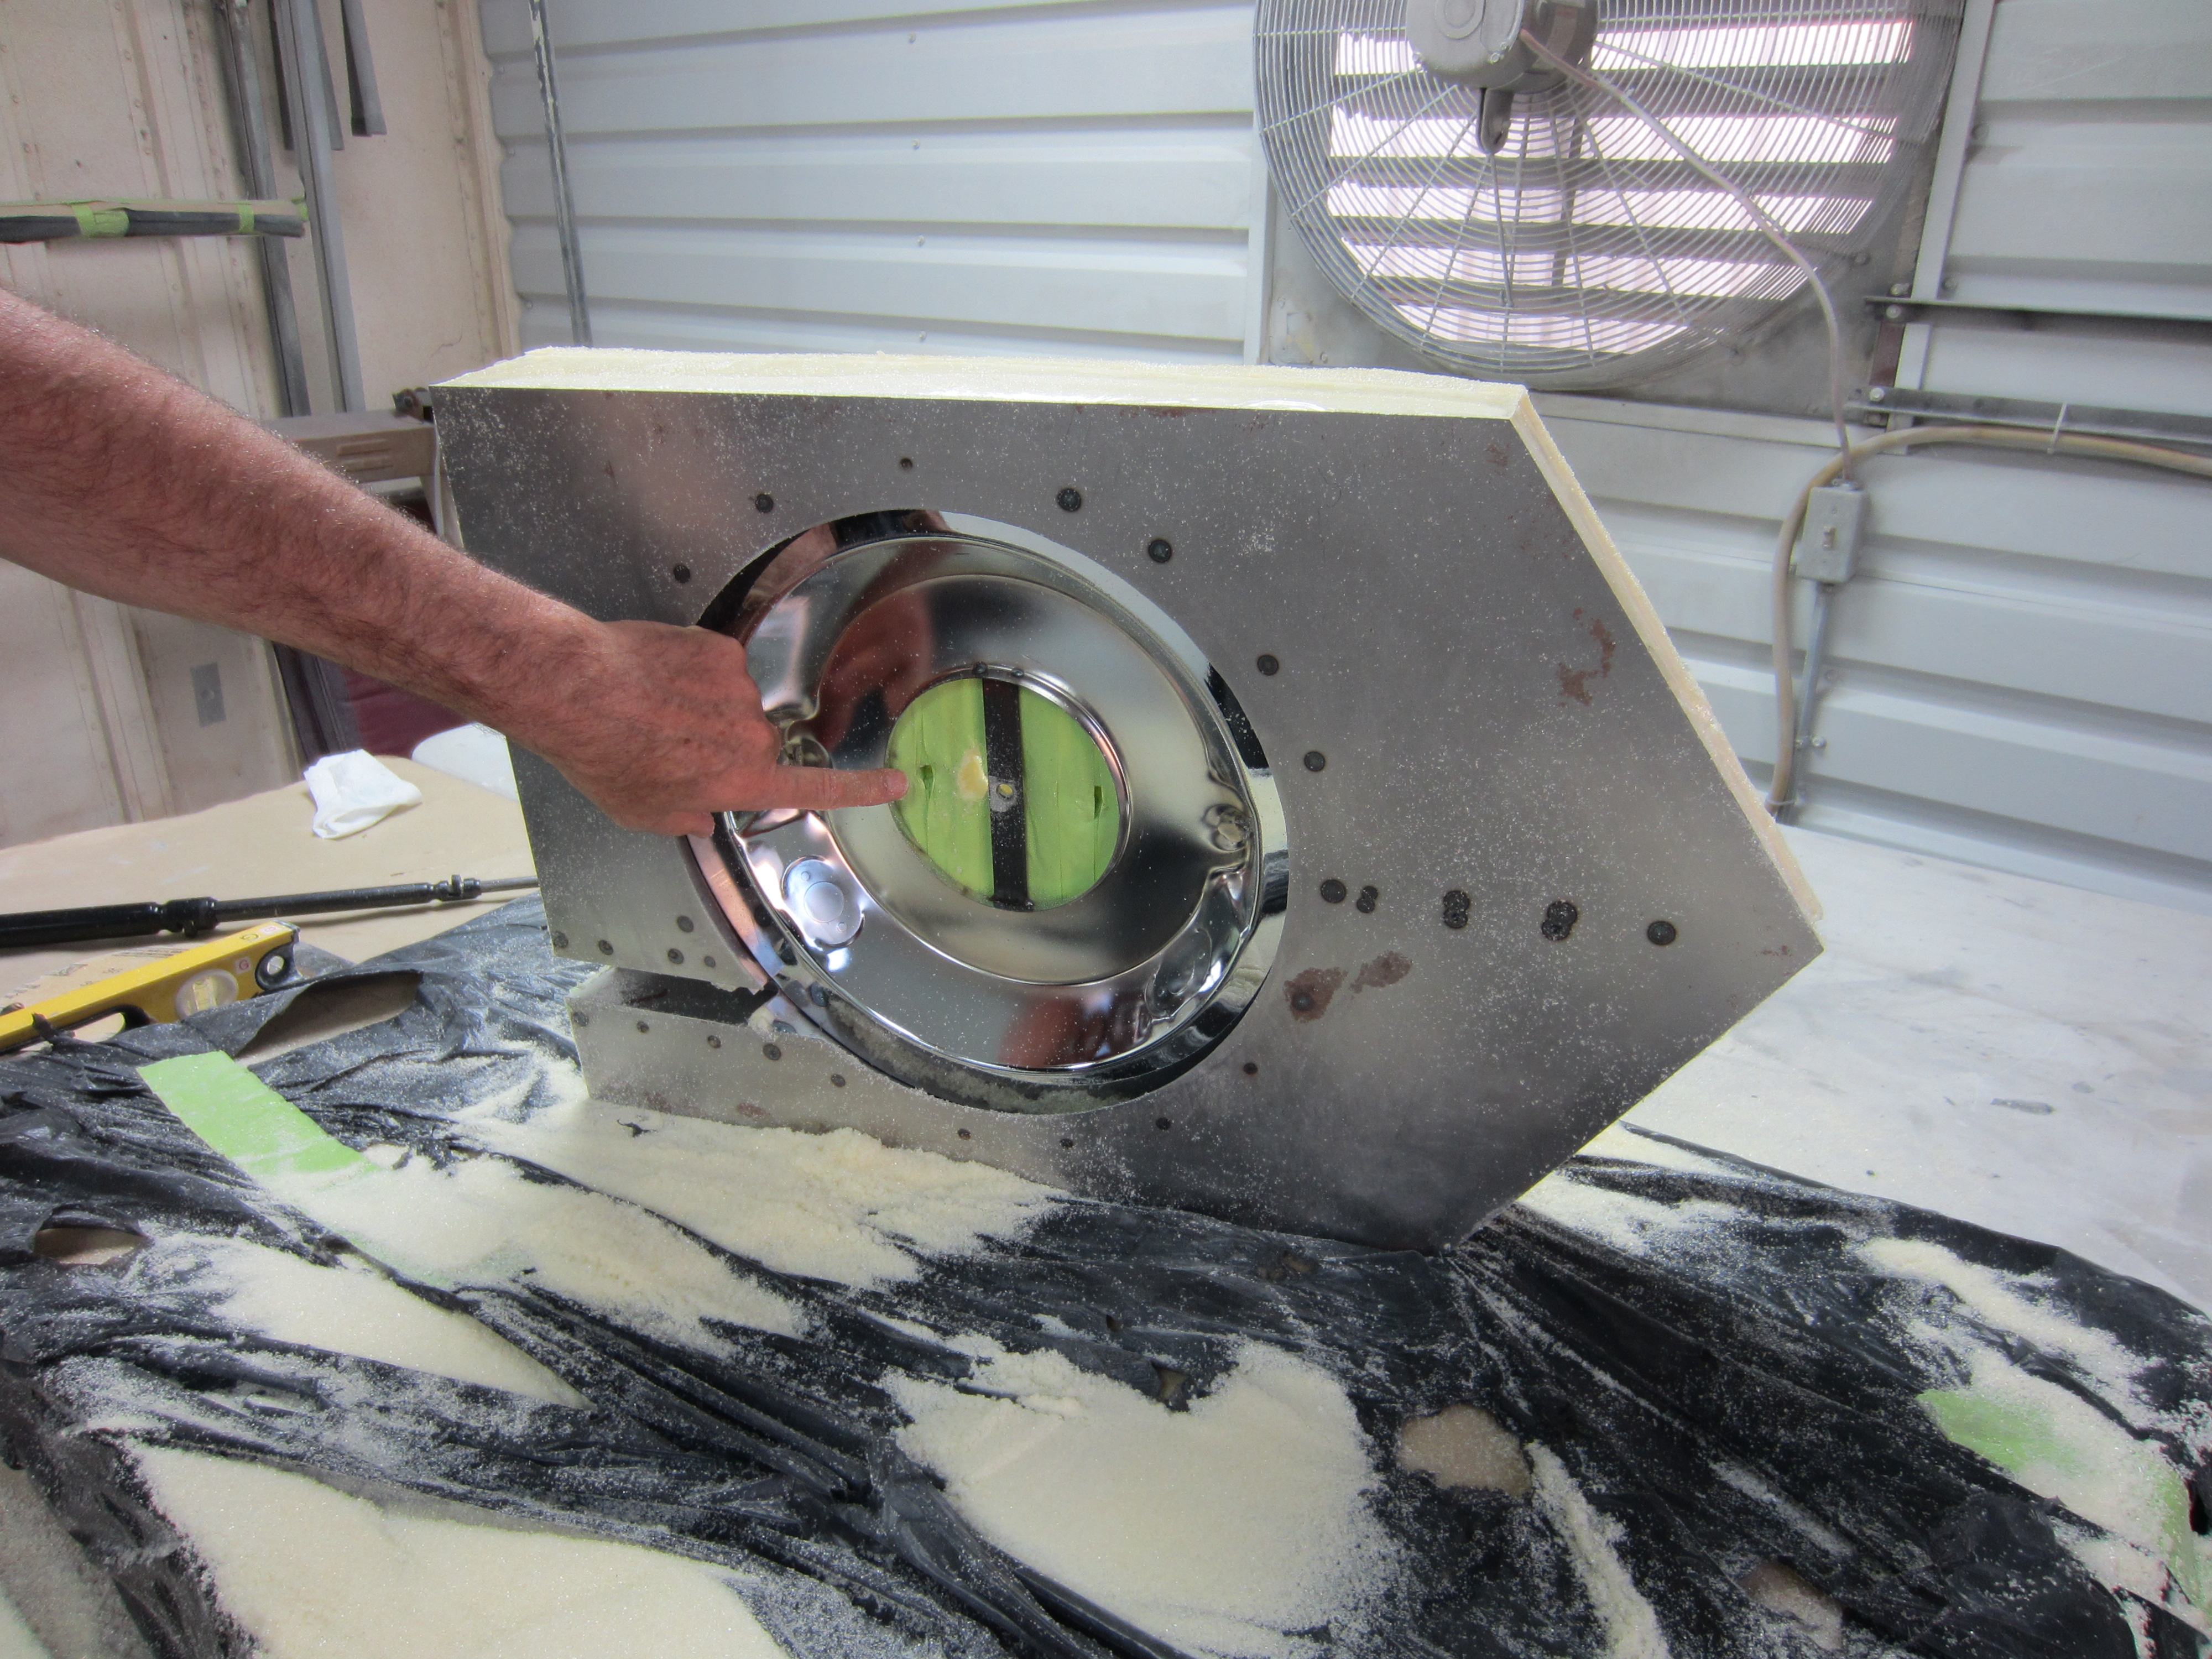
We start out with an over the counter 12 inch filter base from Moroso. We tack welded a trim ring around the perimeter to drop the bottom base/tray down 2 inches to match the height of the valve covers and leveled it side to side. As seen we also added a strap across the carb opening to mount the system and hold it down secure.
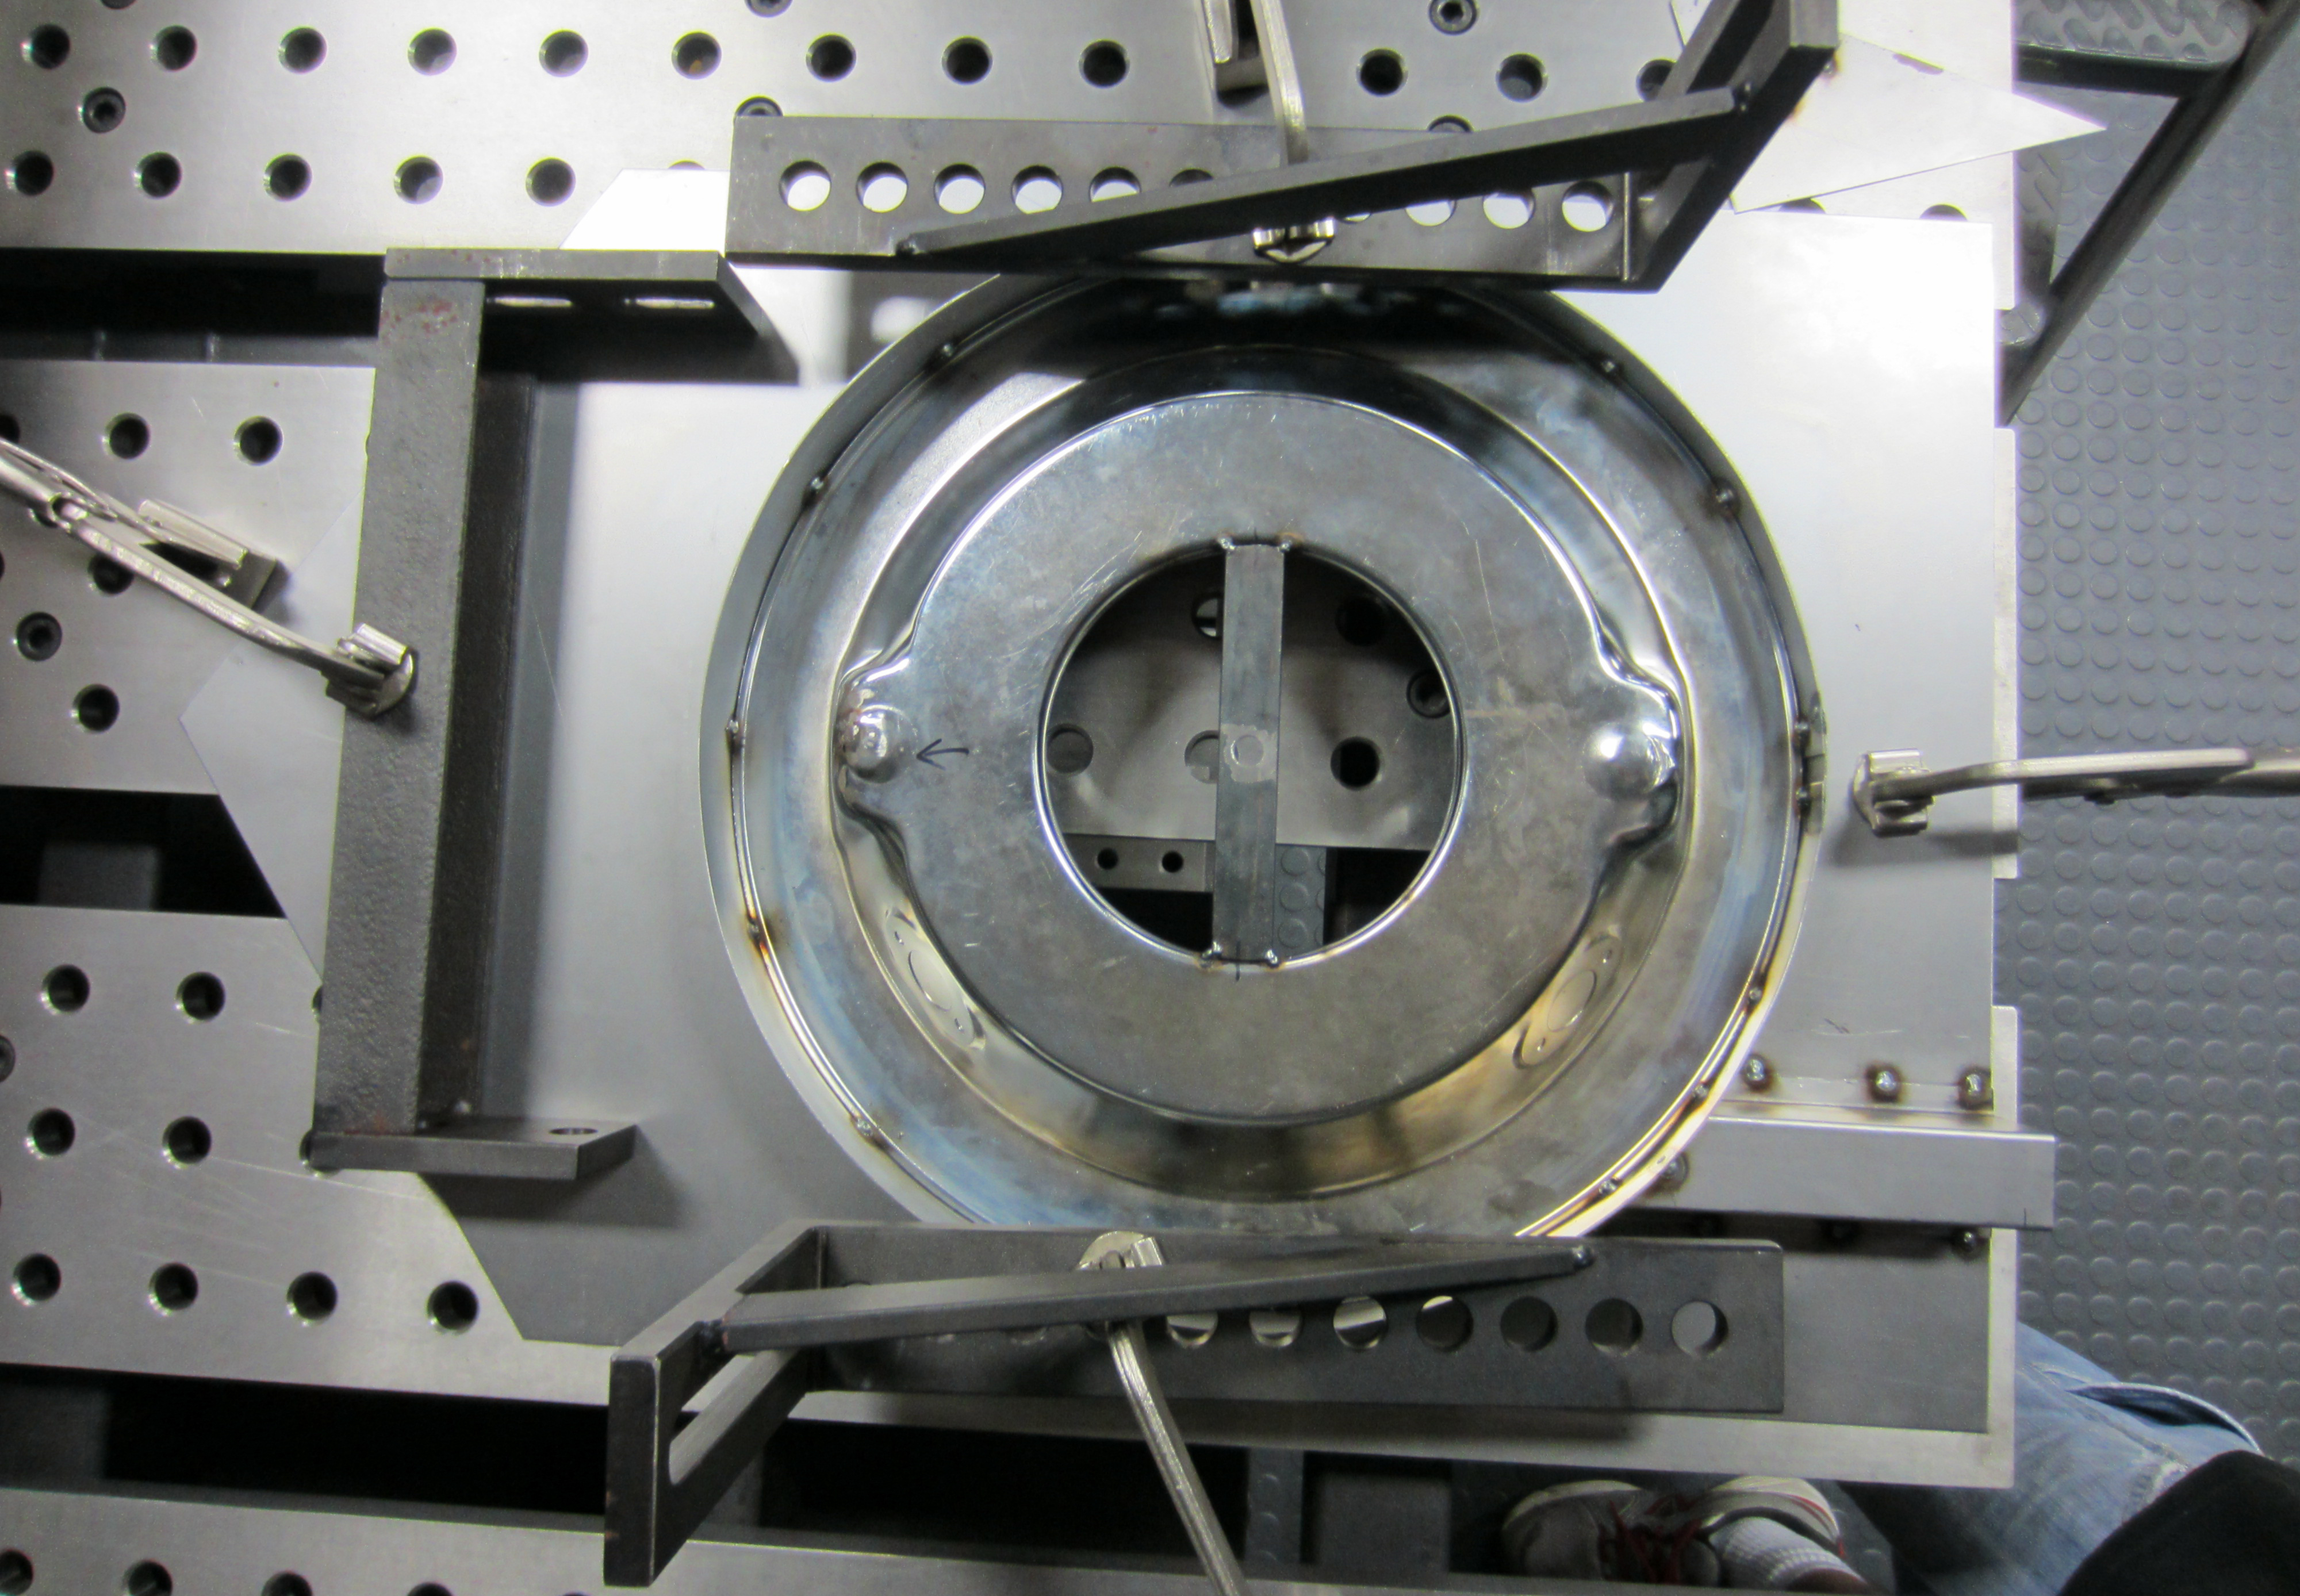
We clamped it all in place on our fab table after we determined the exact position it needed to be in. Perimeter tack welds will do the job as It only needs to be strong enough to support the lightweight air cleaner cover.
A simple channel was added to the back side to clear the throttle cable where it runs through and hooks up to the carb linkage.
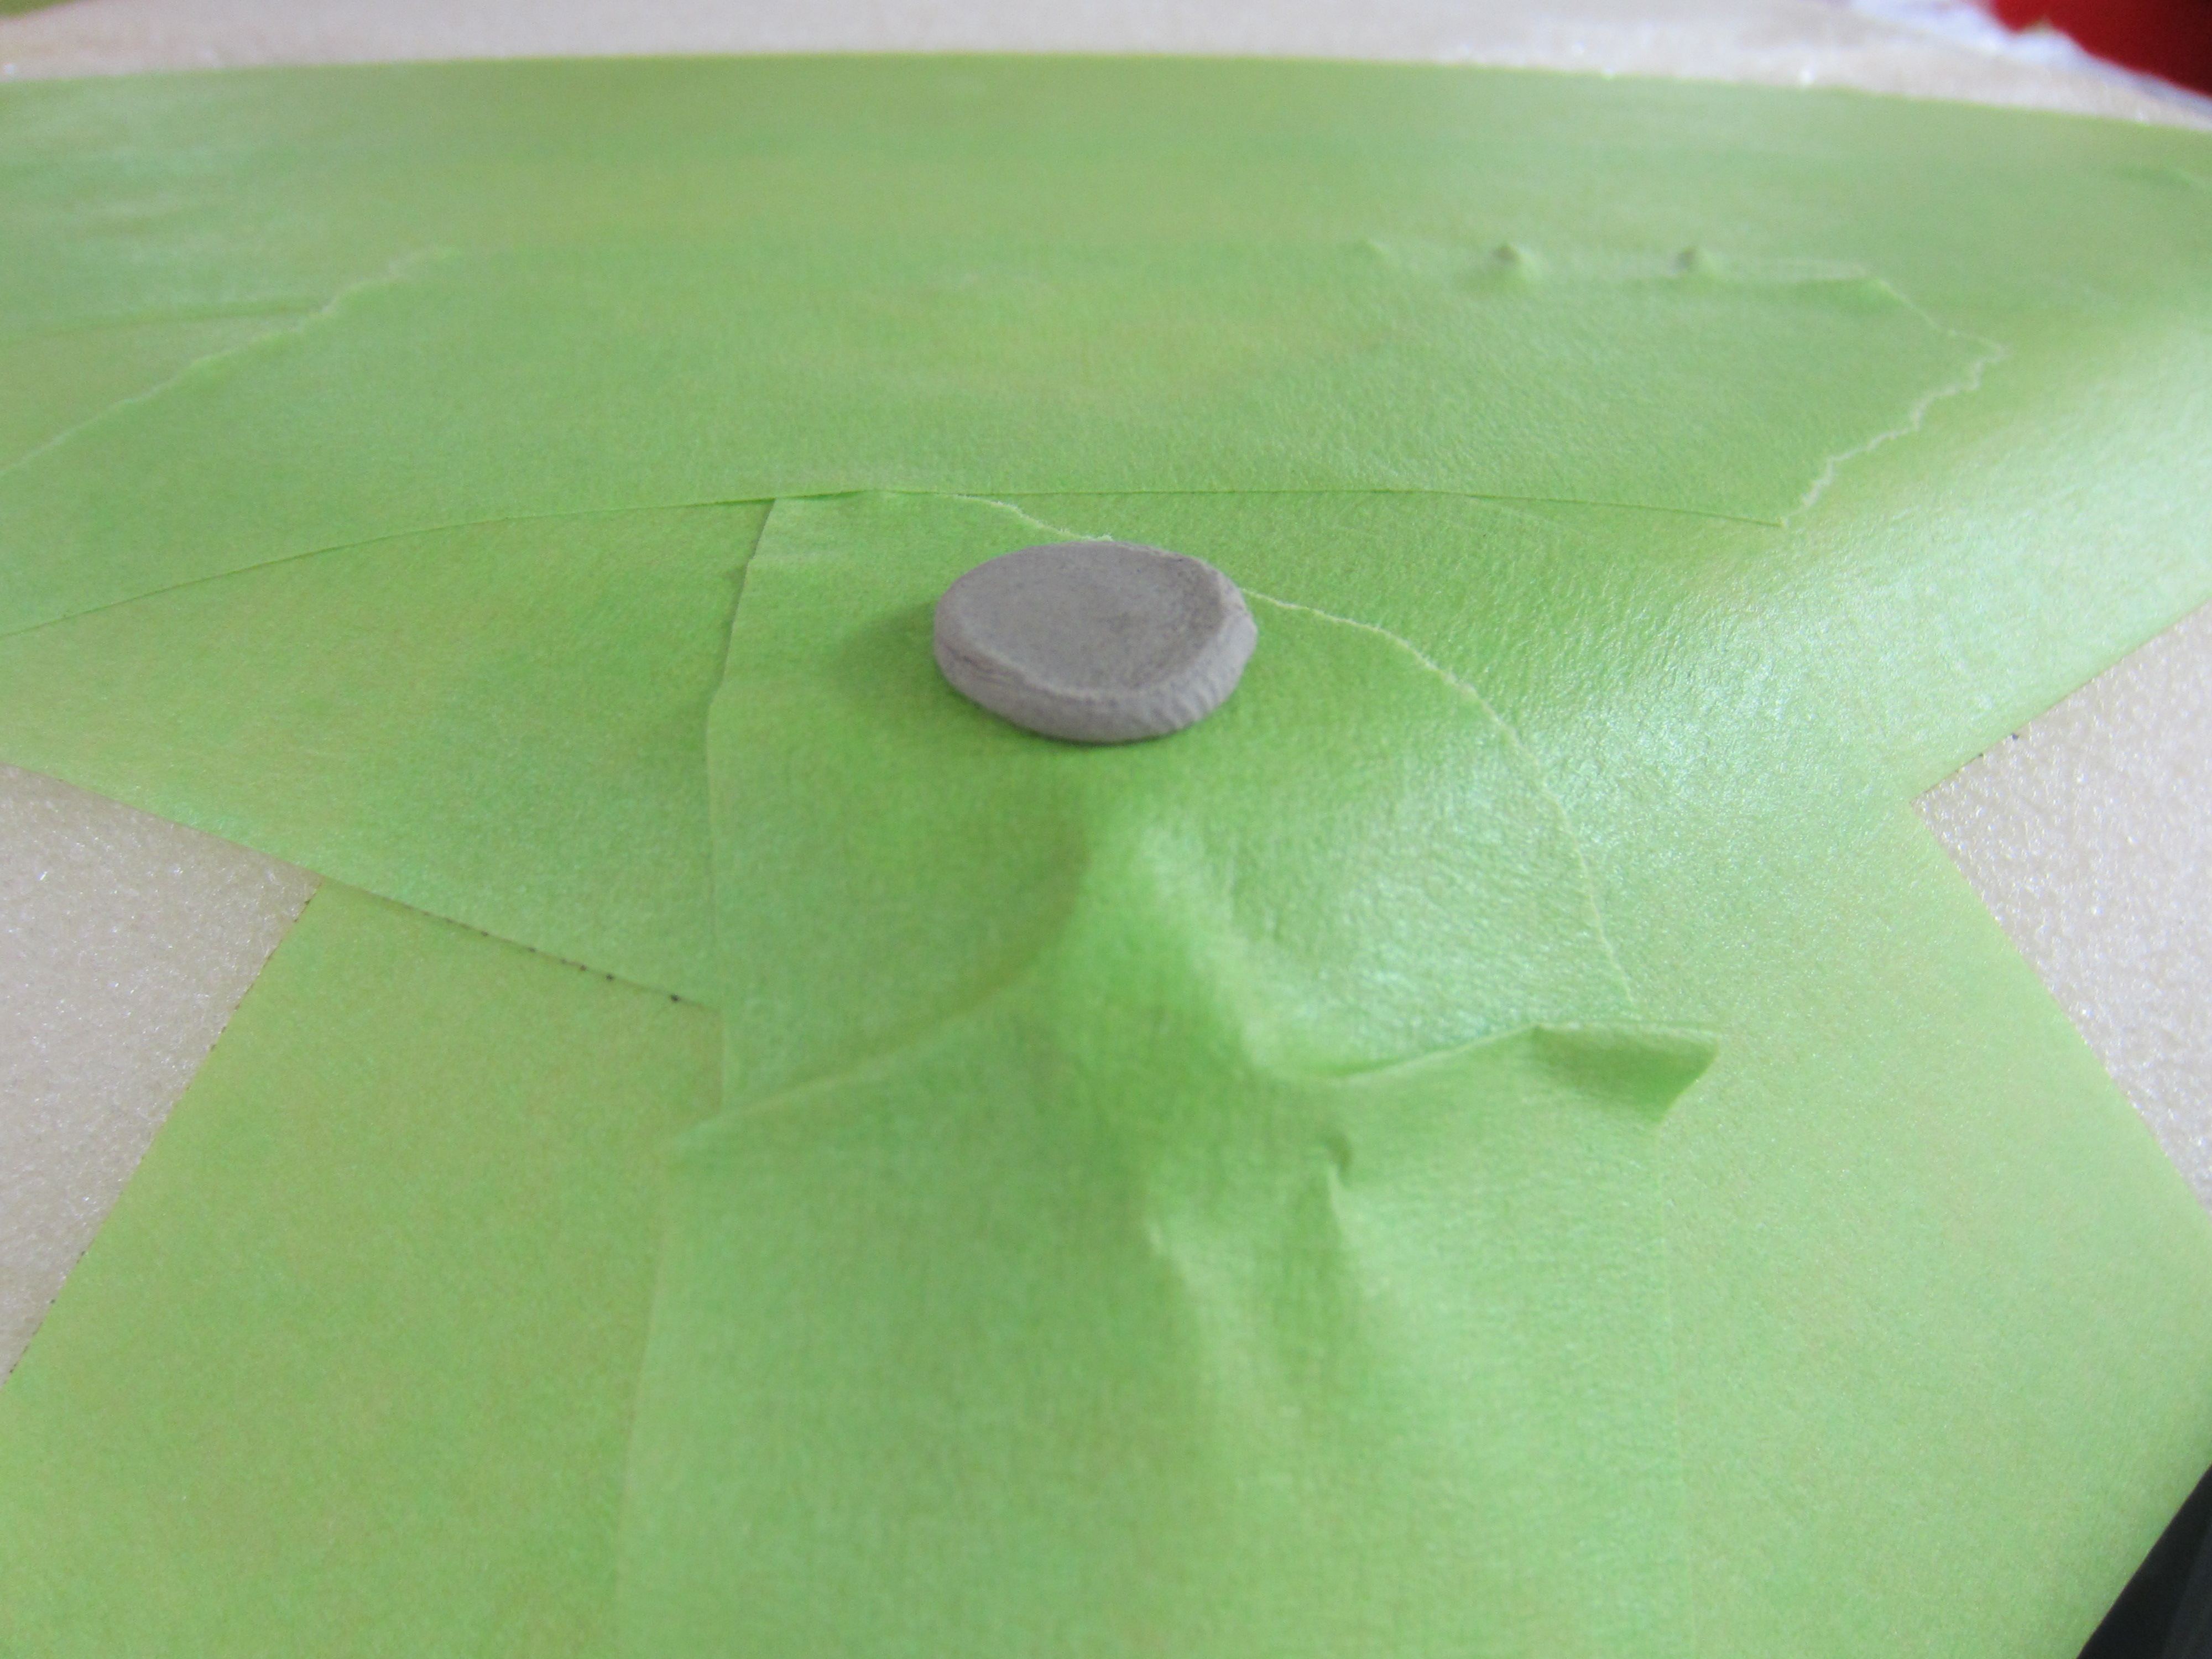
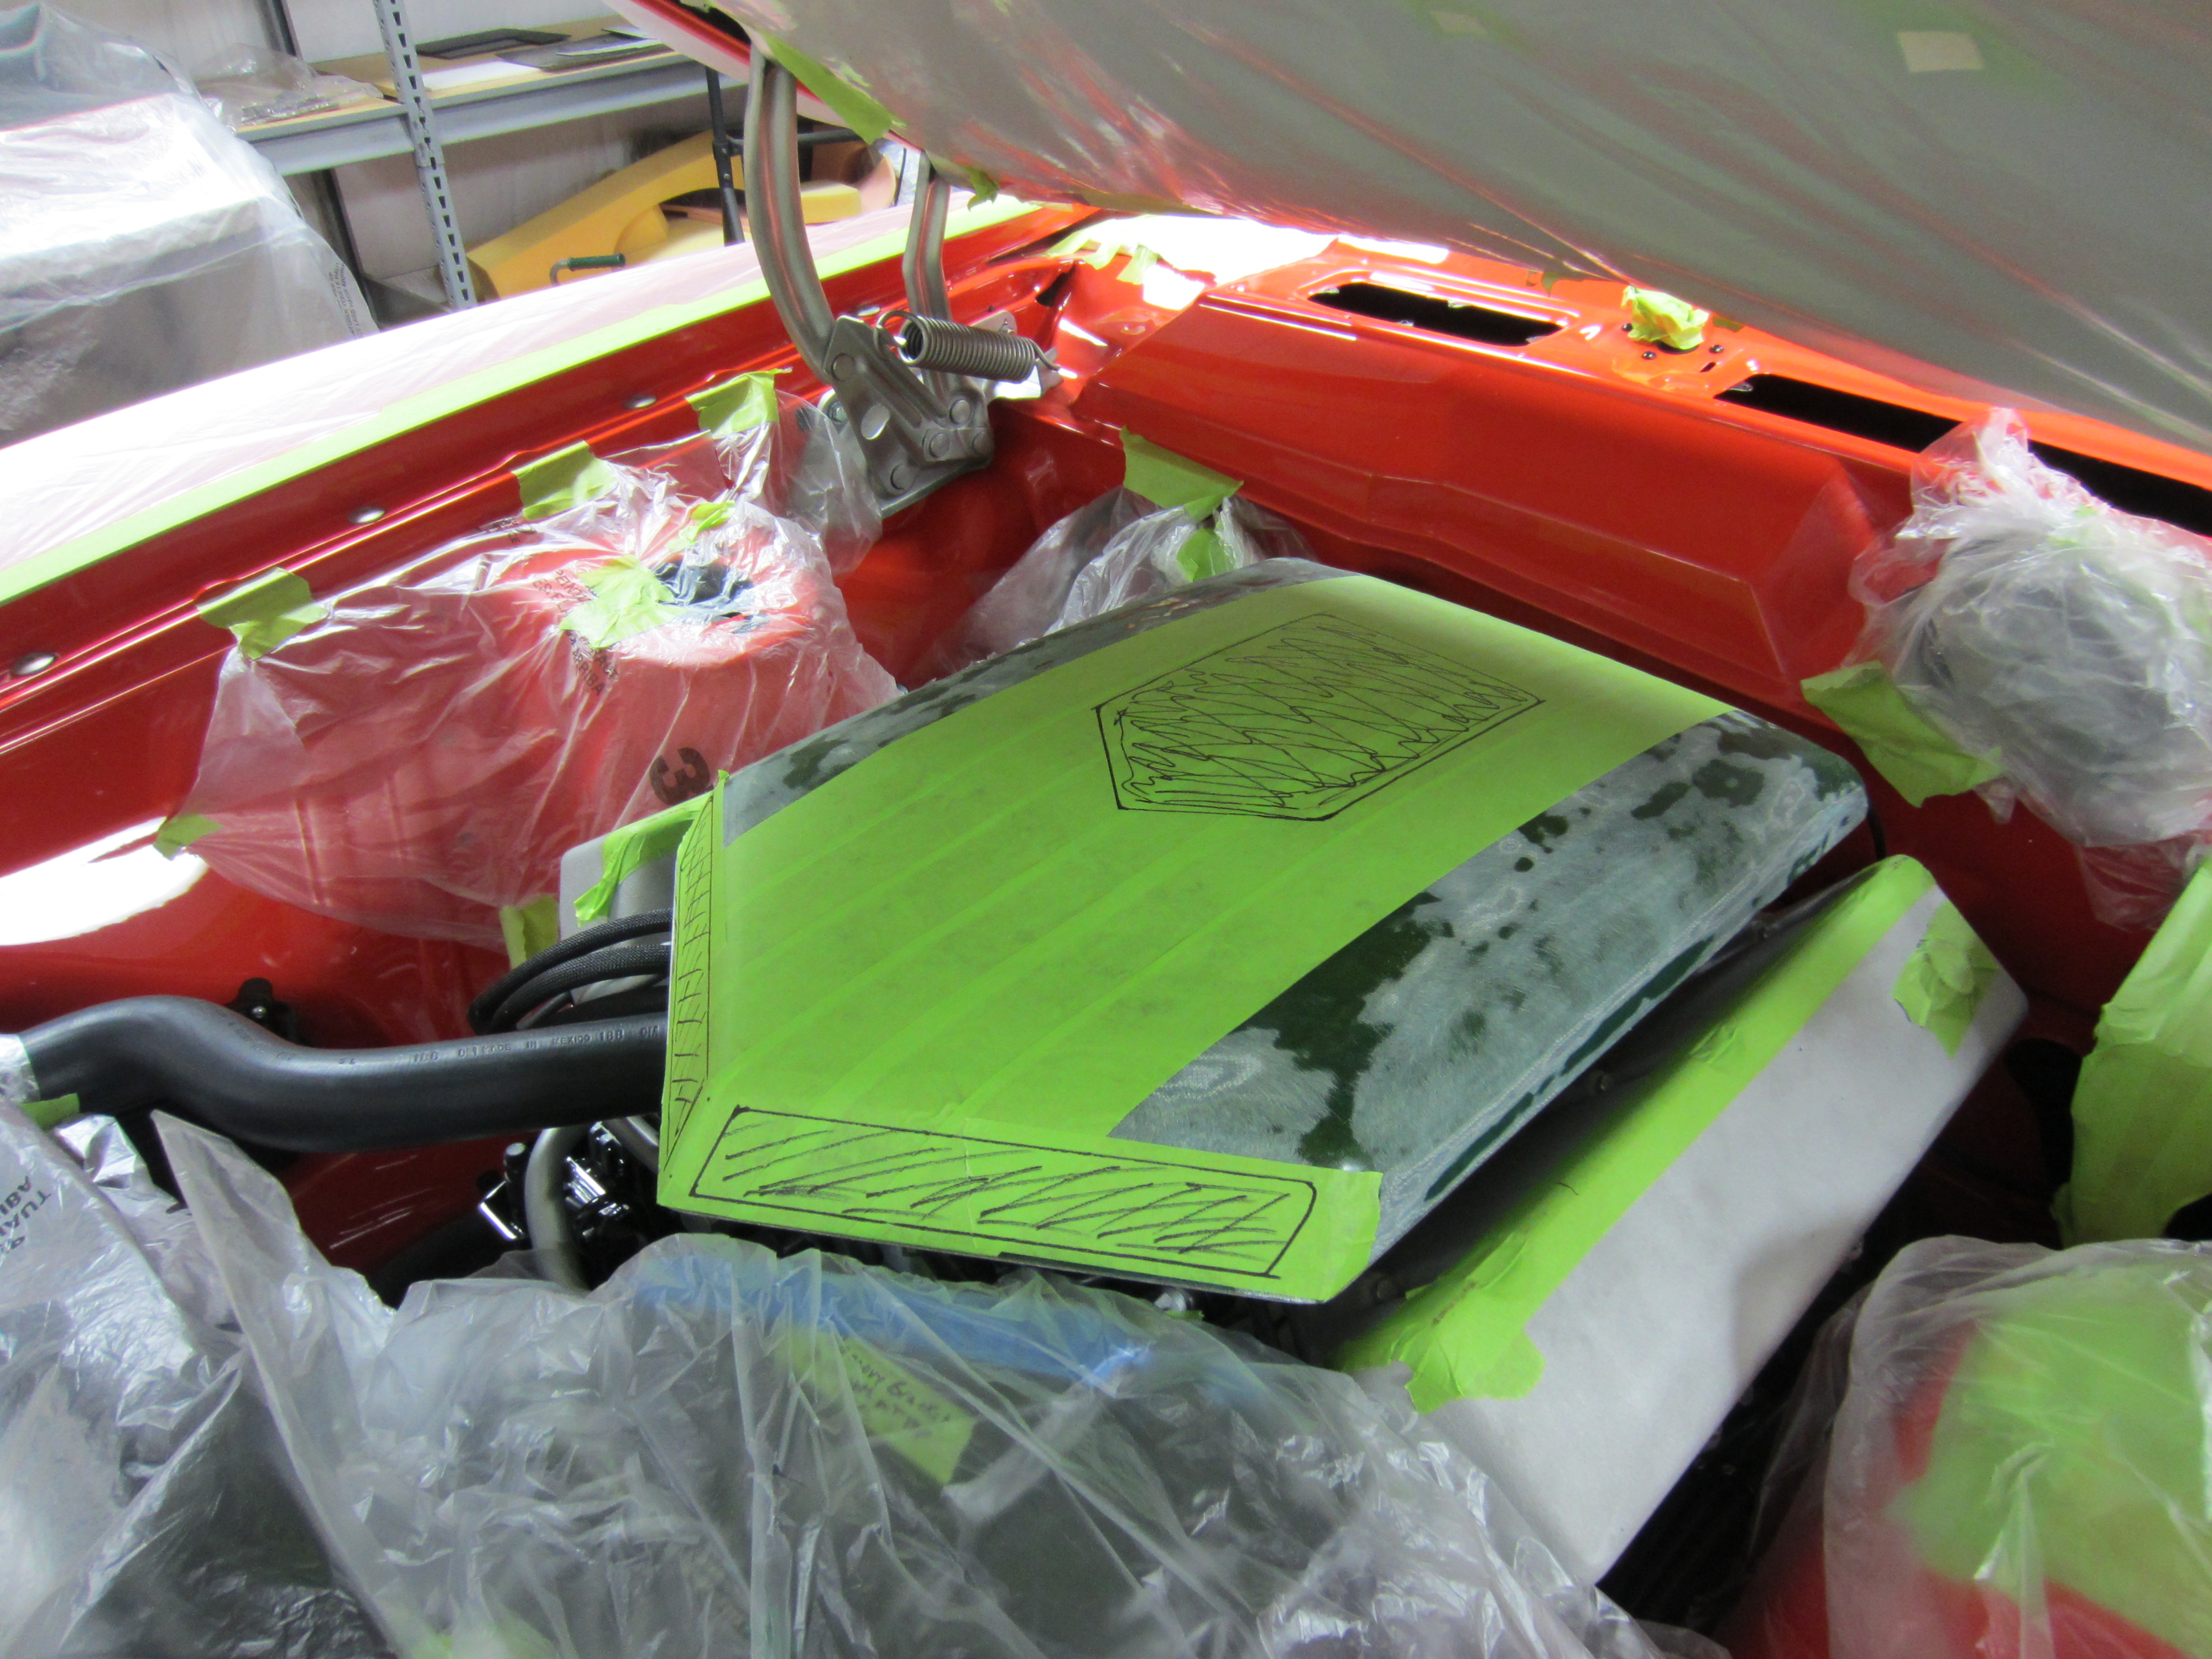
As seen we placed 4 mil plastic on the entire back side of the hood panel. Being this project has minimal carb to hood clearance it has to have a custom air cleaner made in order to clear the hood panel we made beforehand. The following steps will provide the exact dimensions that we can work with.
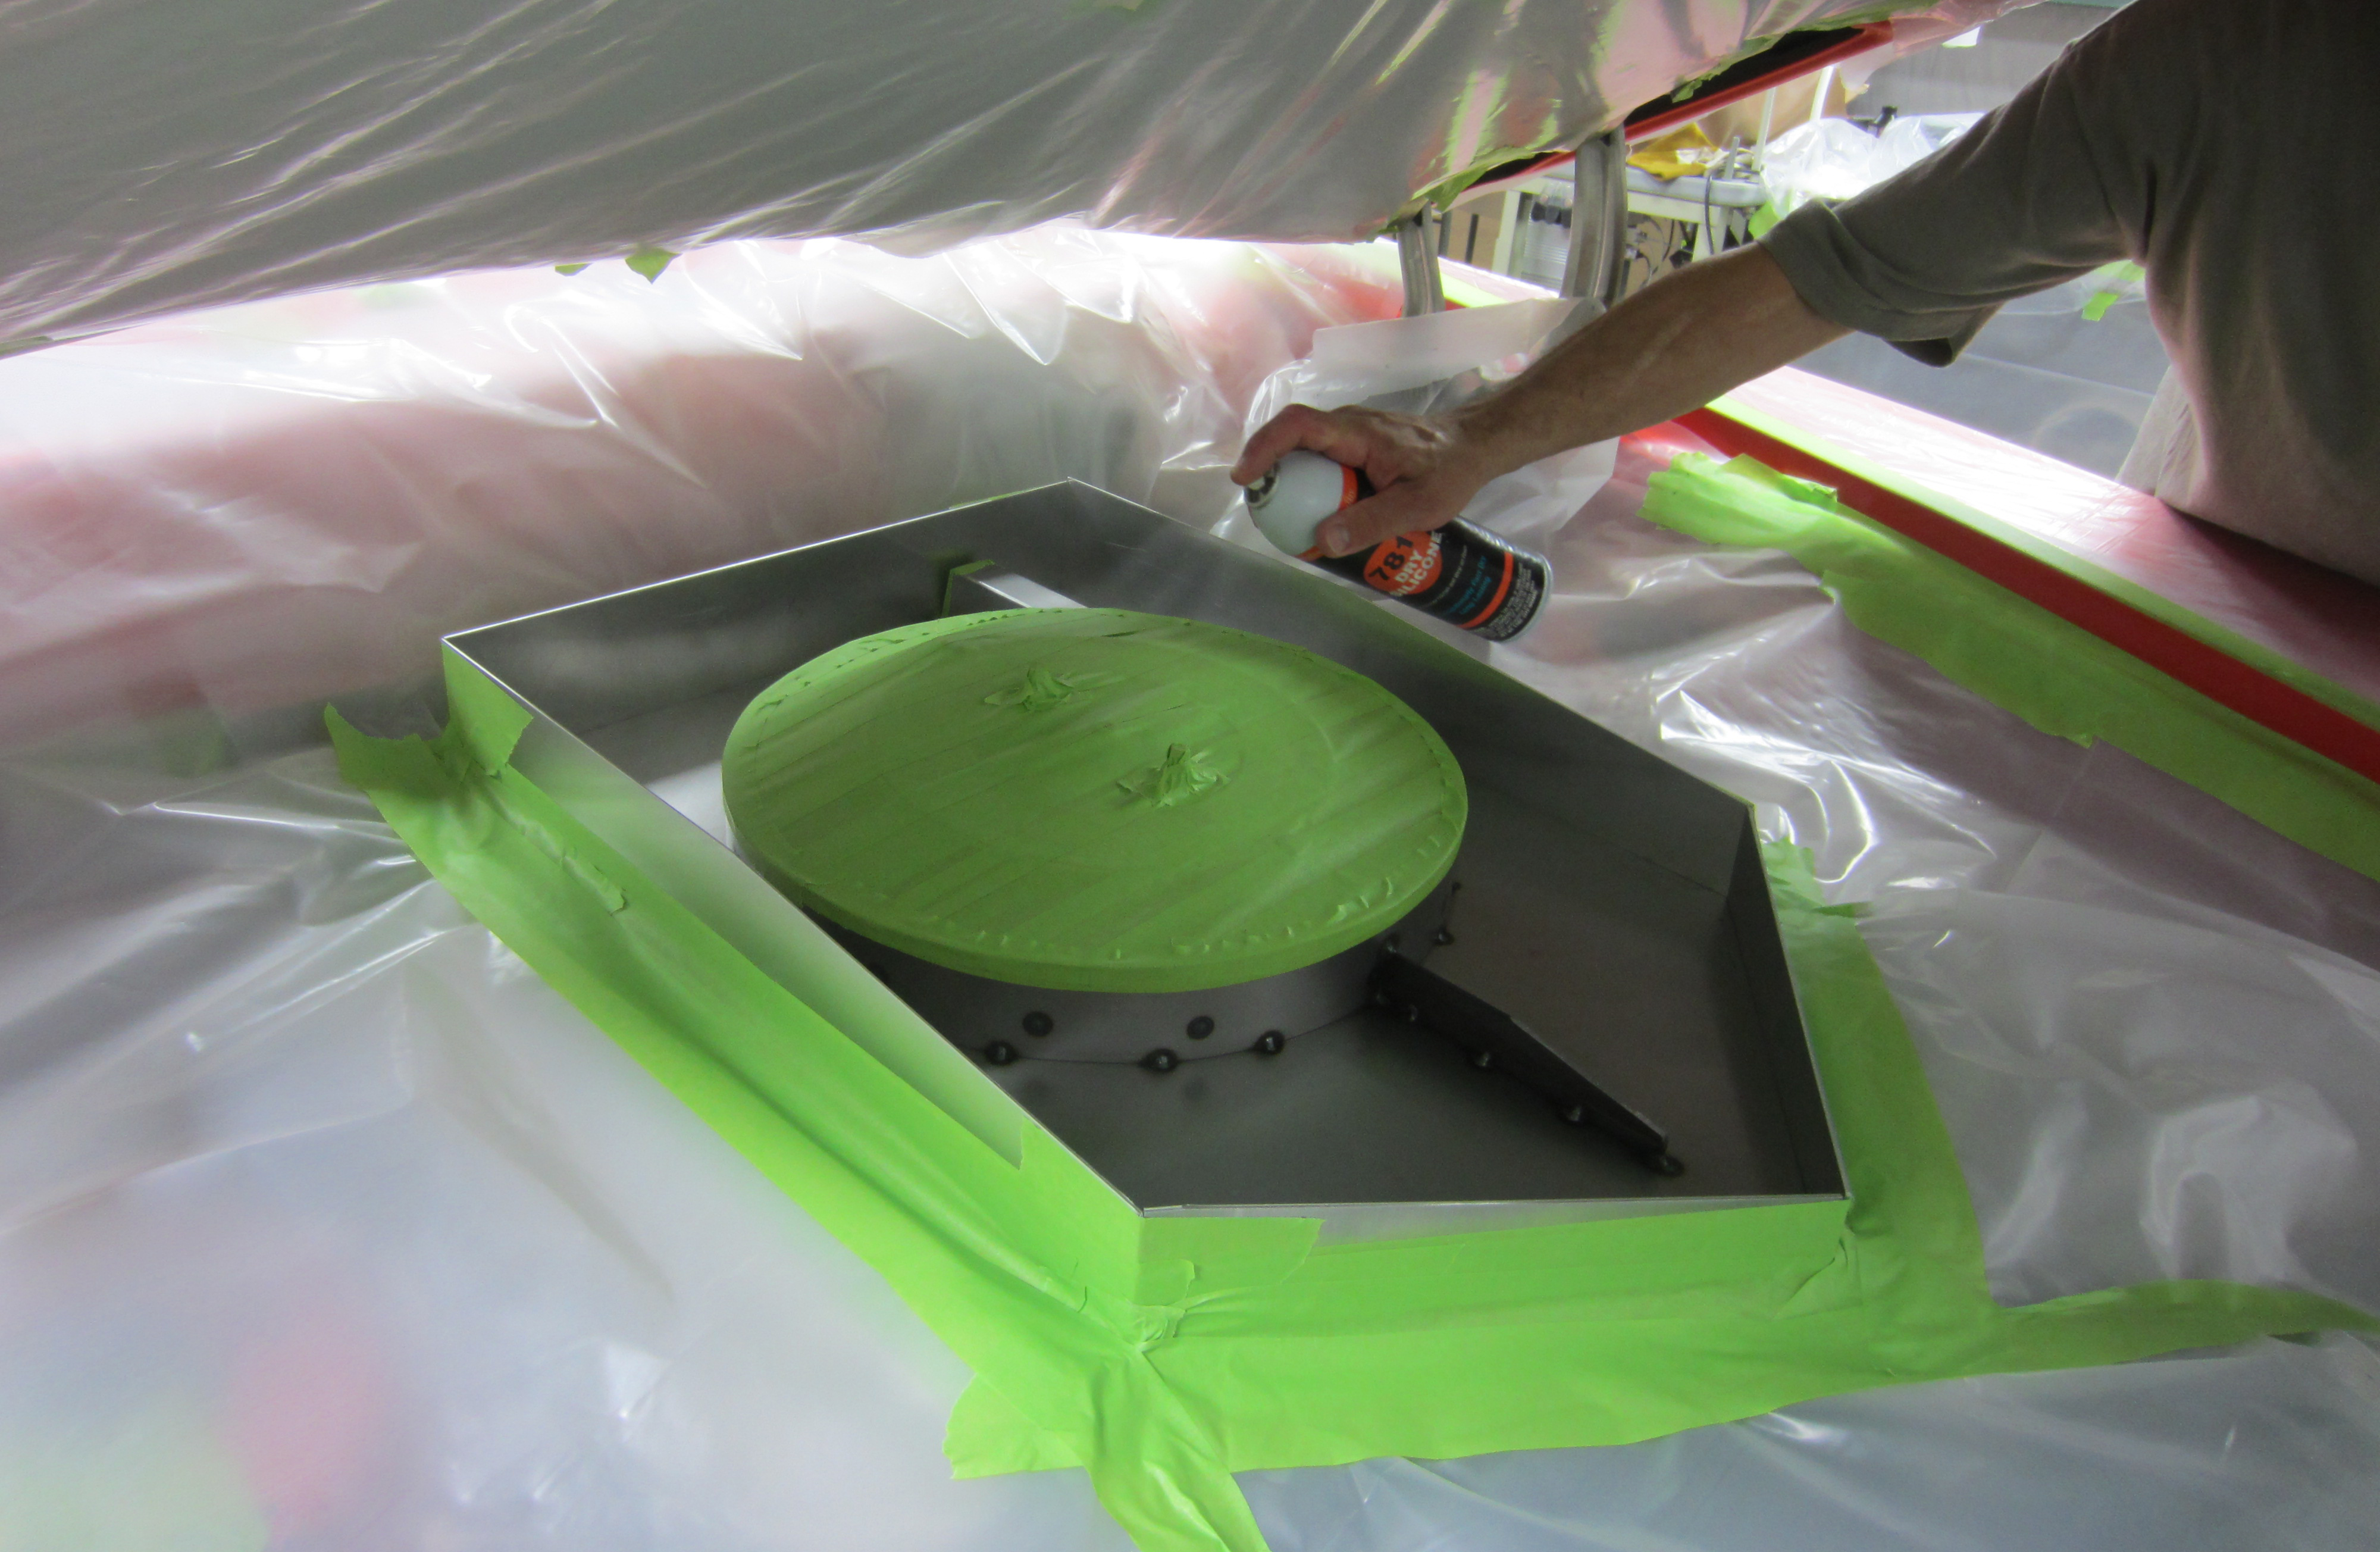
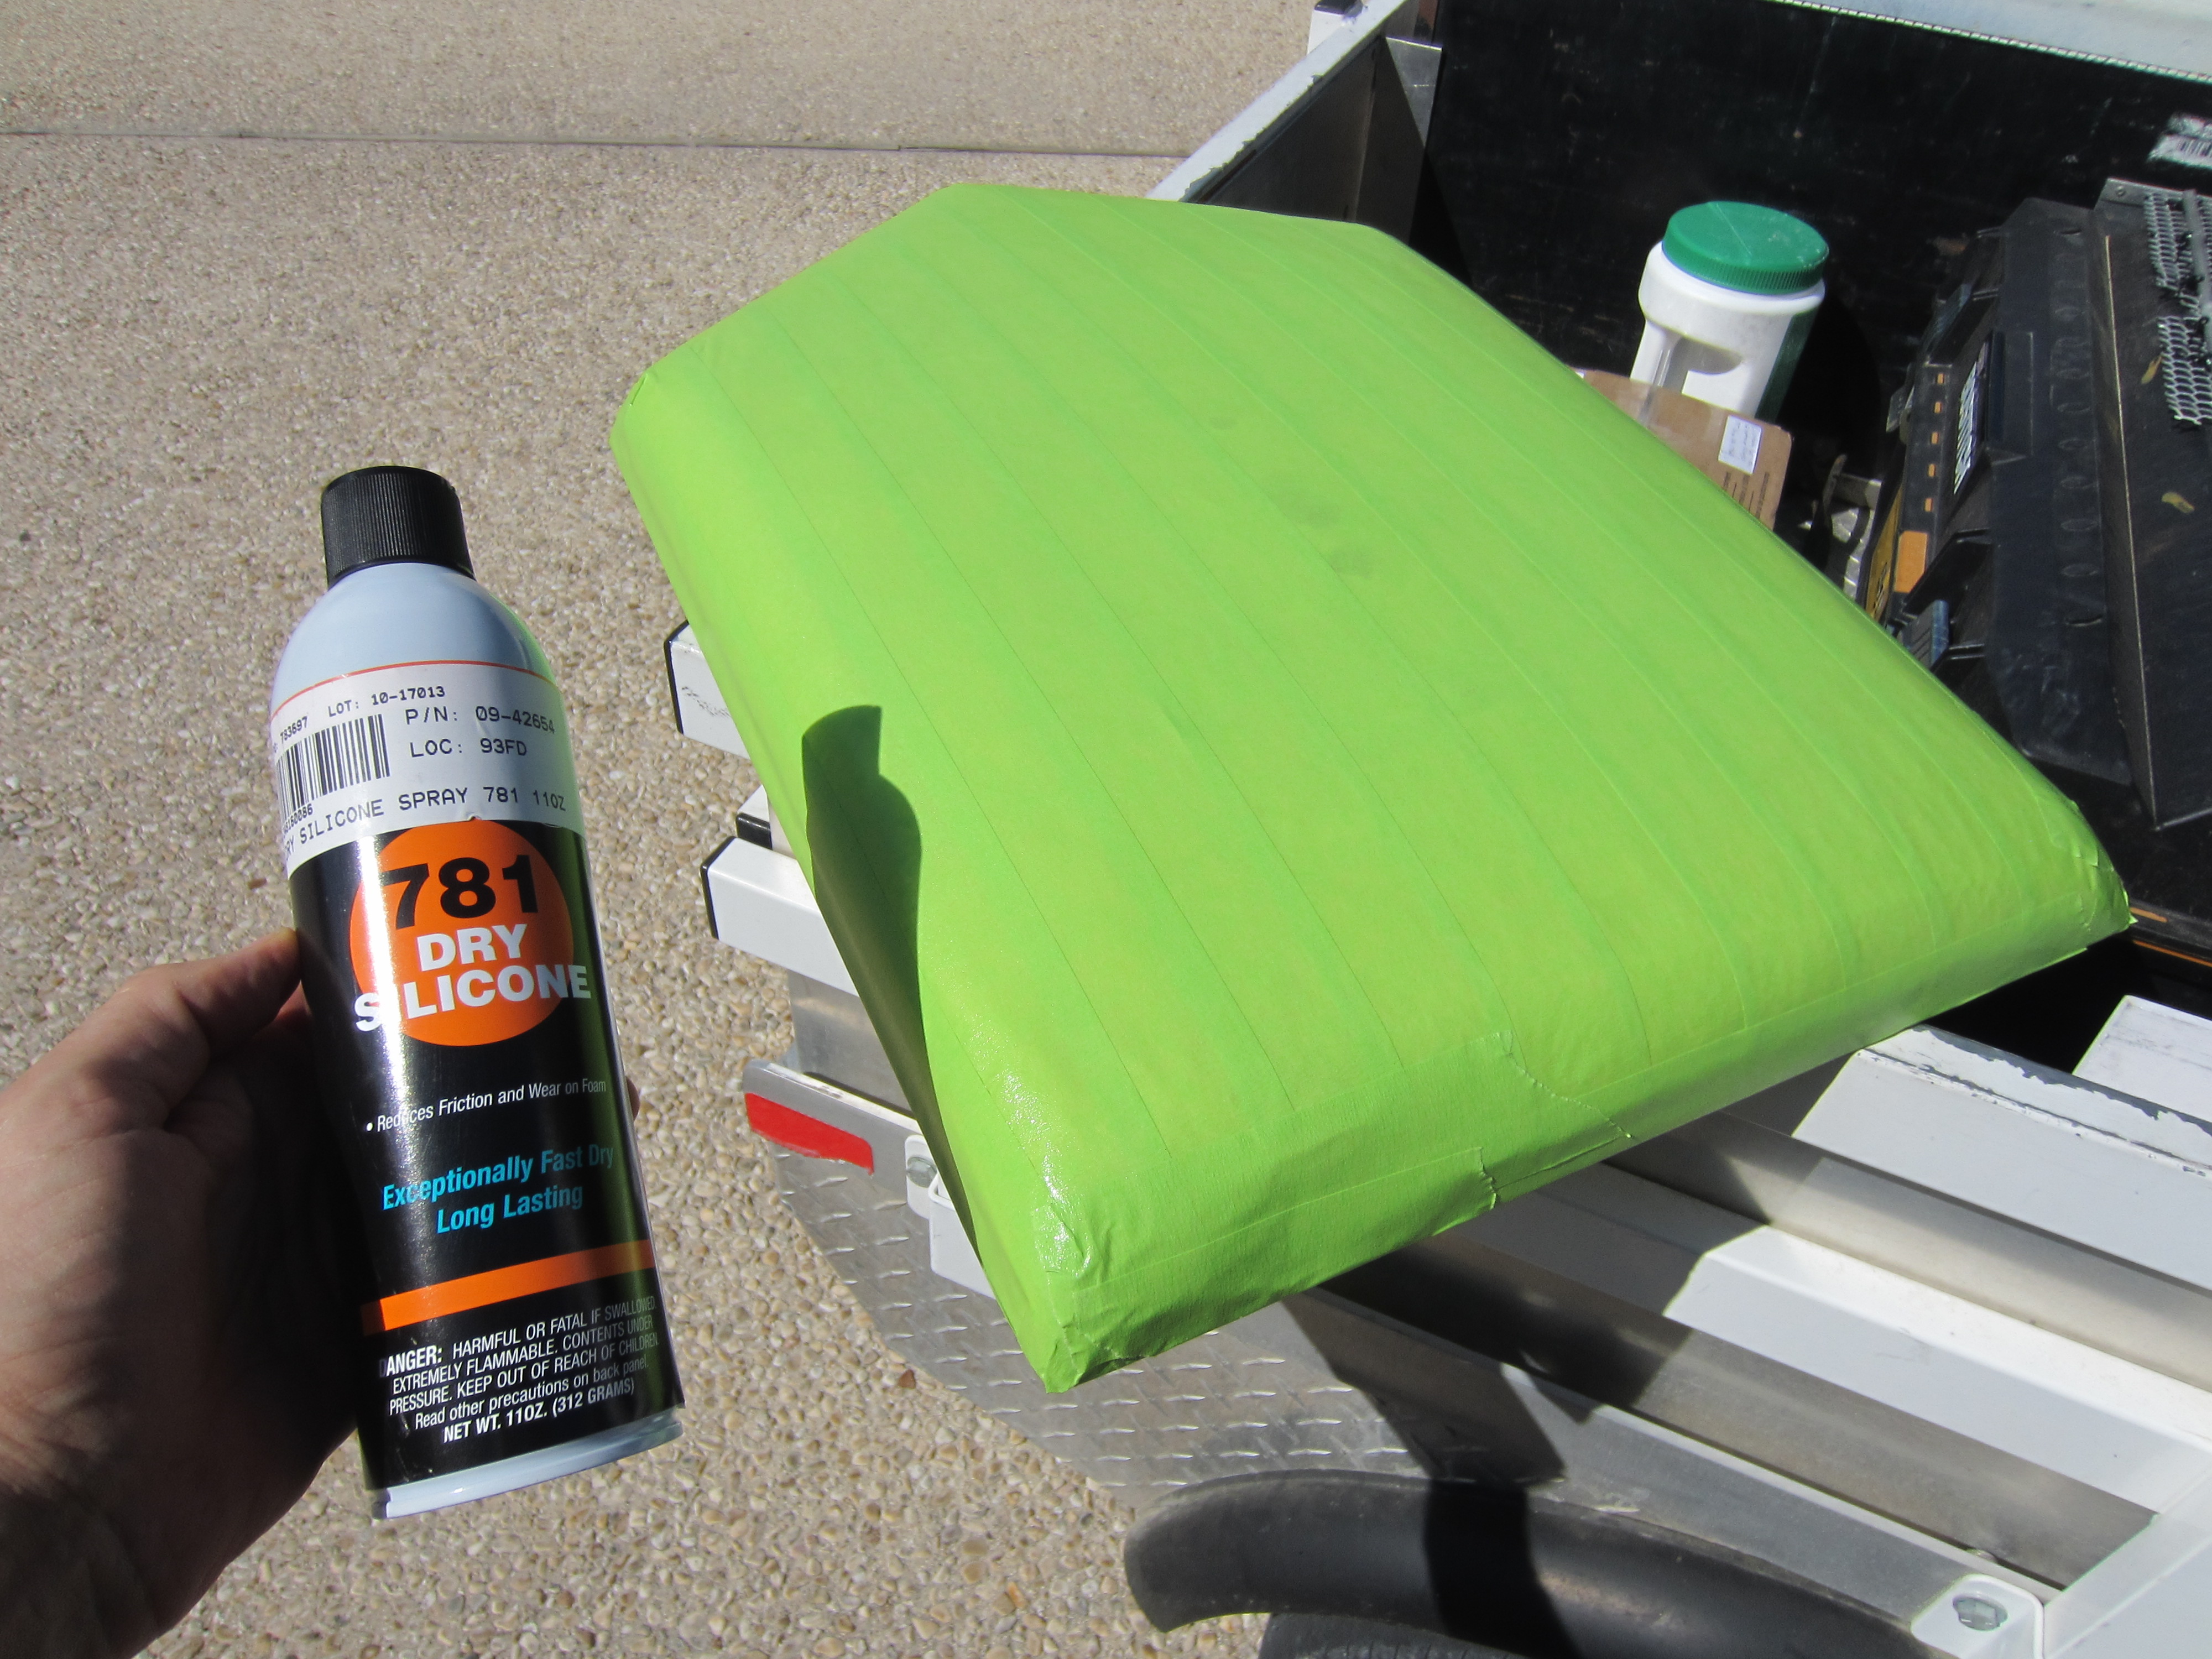
For the side supports we simply tape connected some aluminum strips on all four sides to our flat base to act as foam supports while creating a roughed out perimeter per our Air Cleaner design. It is time to pour in the expanding foam to find out our confines. As seen Eric is spraying the metal down with a dry silicone spray so the foam will release from the metal during cleanup and demo of these temporary side pieces.
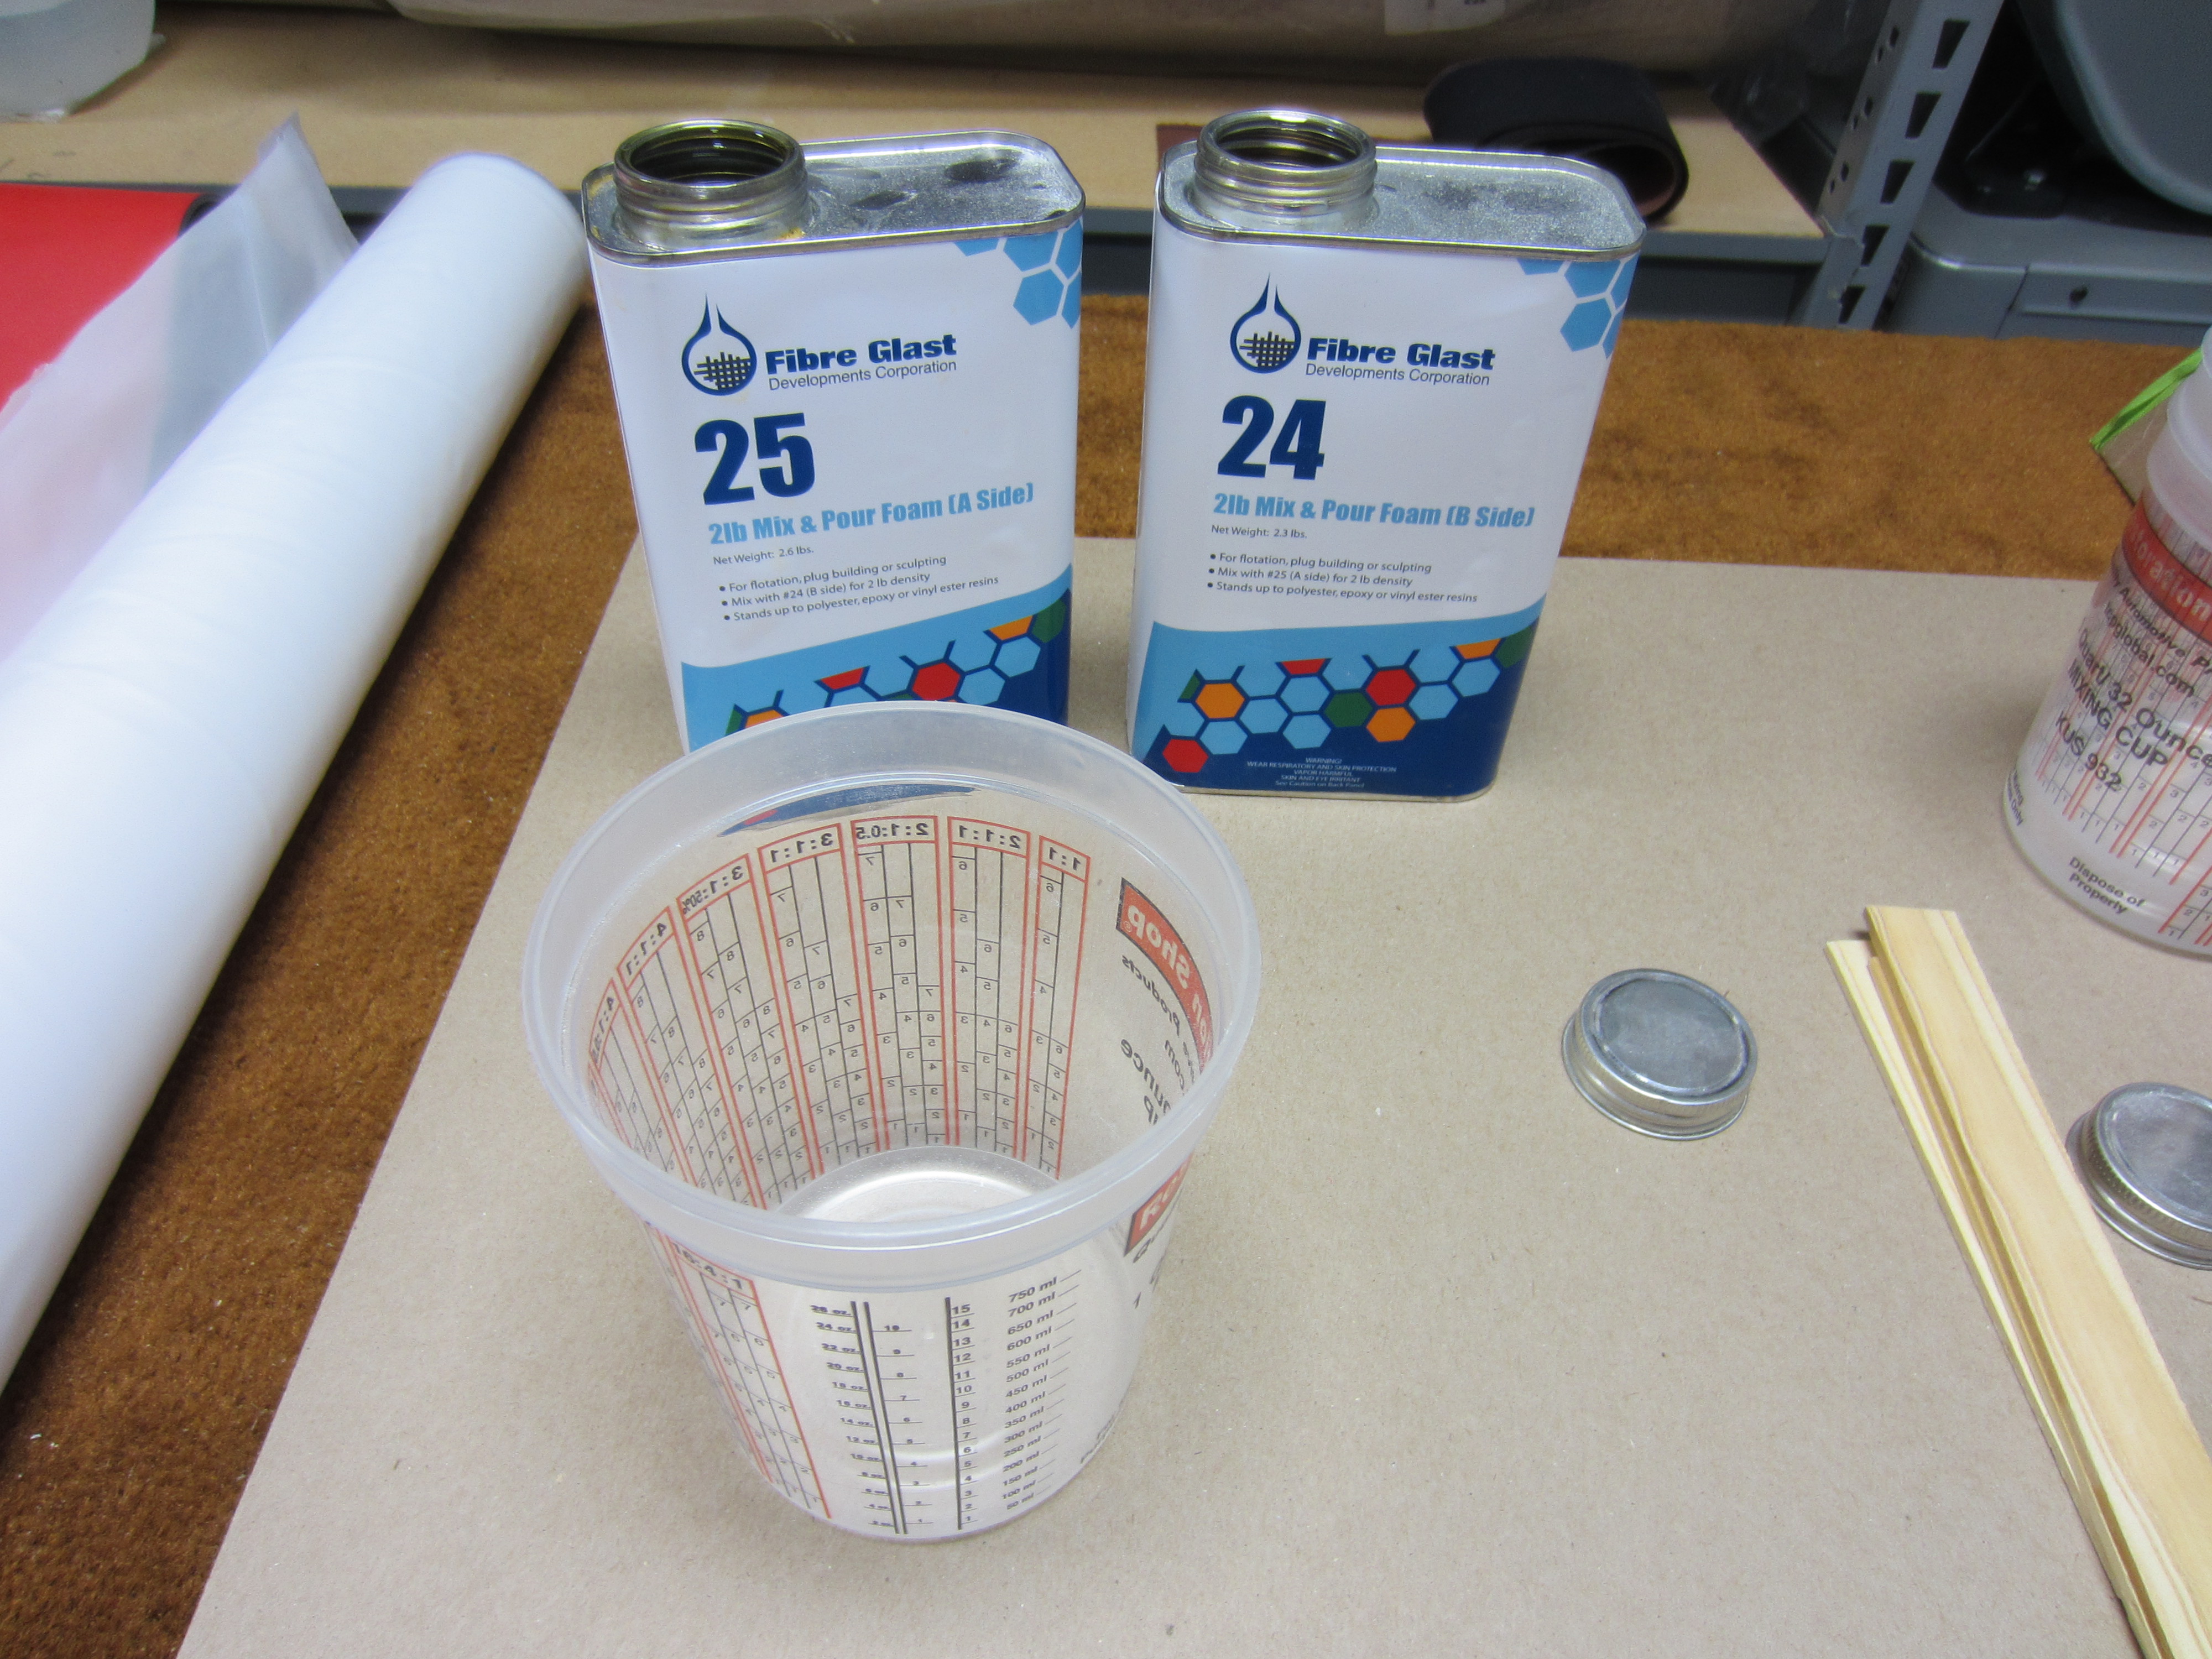
Fiberglast brand #24 and #25 is the best product for the job.
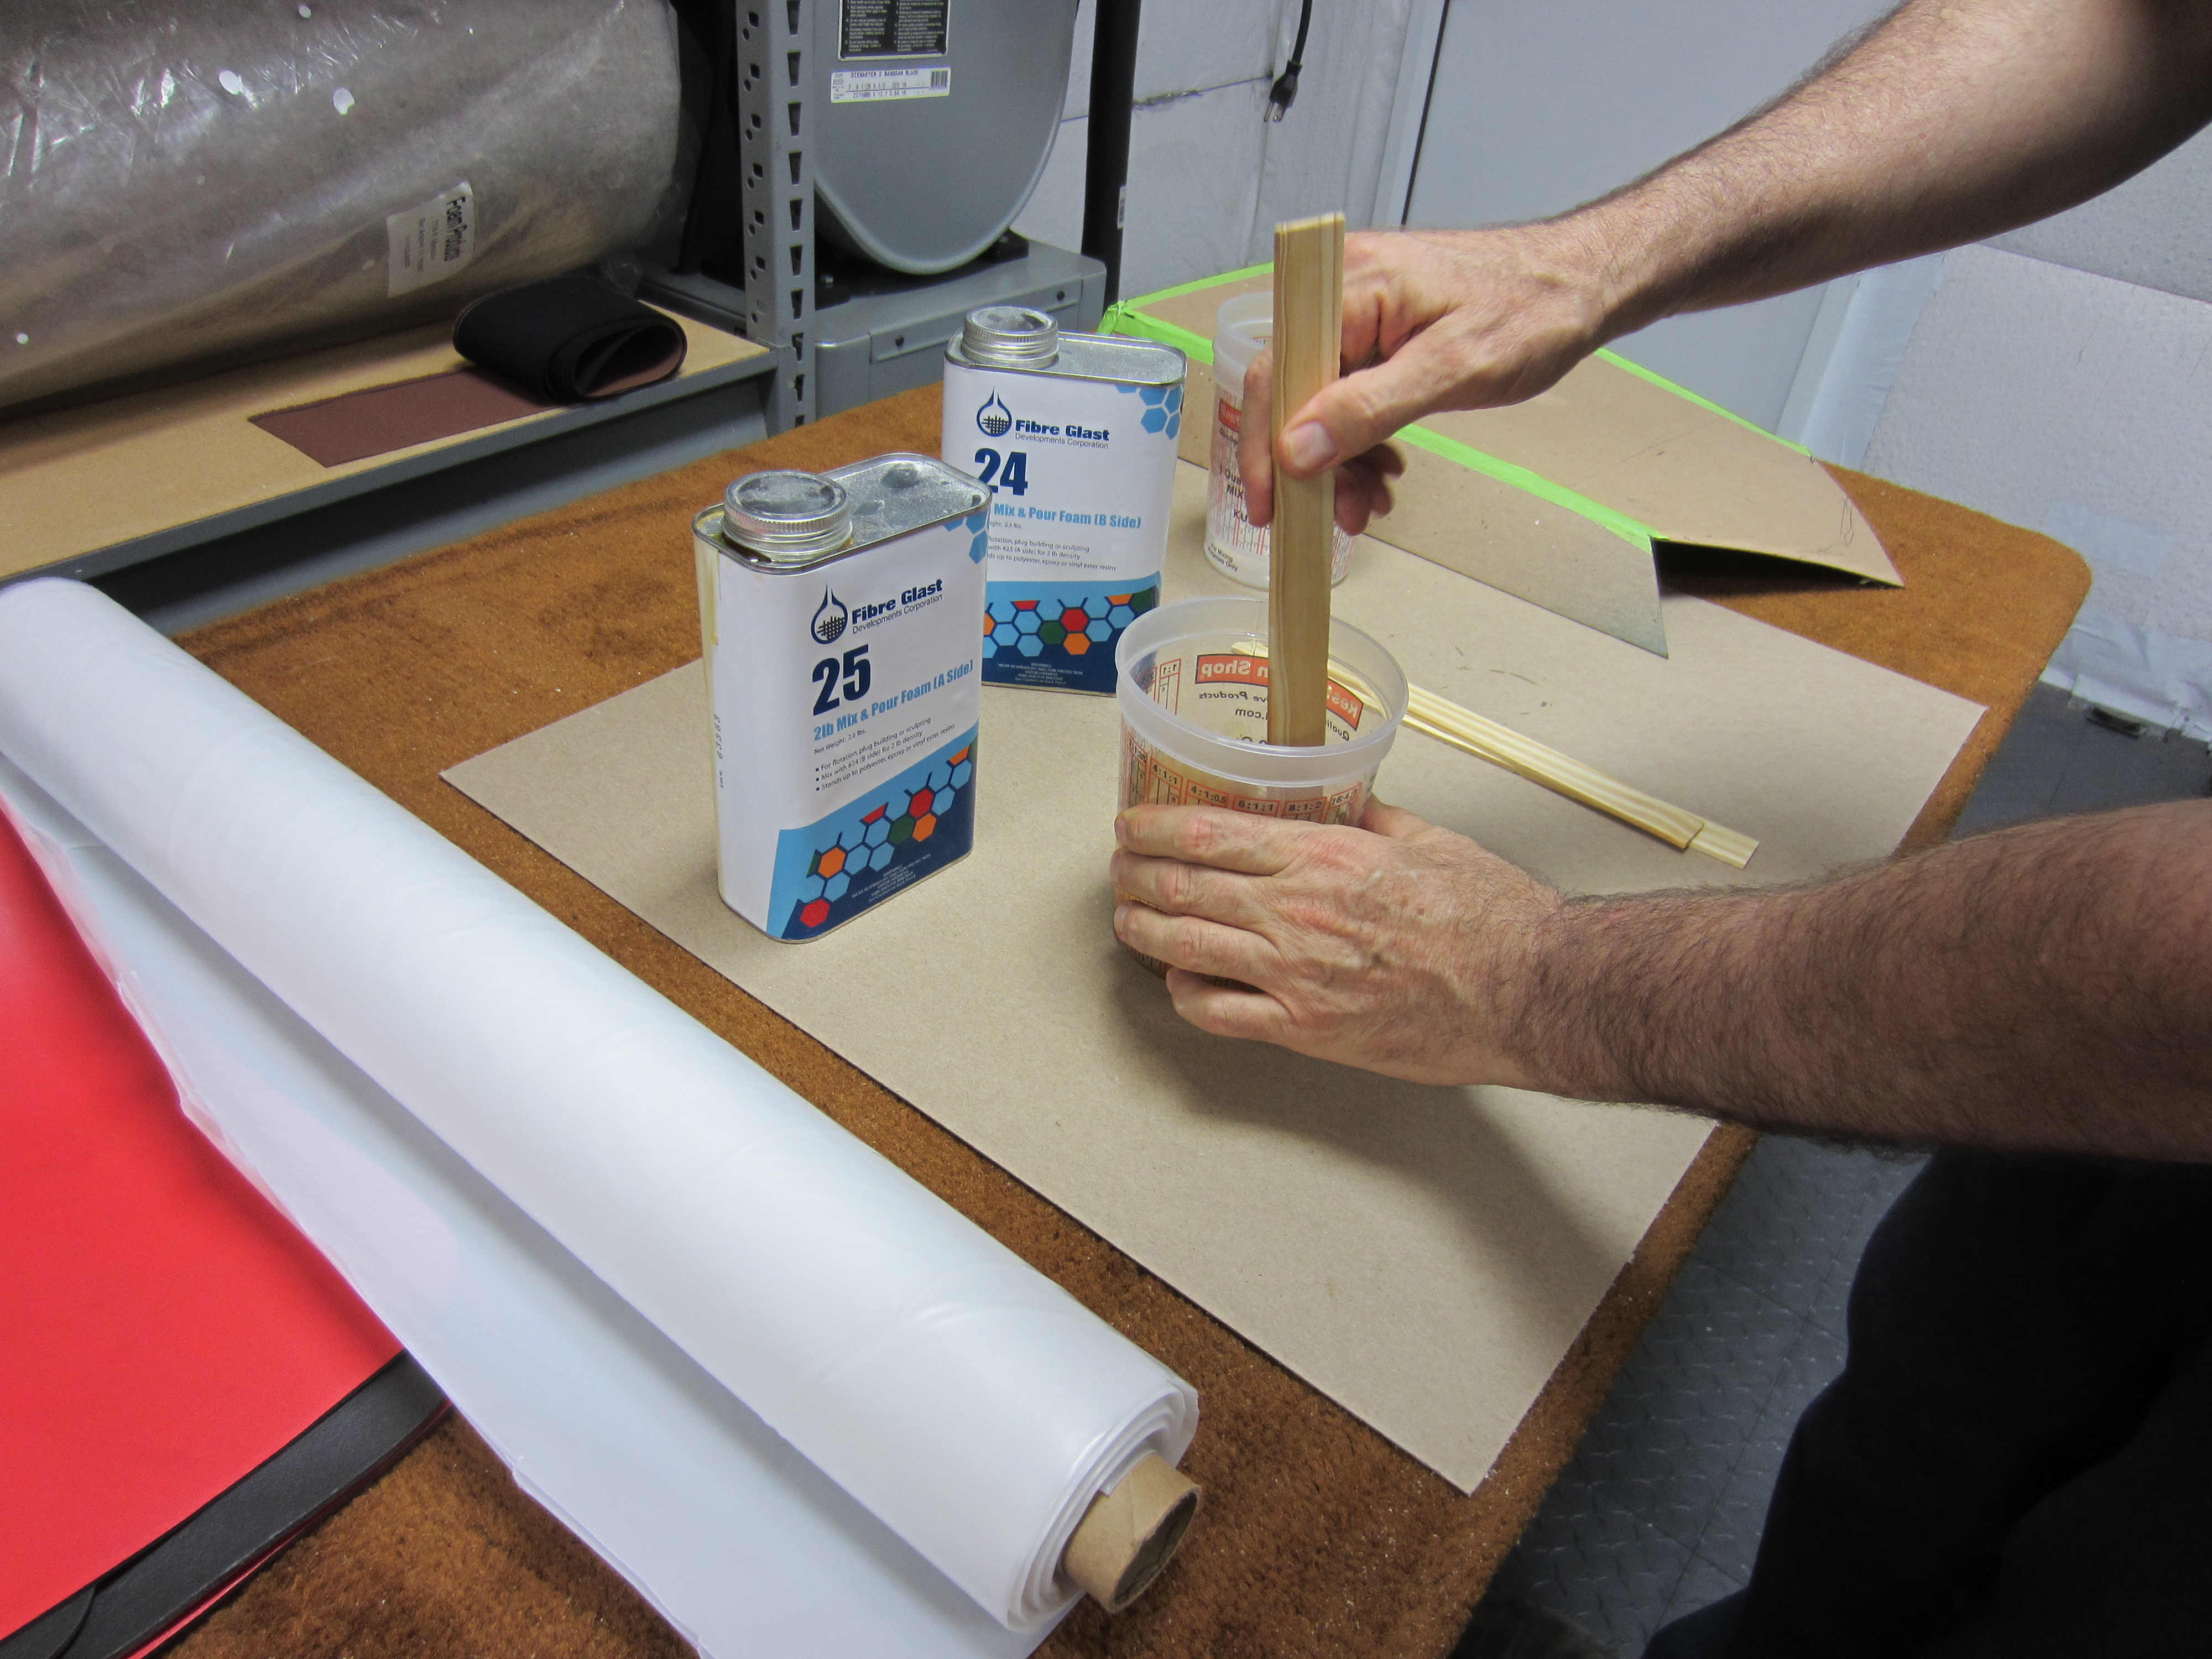
Simply follow the instructions on the can. You need to "get after it" because it kicks pretty fast. Its best to start out with a small amount until you get used to how much it expands in order to minimize waste. In this case I went with 16 OZ of mixed product. In case you mix too little you can always remix more then re-pour it inside the mold as it adheres to its self very well.
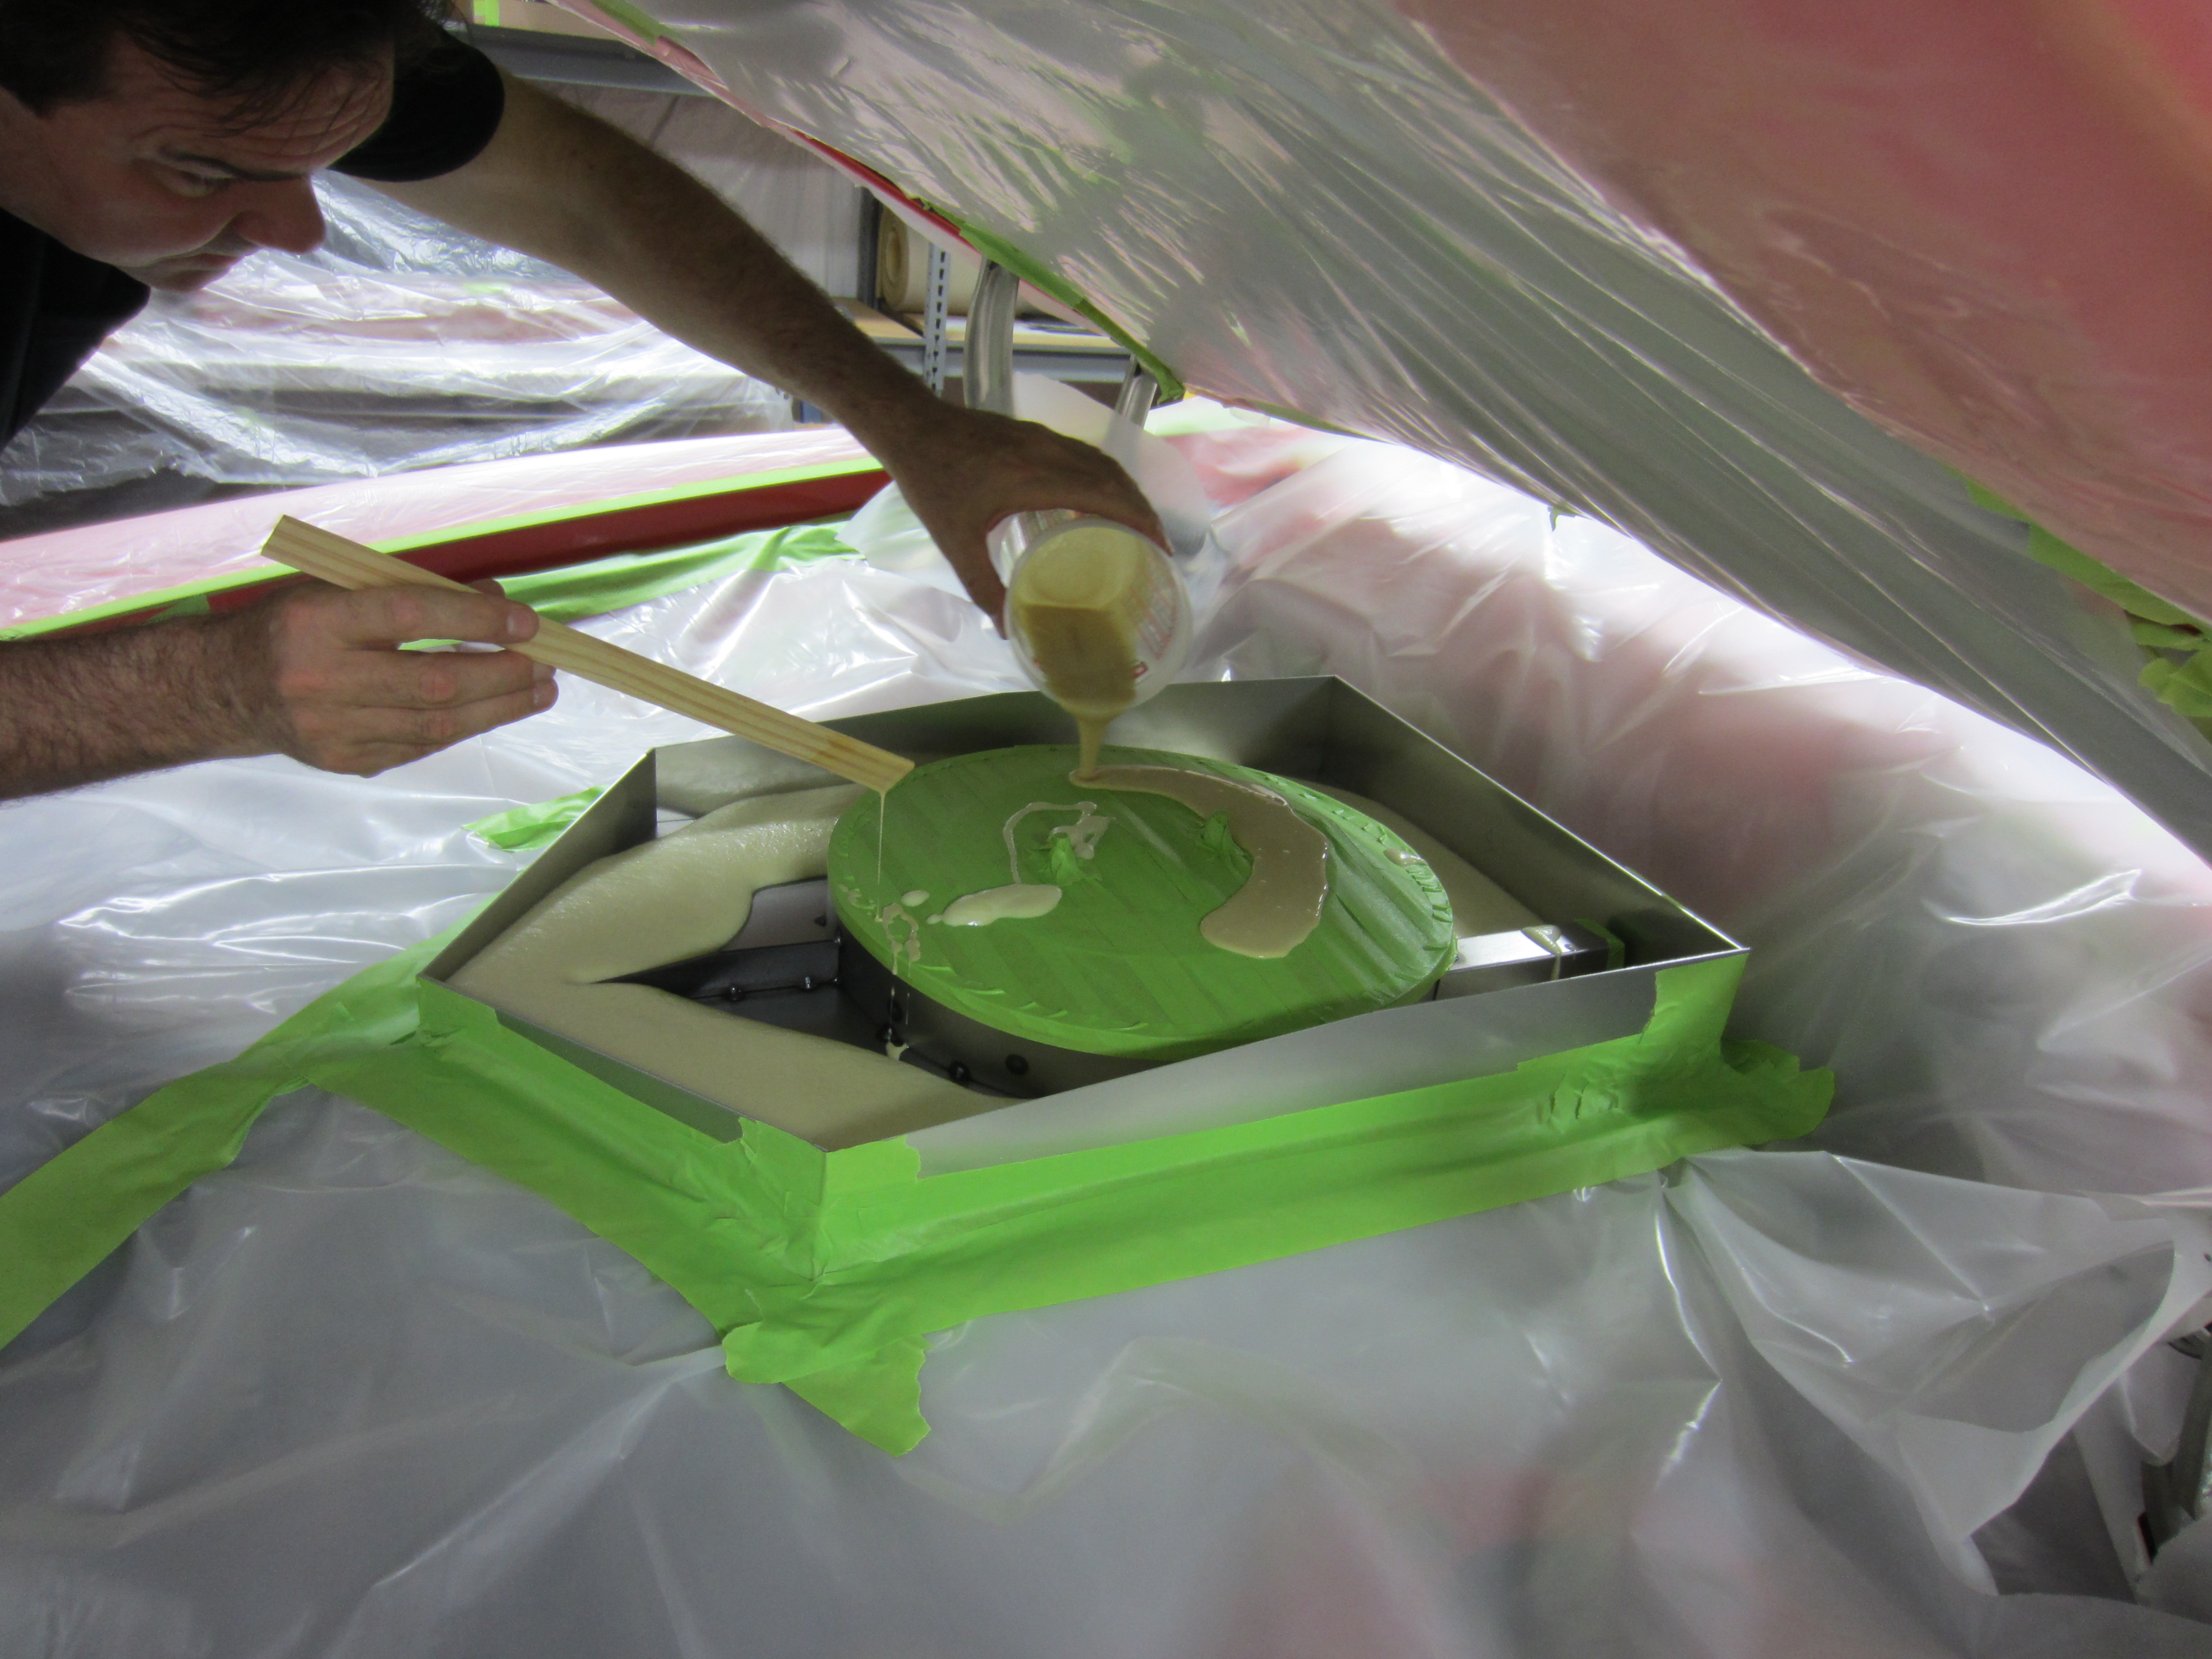
It expands about 15 times its thickness as a rule, so pouring it evenly is important. It is best to level the car or truck body side to side and front to back so the foam will be level to form it best.
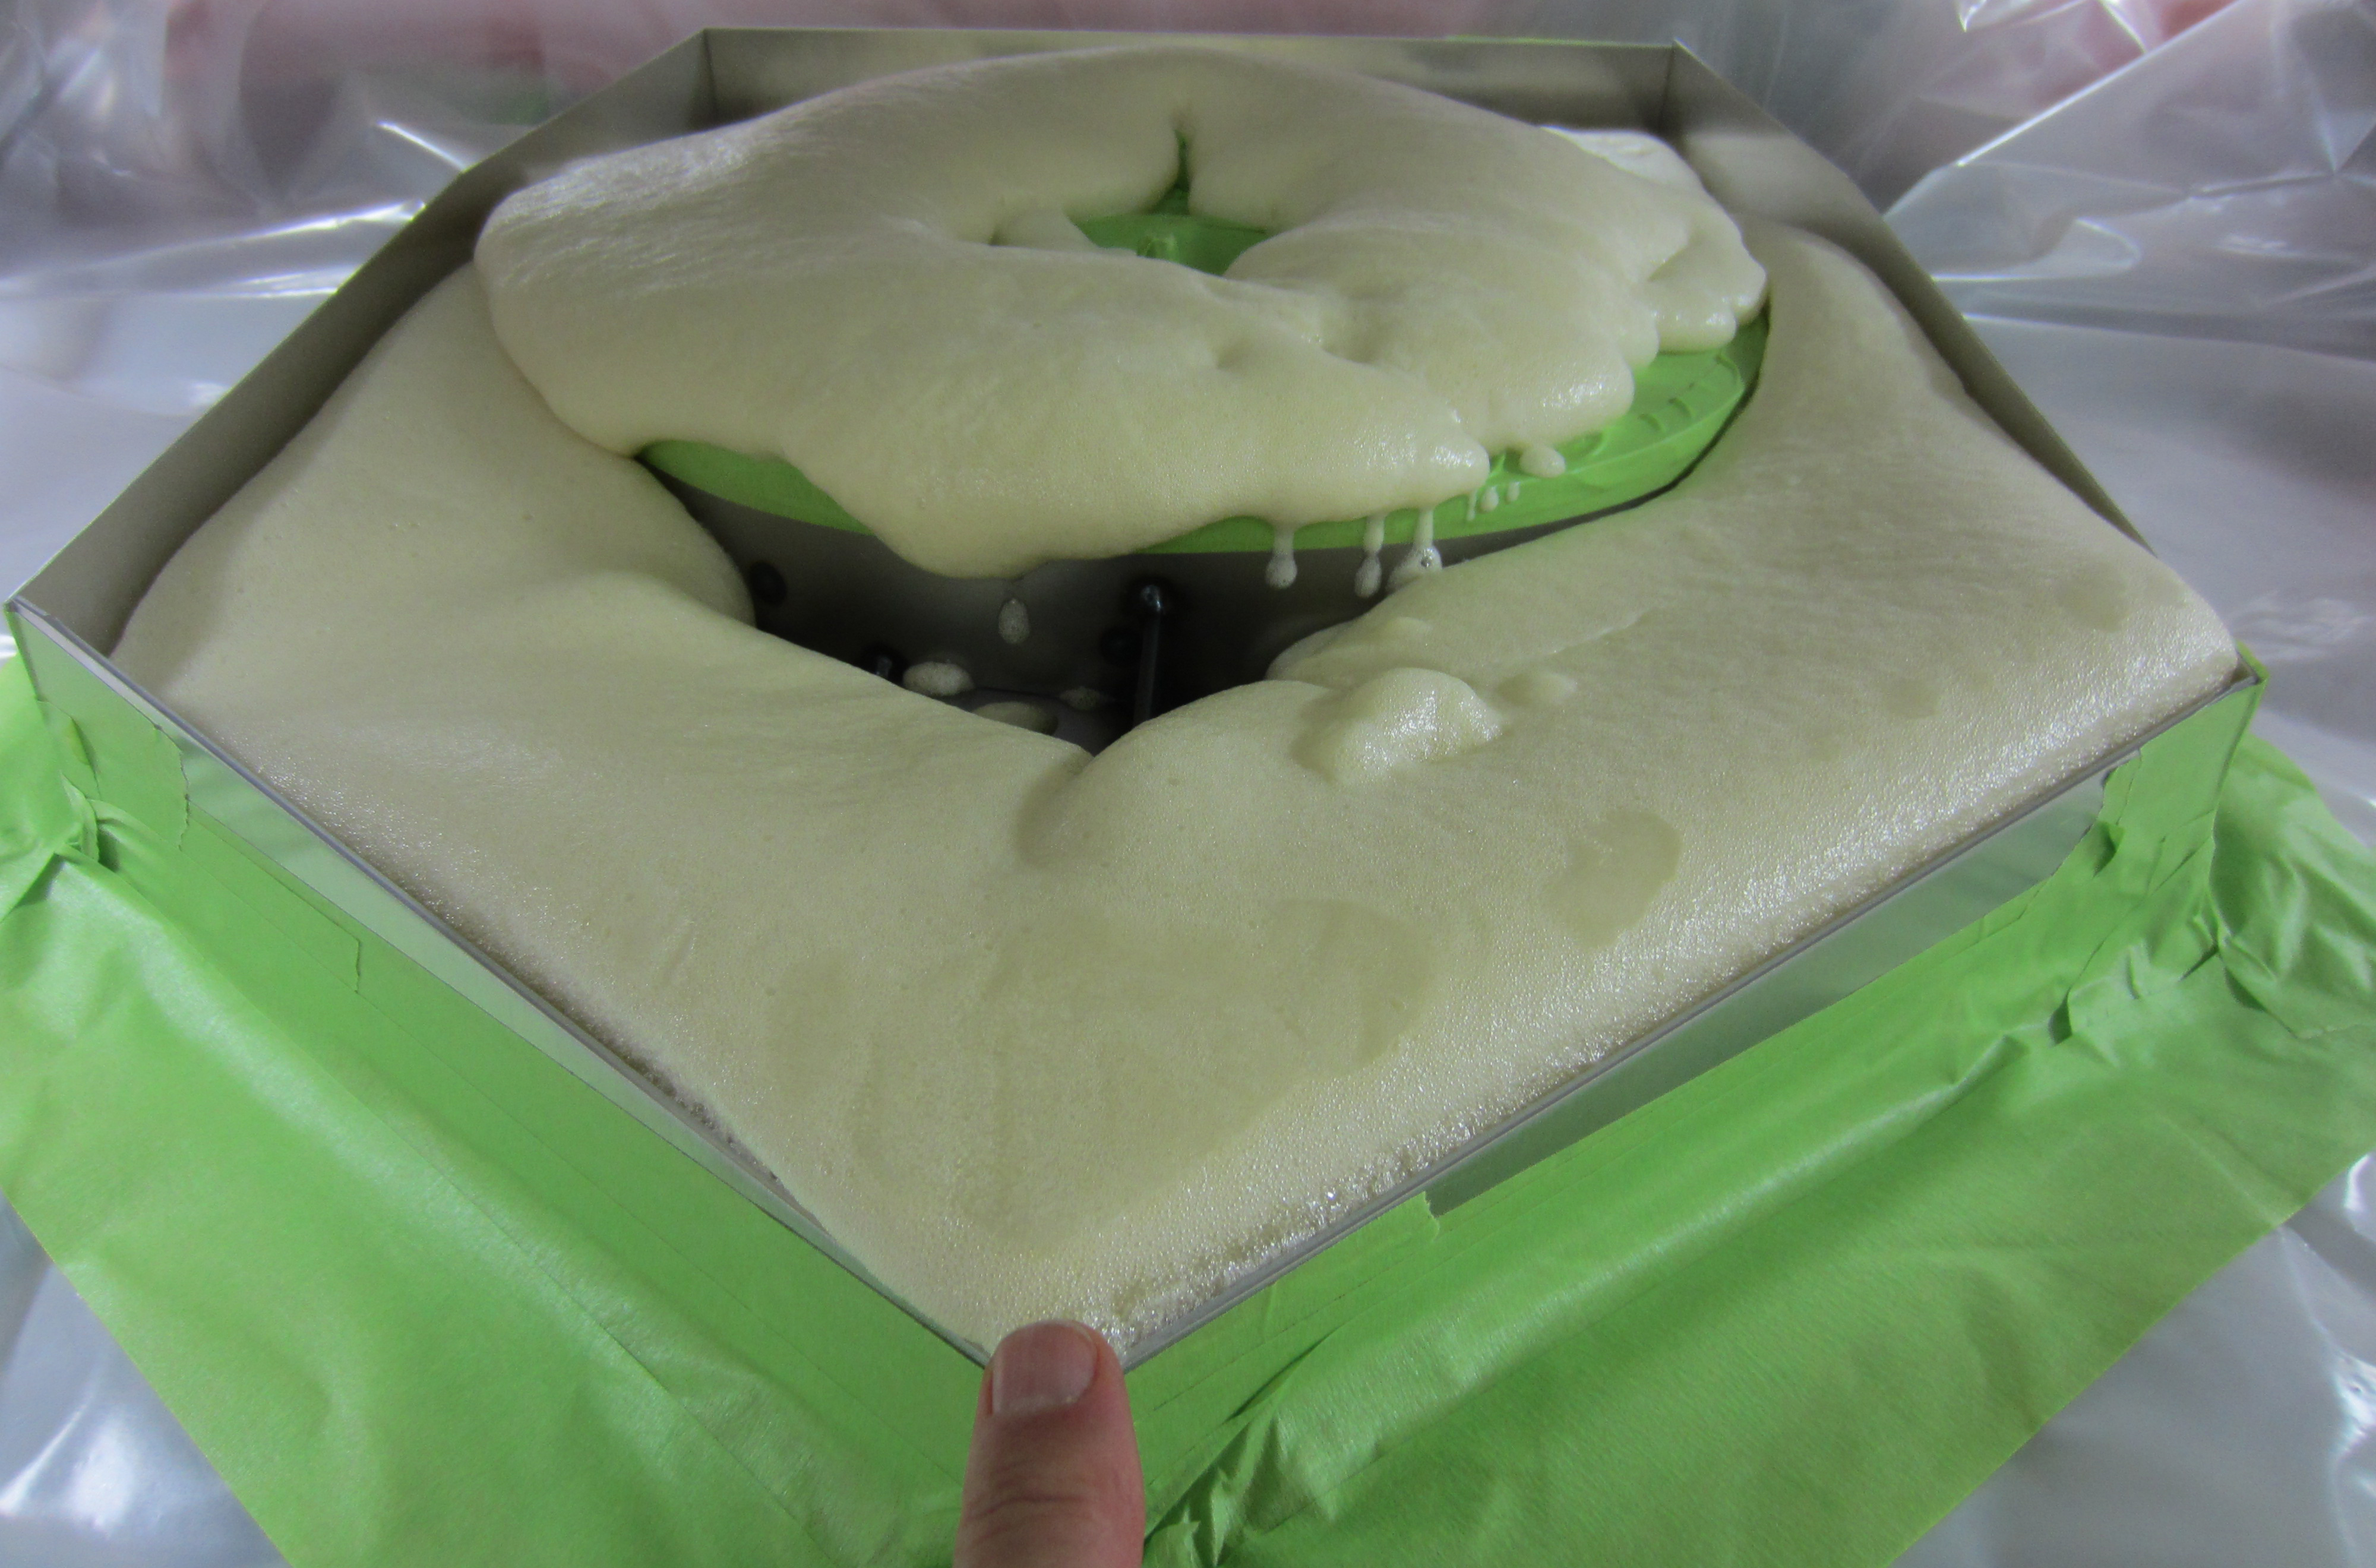
As seen within minutes the foam is rising and will continue so its time to shut the hood and let it take shape.
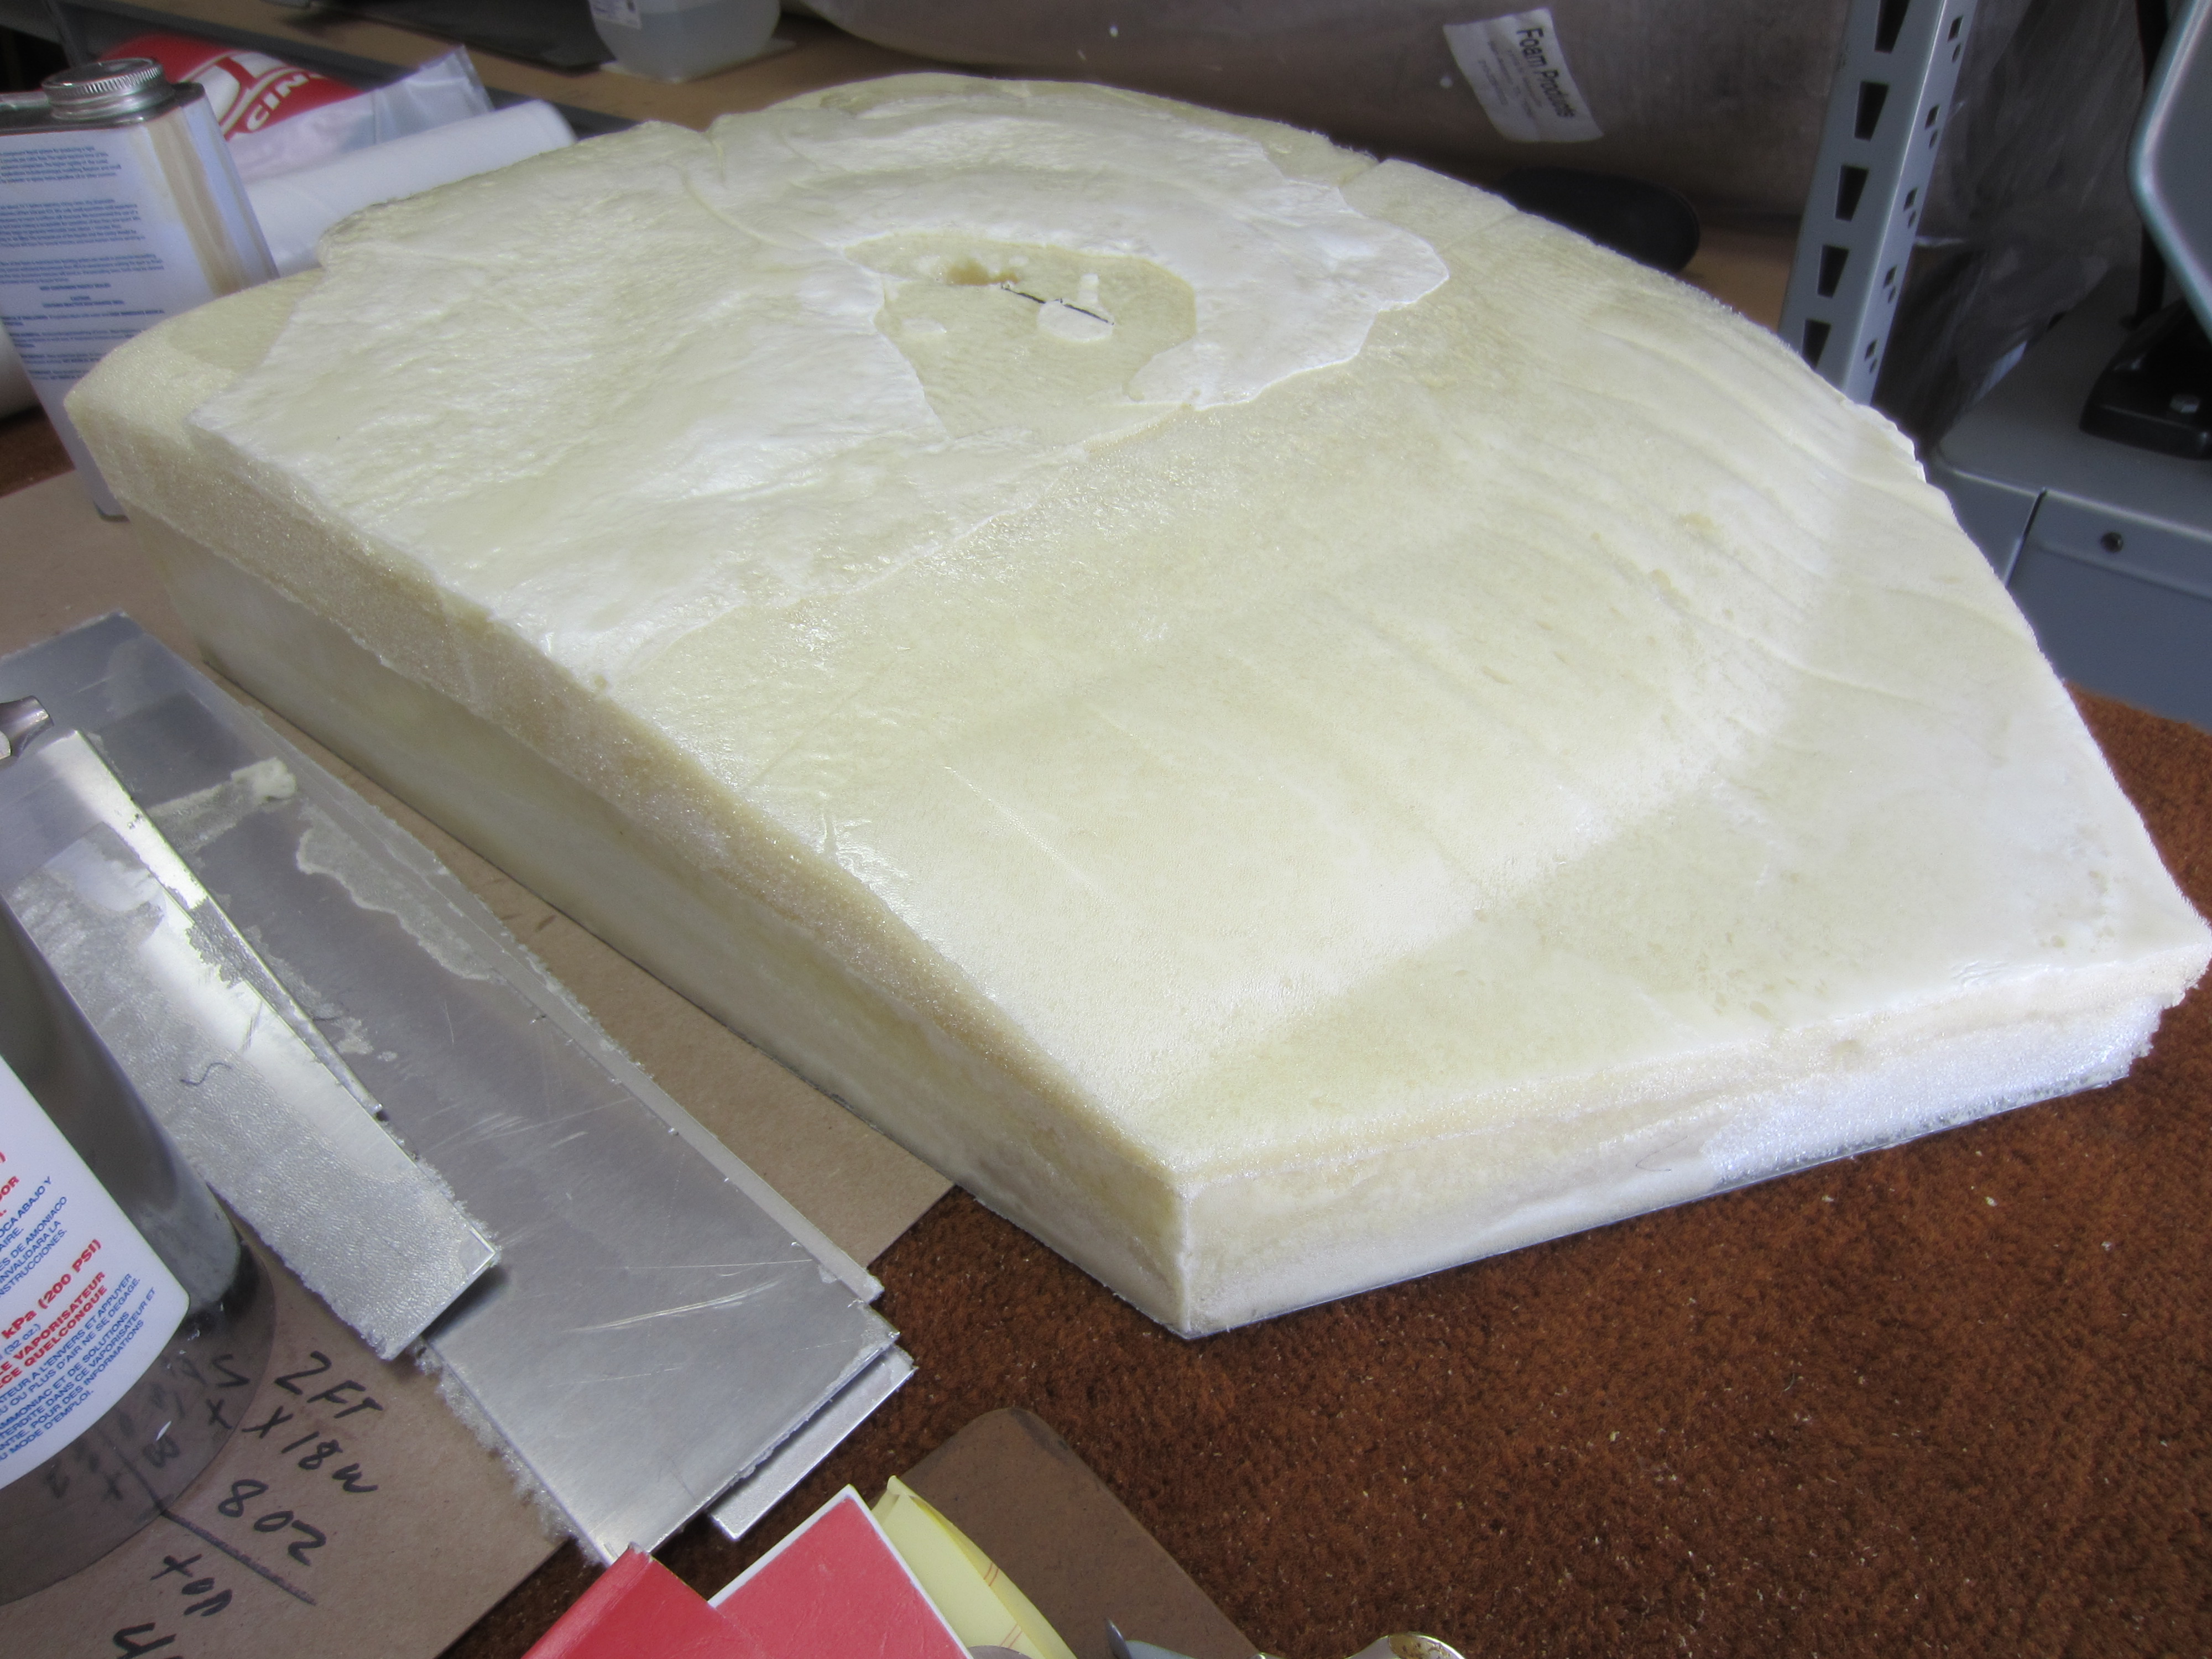
We let it cure for 45 minutes then raised the hood and removed it. We now know the maximum height to clear the back side of the hood as the foam rose up and touched the 4 mil plastic that we adhered to the back side of hood with out sticking. Now we will simply block it in to the shape we want.

I started to sand it down using 40 grit on a big orbital sander. You need to know what you want it to look like as the foam shaves very fast. I then went on to hand sanding in 80 grit using a 6 inch block.
I flipped it over and I can see where i am getting thin where the opening of the carb is so i know i am getting close to gaining my maximum clearance while still getting the shape I am after.
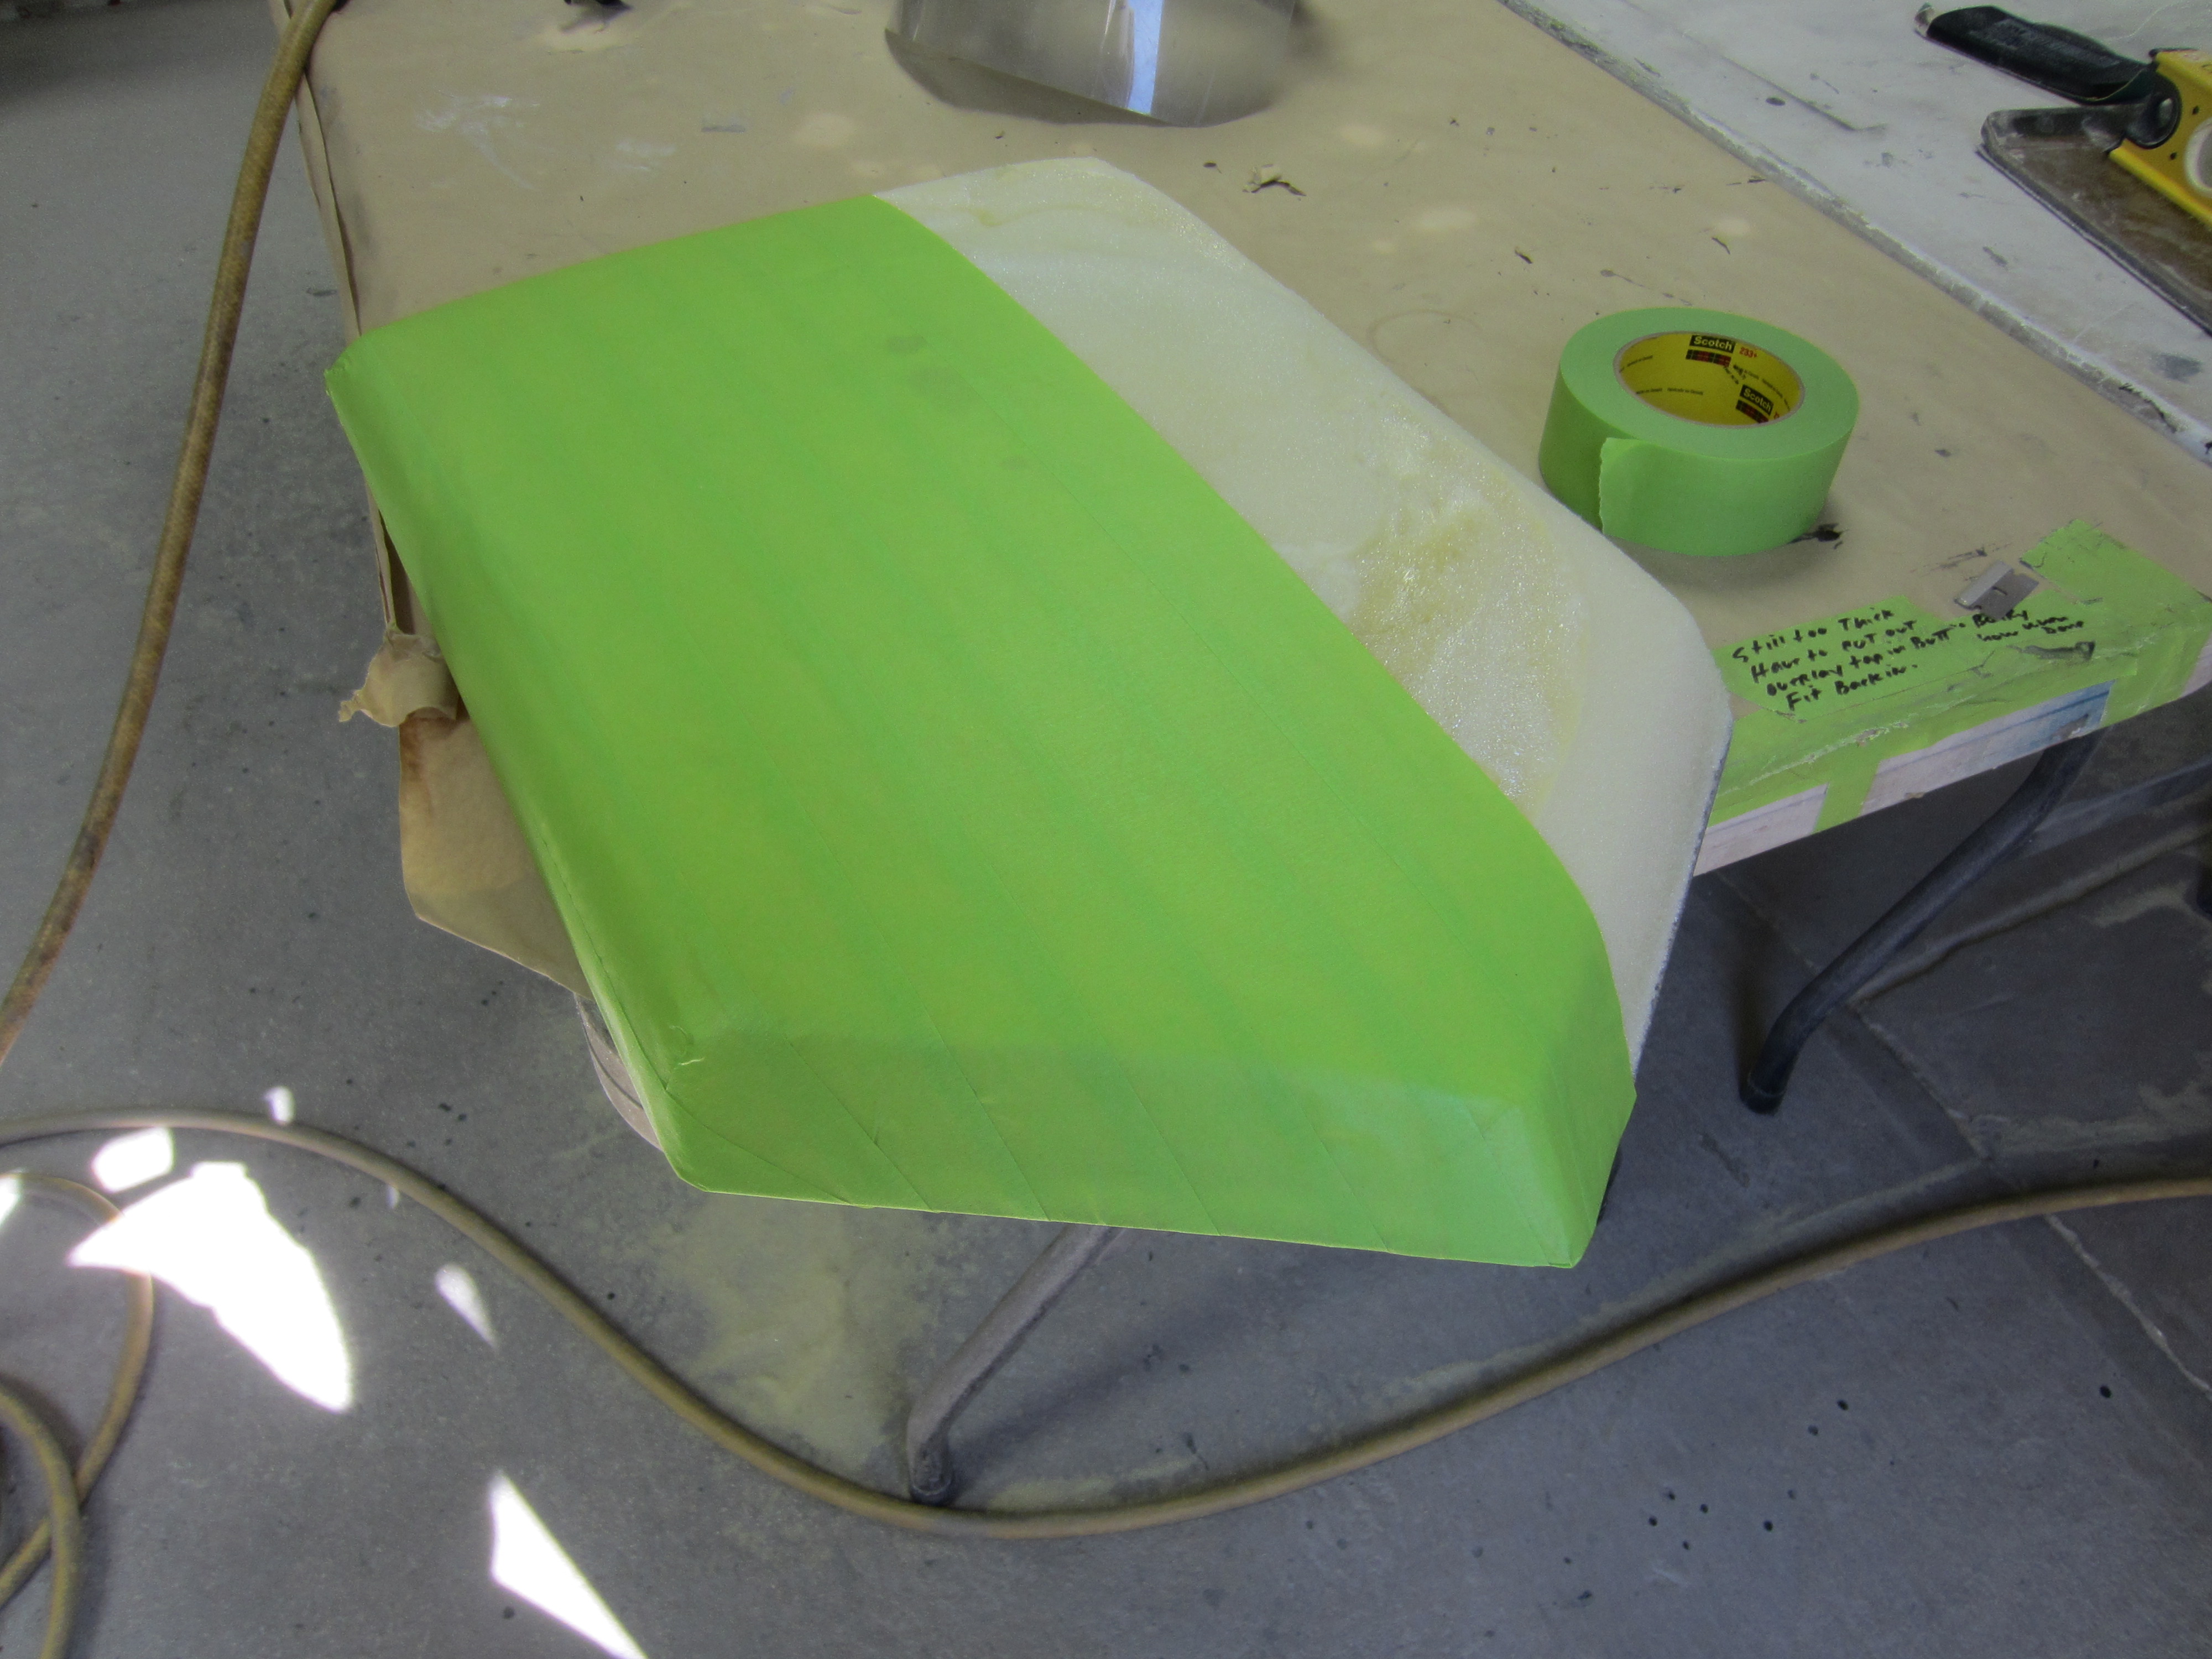
I have it shaped out pretty close to where i wanted so its time to check the clearance once more before the fiberglass work. Taping it off tight with little to no wrinkles is vital.
We reinstalled the foam mock up on the engine, using window / rope caulk we closed the hood in to position and we have 3/16th clearance at the tip which is the closest point. I need to shave the front nose down just a bit more as I want a minimum 1/4 inch when all the fiberglass thickness is built up.
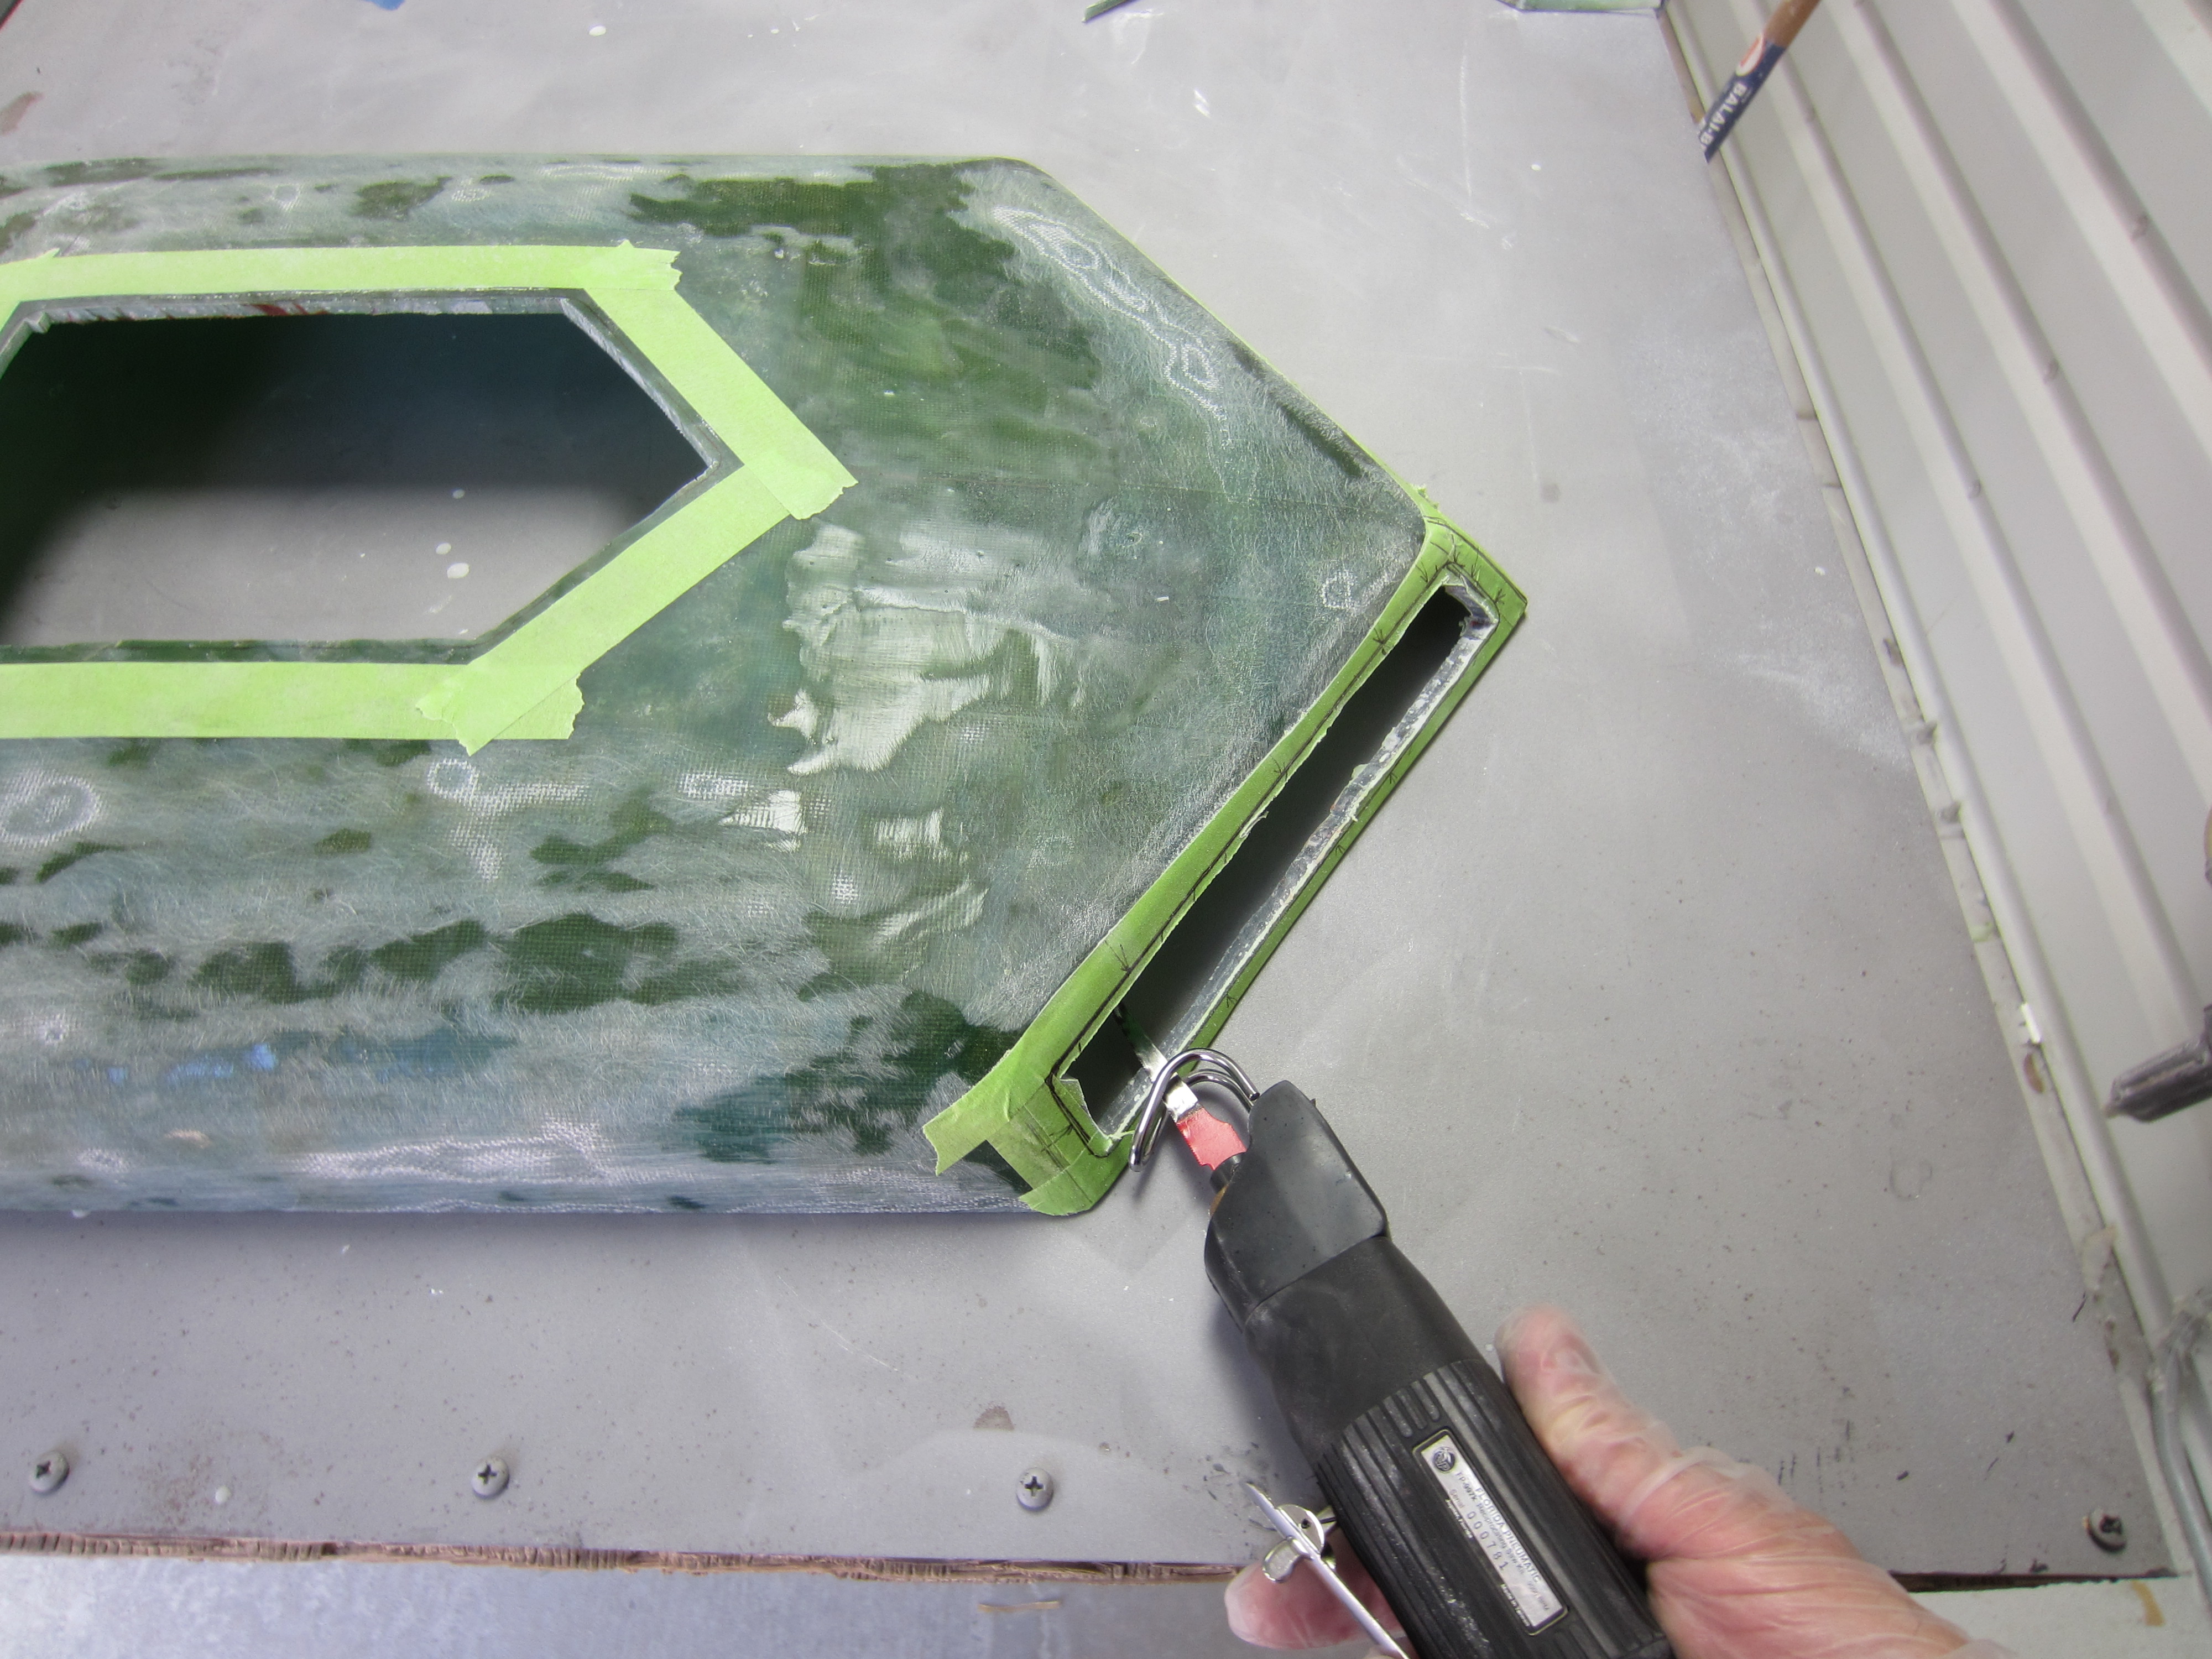
I shaved it a bit more and got the clearance where I needed it. It is re-taped very tight to provide a nice mold. I then spray it down with dry silicone in order to get the fiberglass to release from the mold as easy as possible.
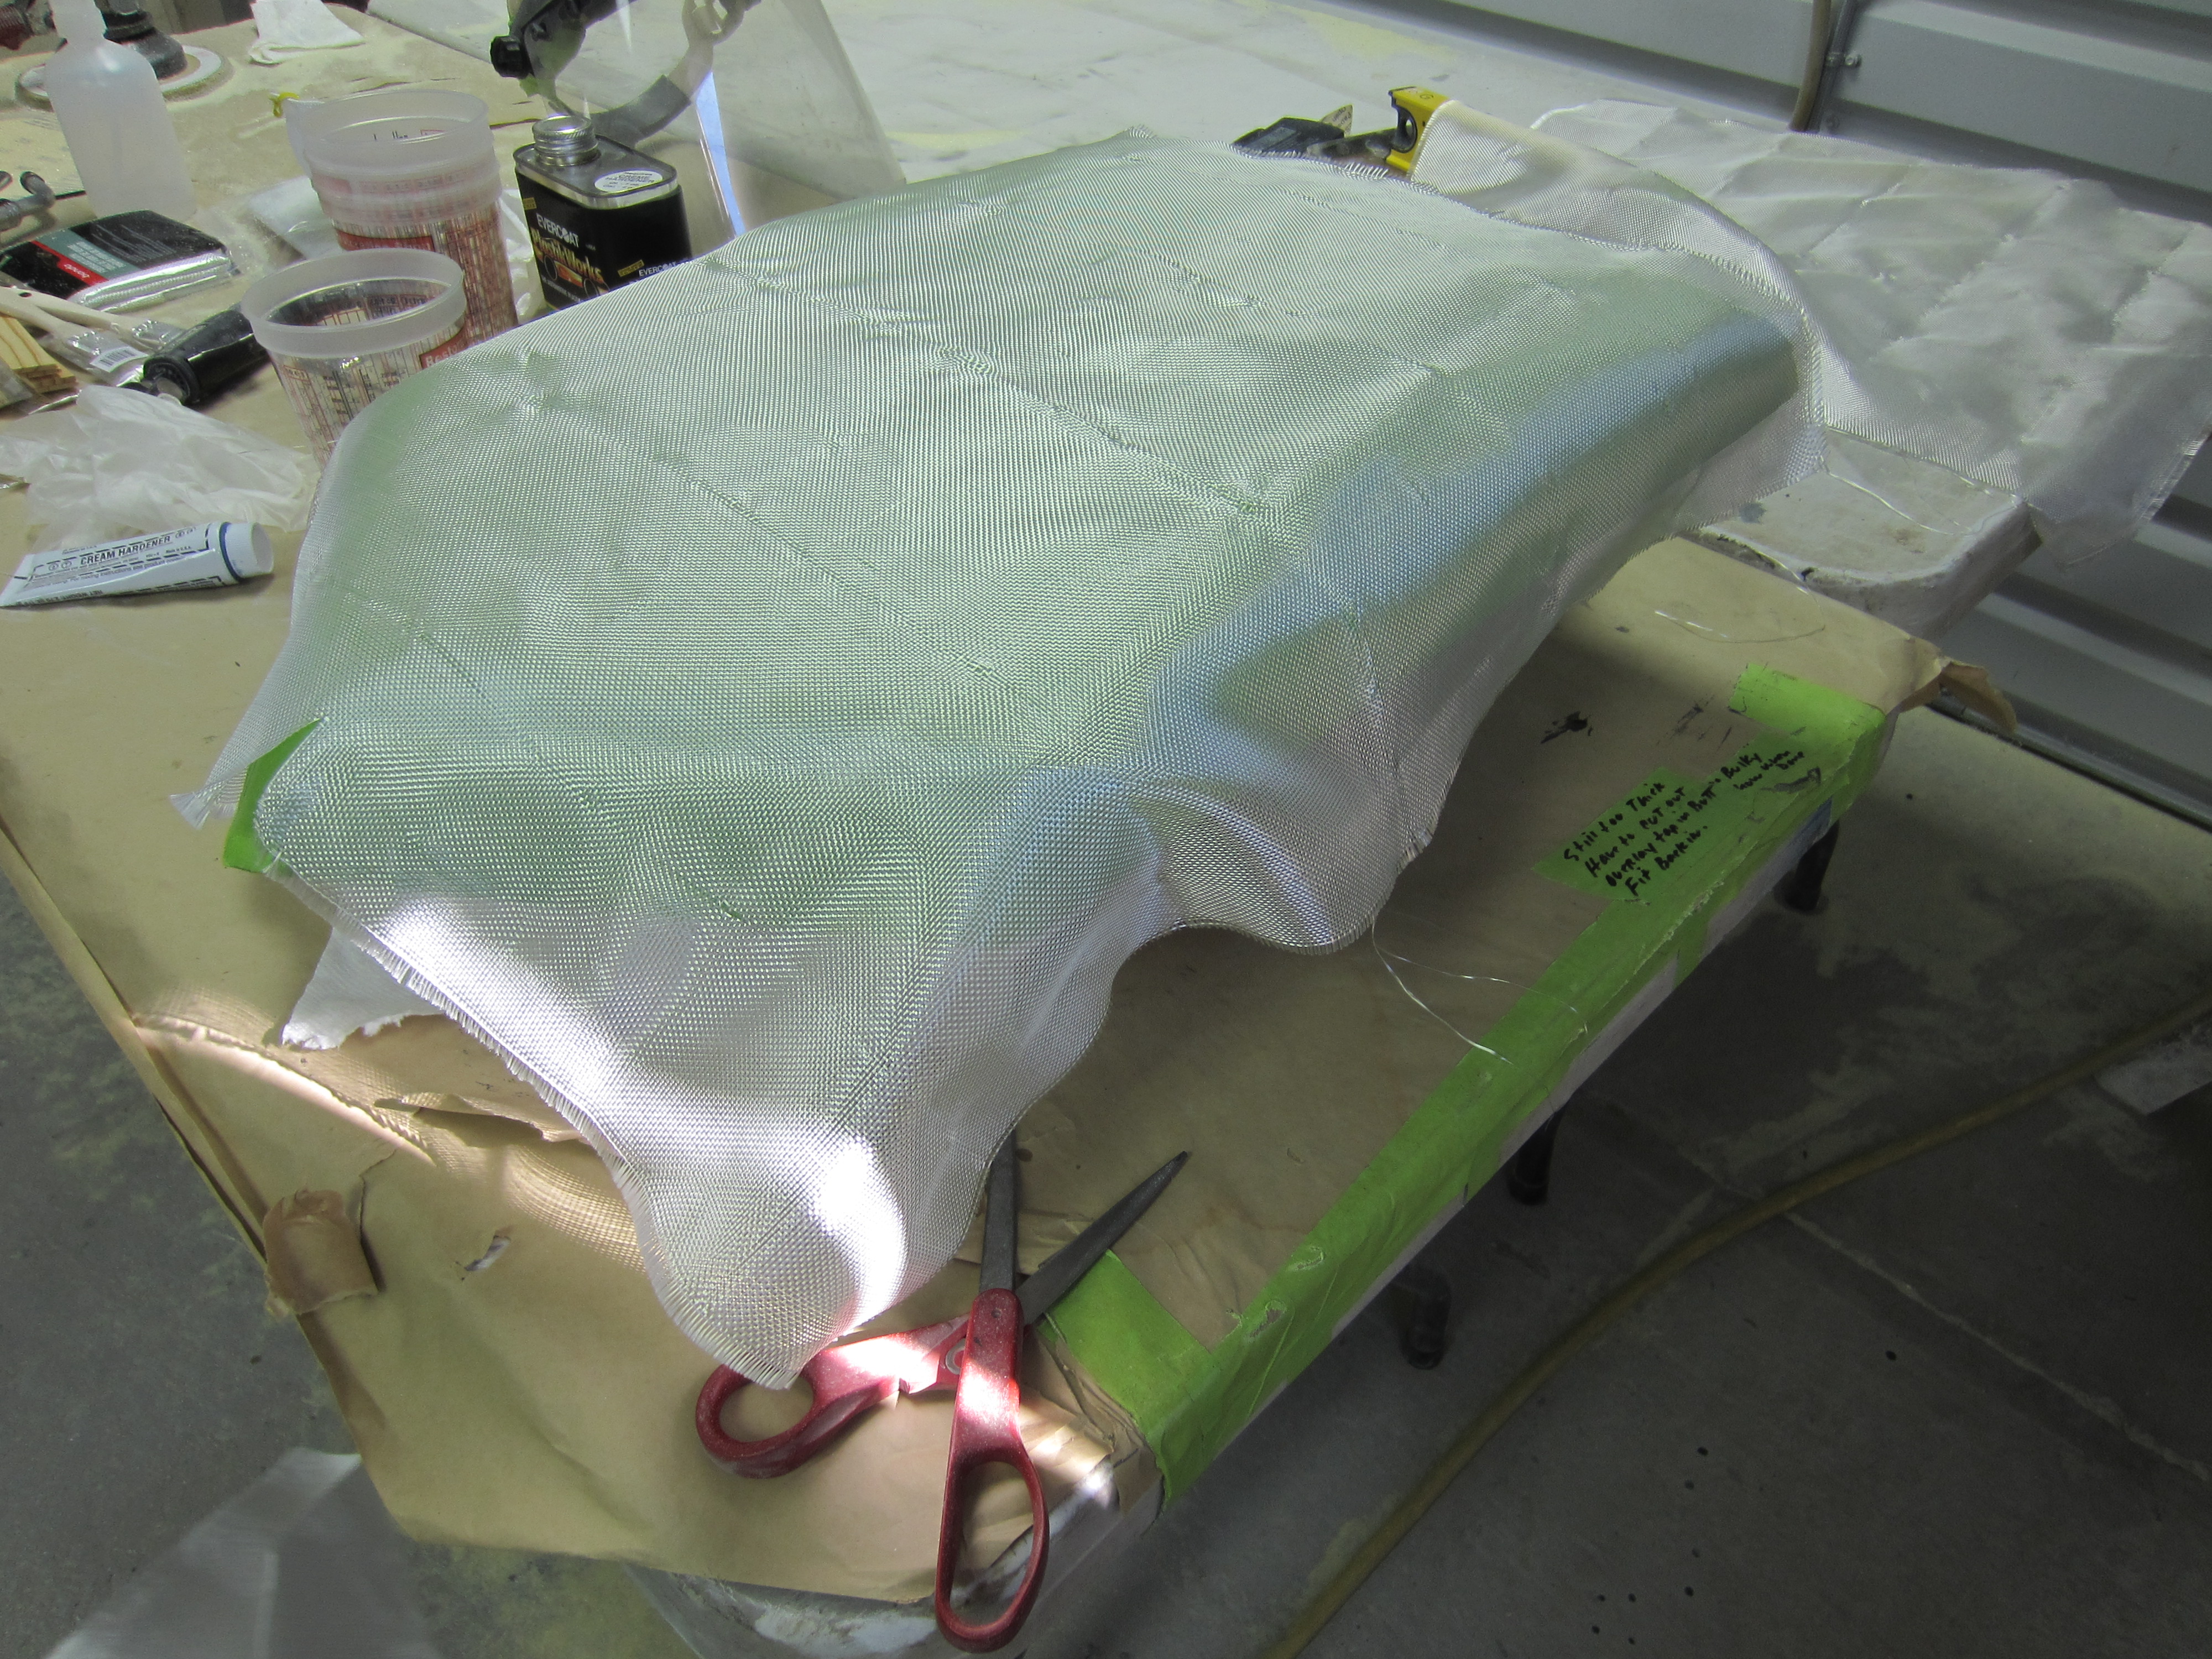
I am starting out with screen matting for a nice release of the mold on the first layers and also a smoother top surface. I use just enough resin to saturate the strands and no more.
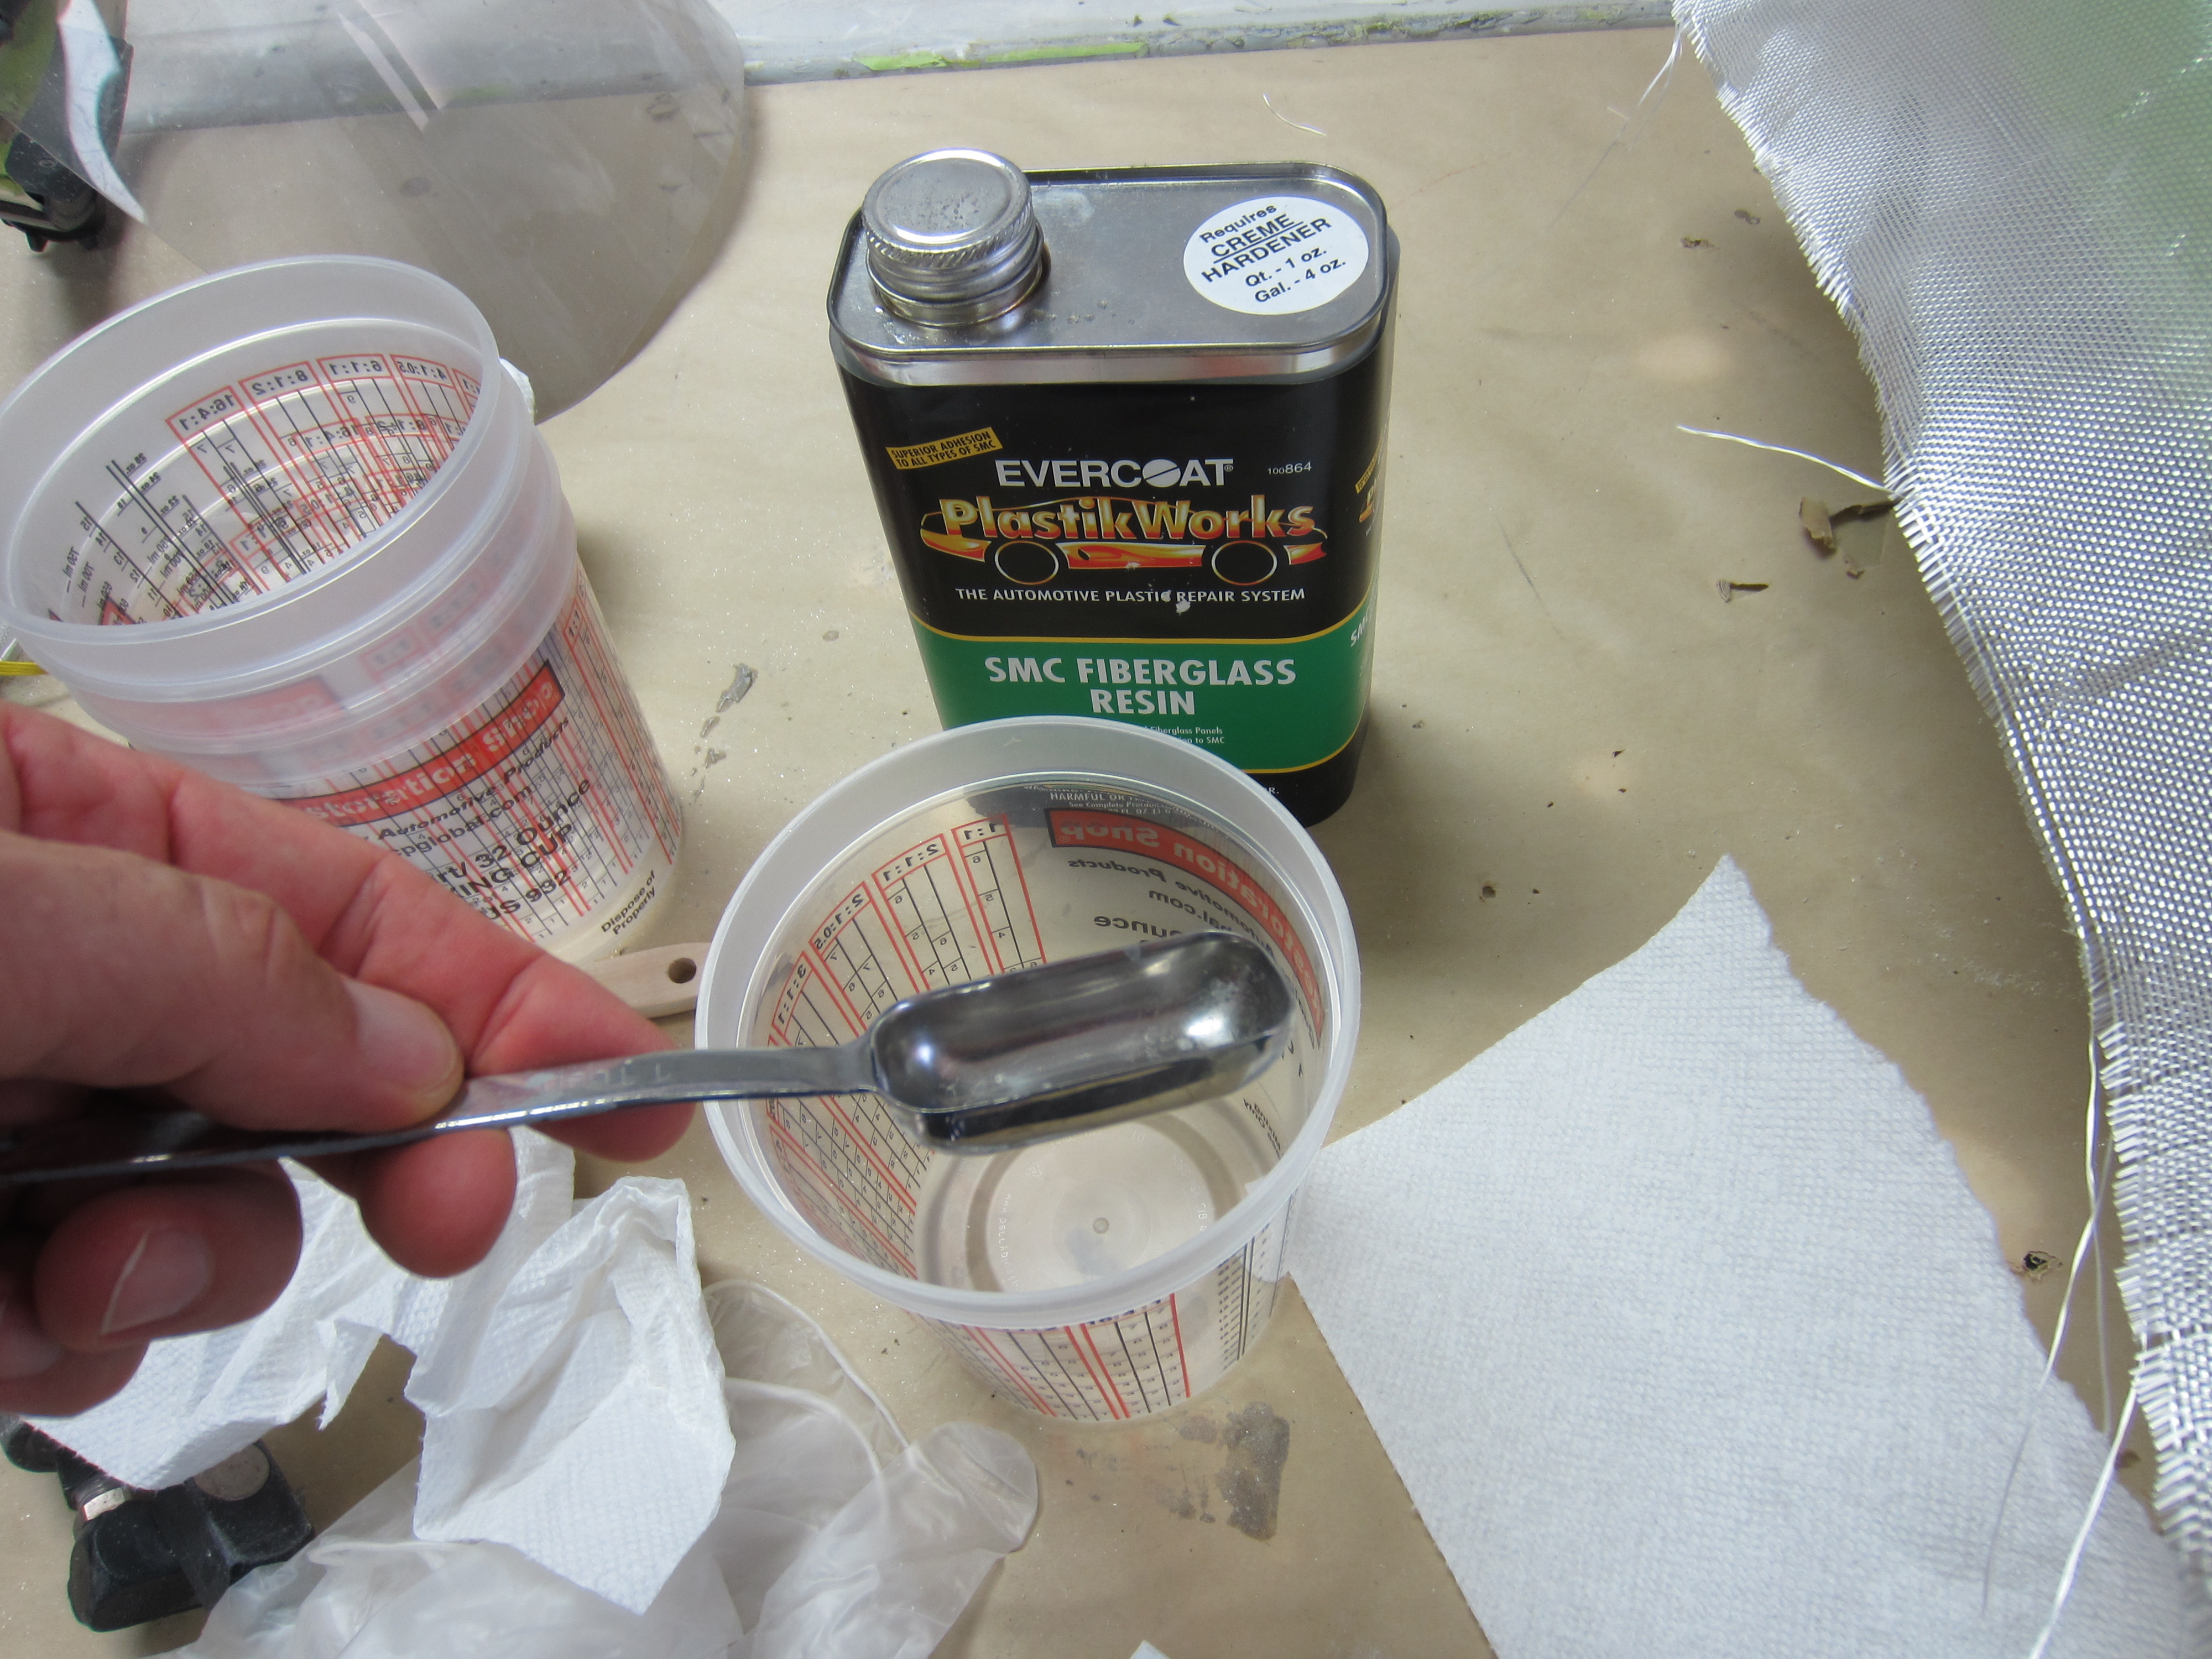
Ever Coat 864 resin is our chosen product. It uses a cream hardener like body filler which cures faster so you can continue to work the project quicker. Because of the color in cream hardener it also allows you to see the mixing ratio during hot and colder temps which aides in consistency compared to MEK or liquid hardener resins.
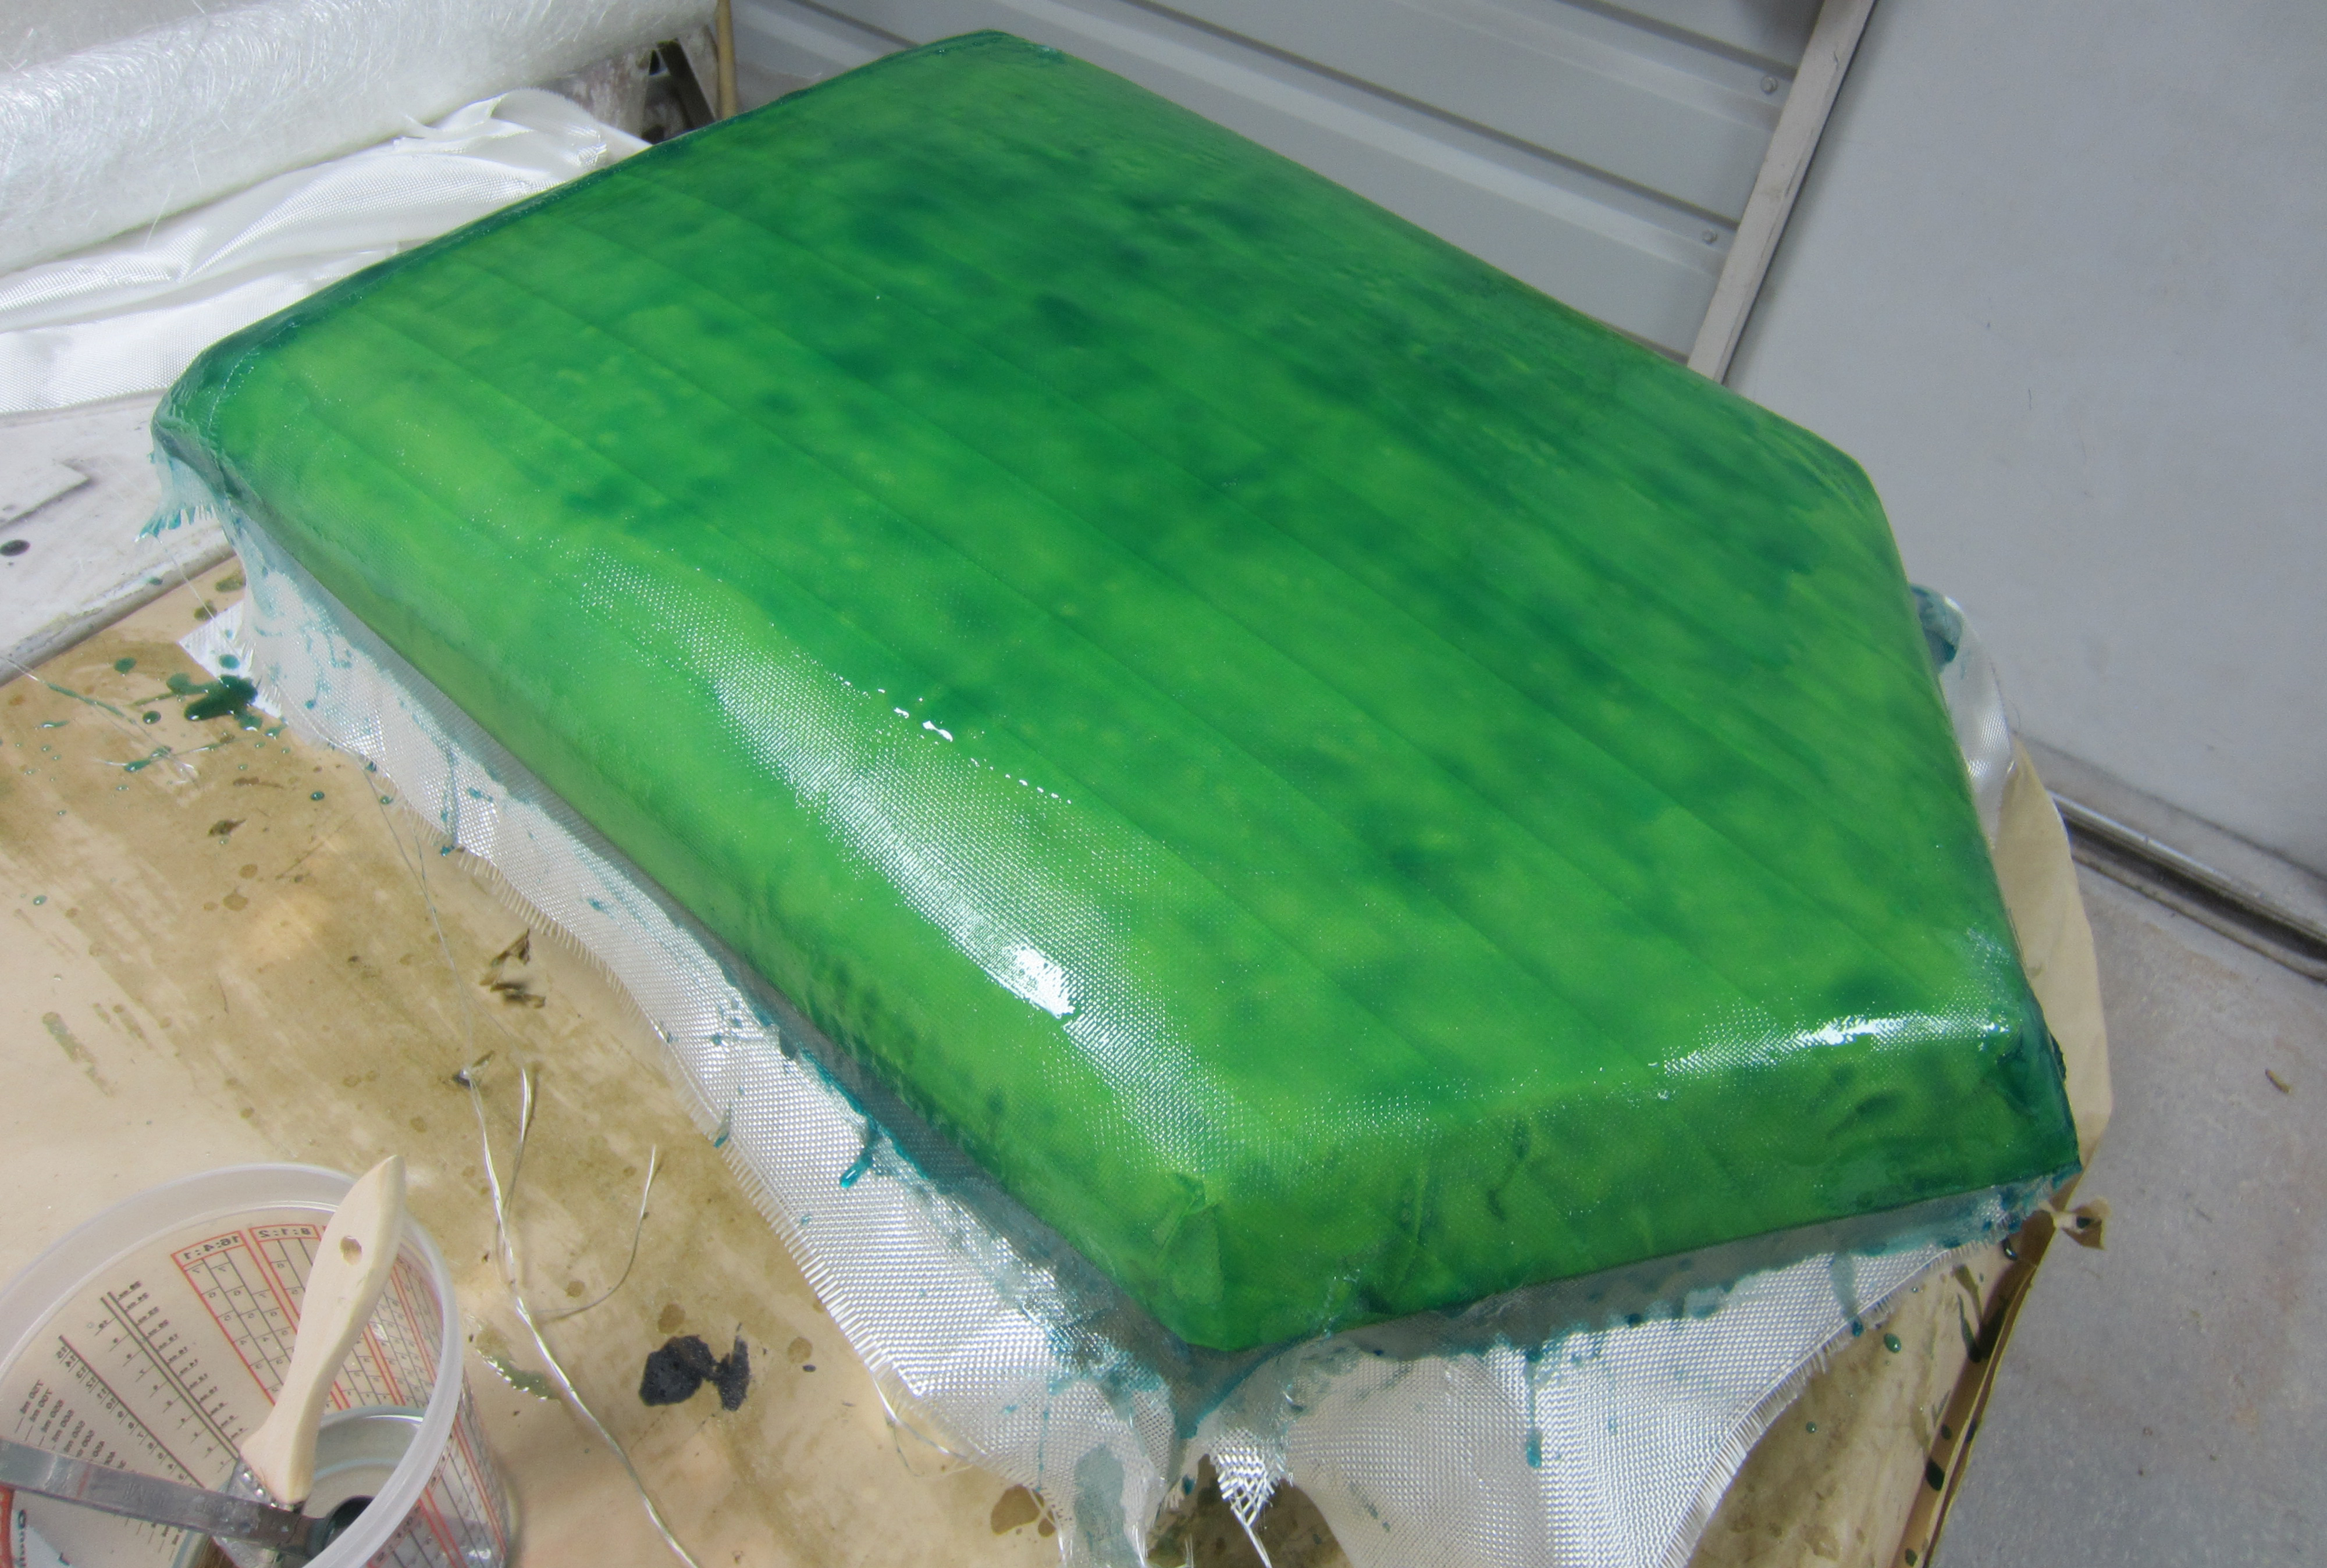
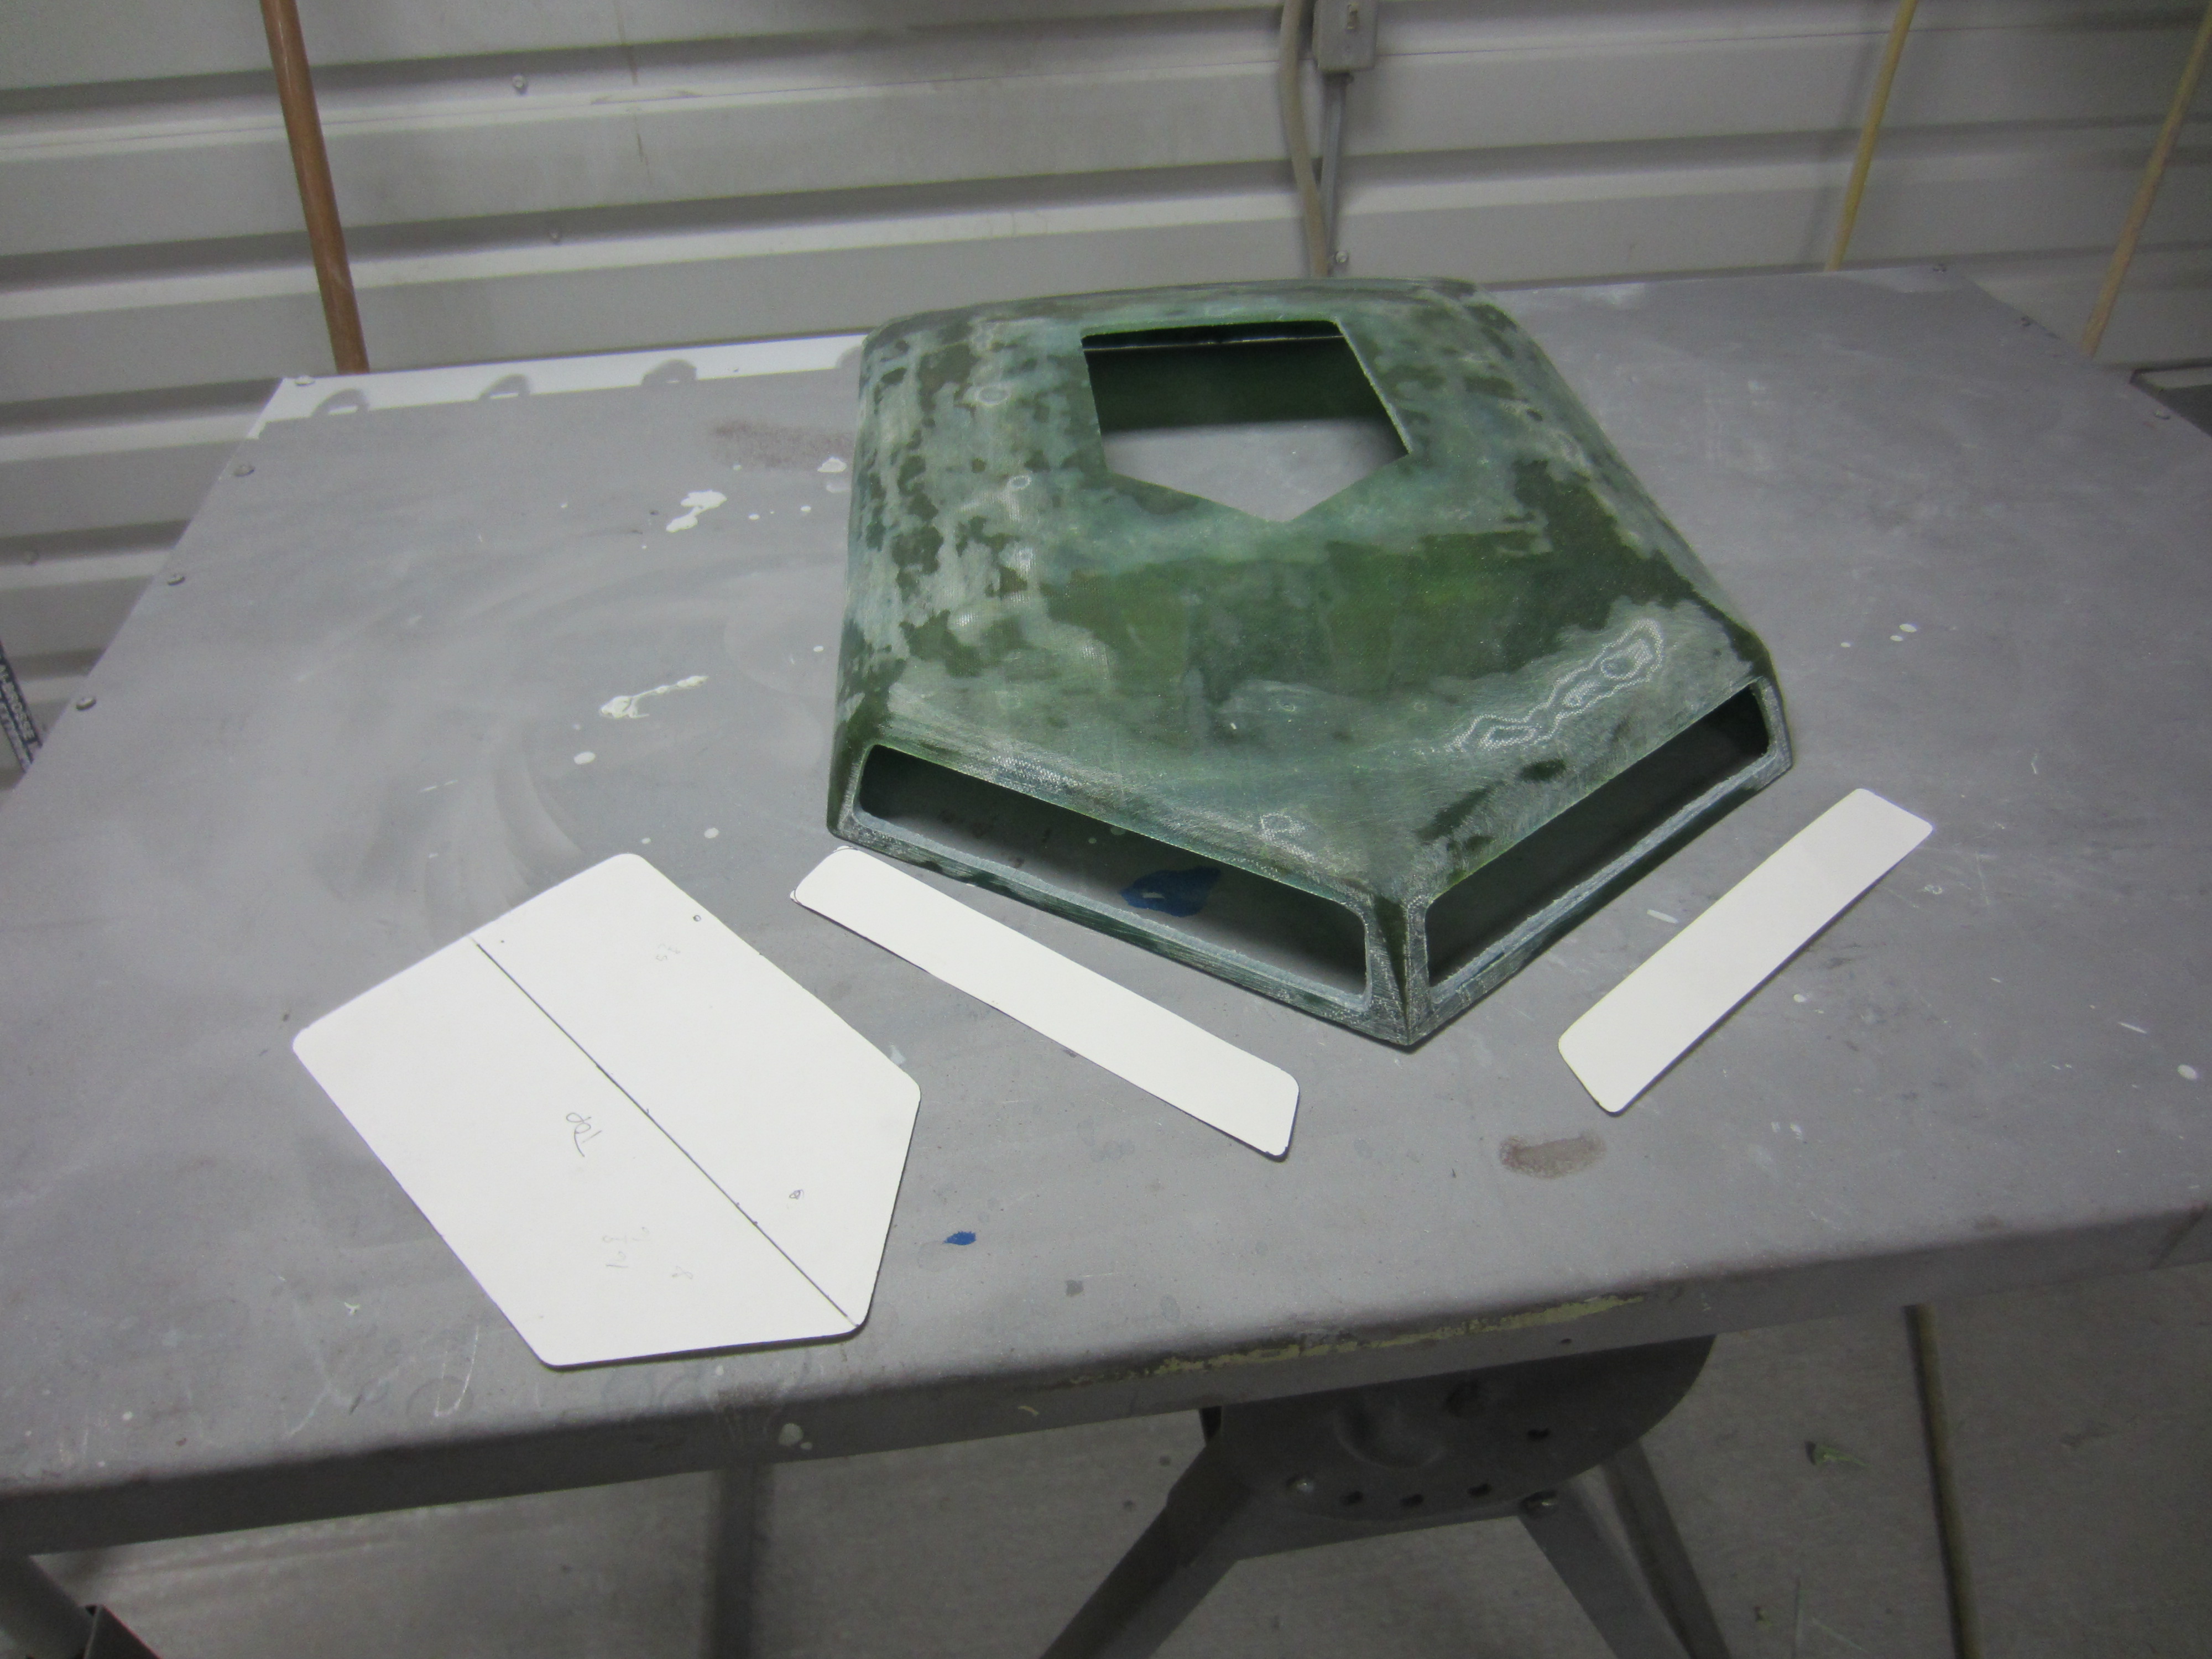
The air cleaner has been glassed and needs time to cure. Eventually after we add fiberglass matting to the underside we are aiming for 3/16th thick which will hold up to rigorous use and also support our body and paint work for years to come.

After curing out it pulled off the mold pretty easy. We are now removing small remnants of tape that adhered to the new glass work. We are ready to reinforce with matting but first we will wipe with prepsol to remove any residues of the silicone spray.
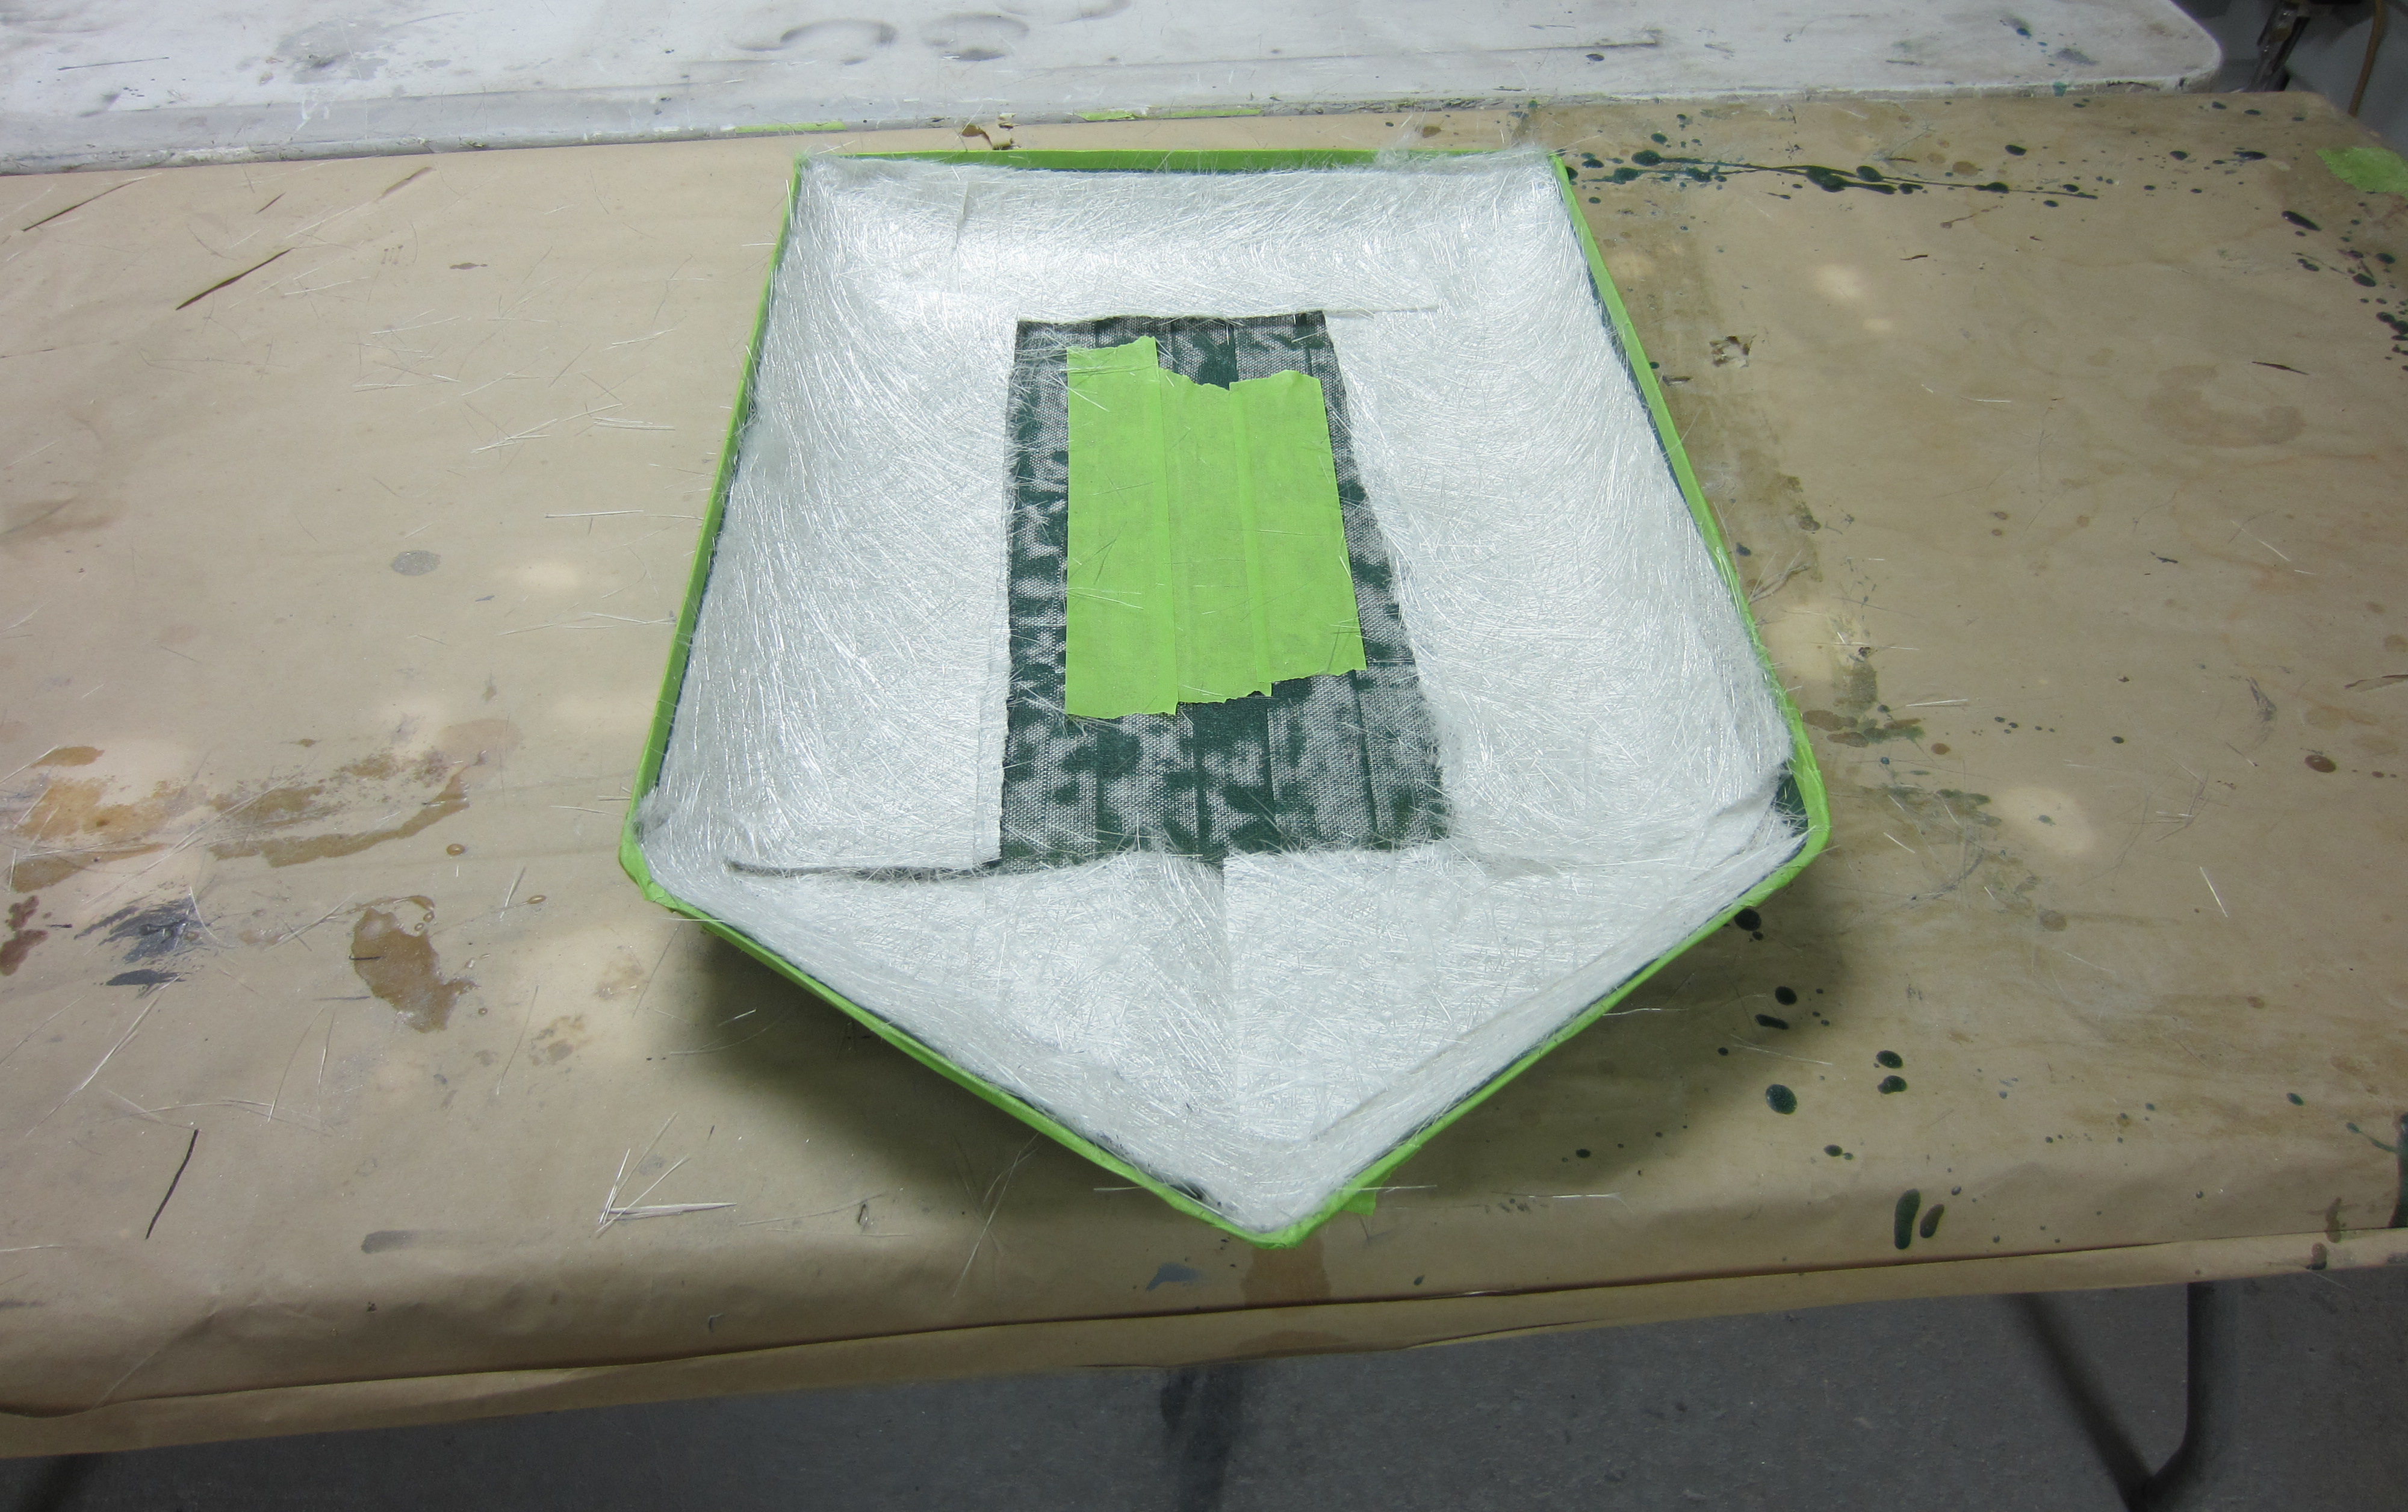
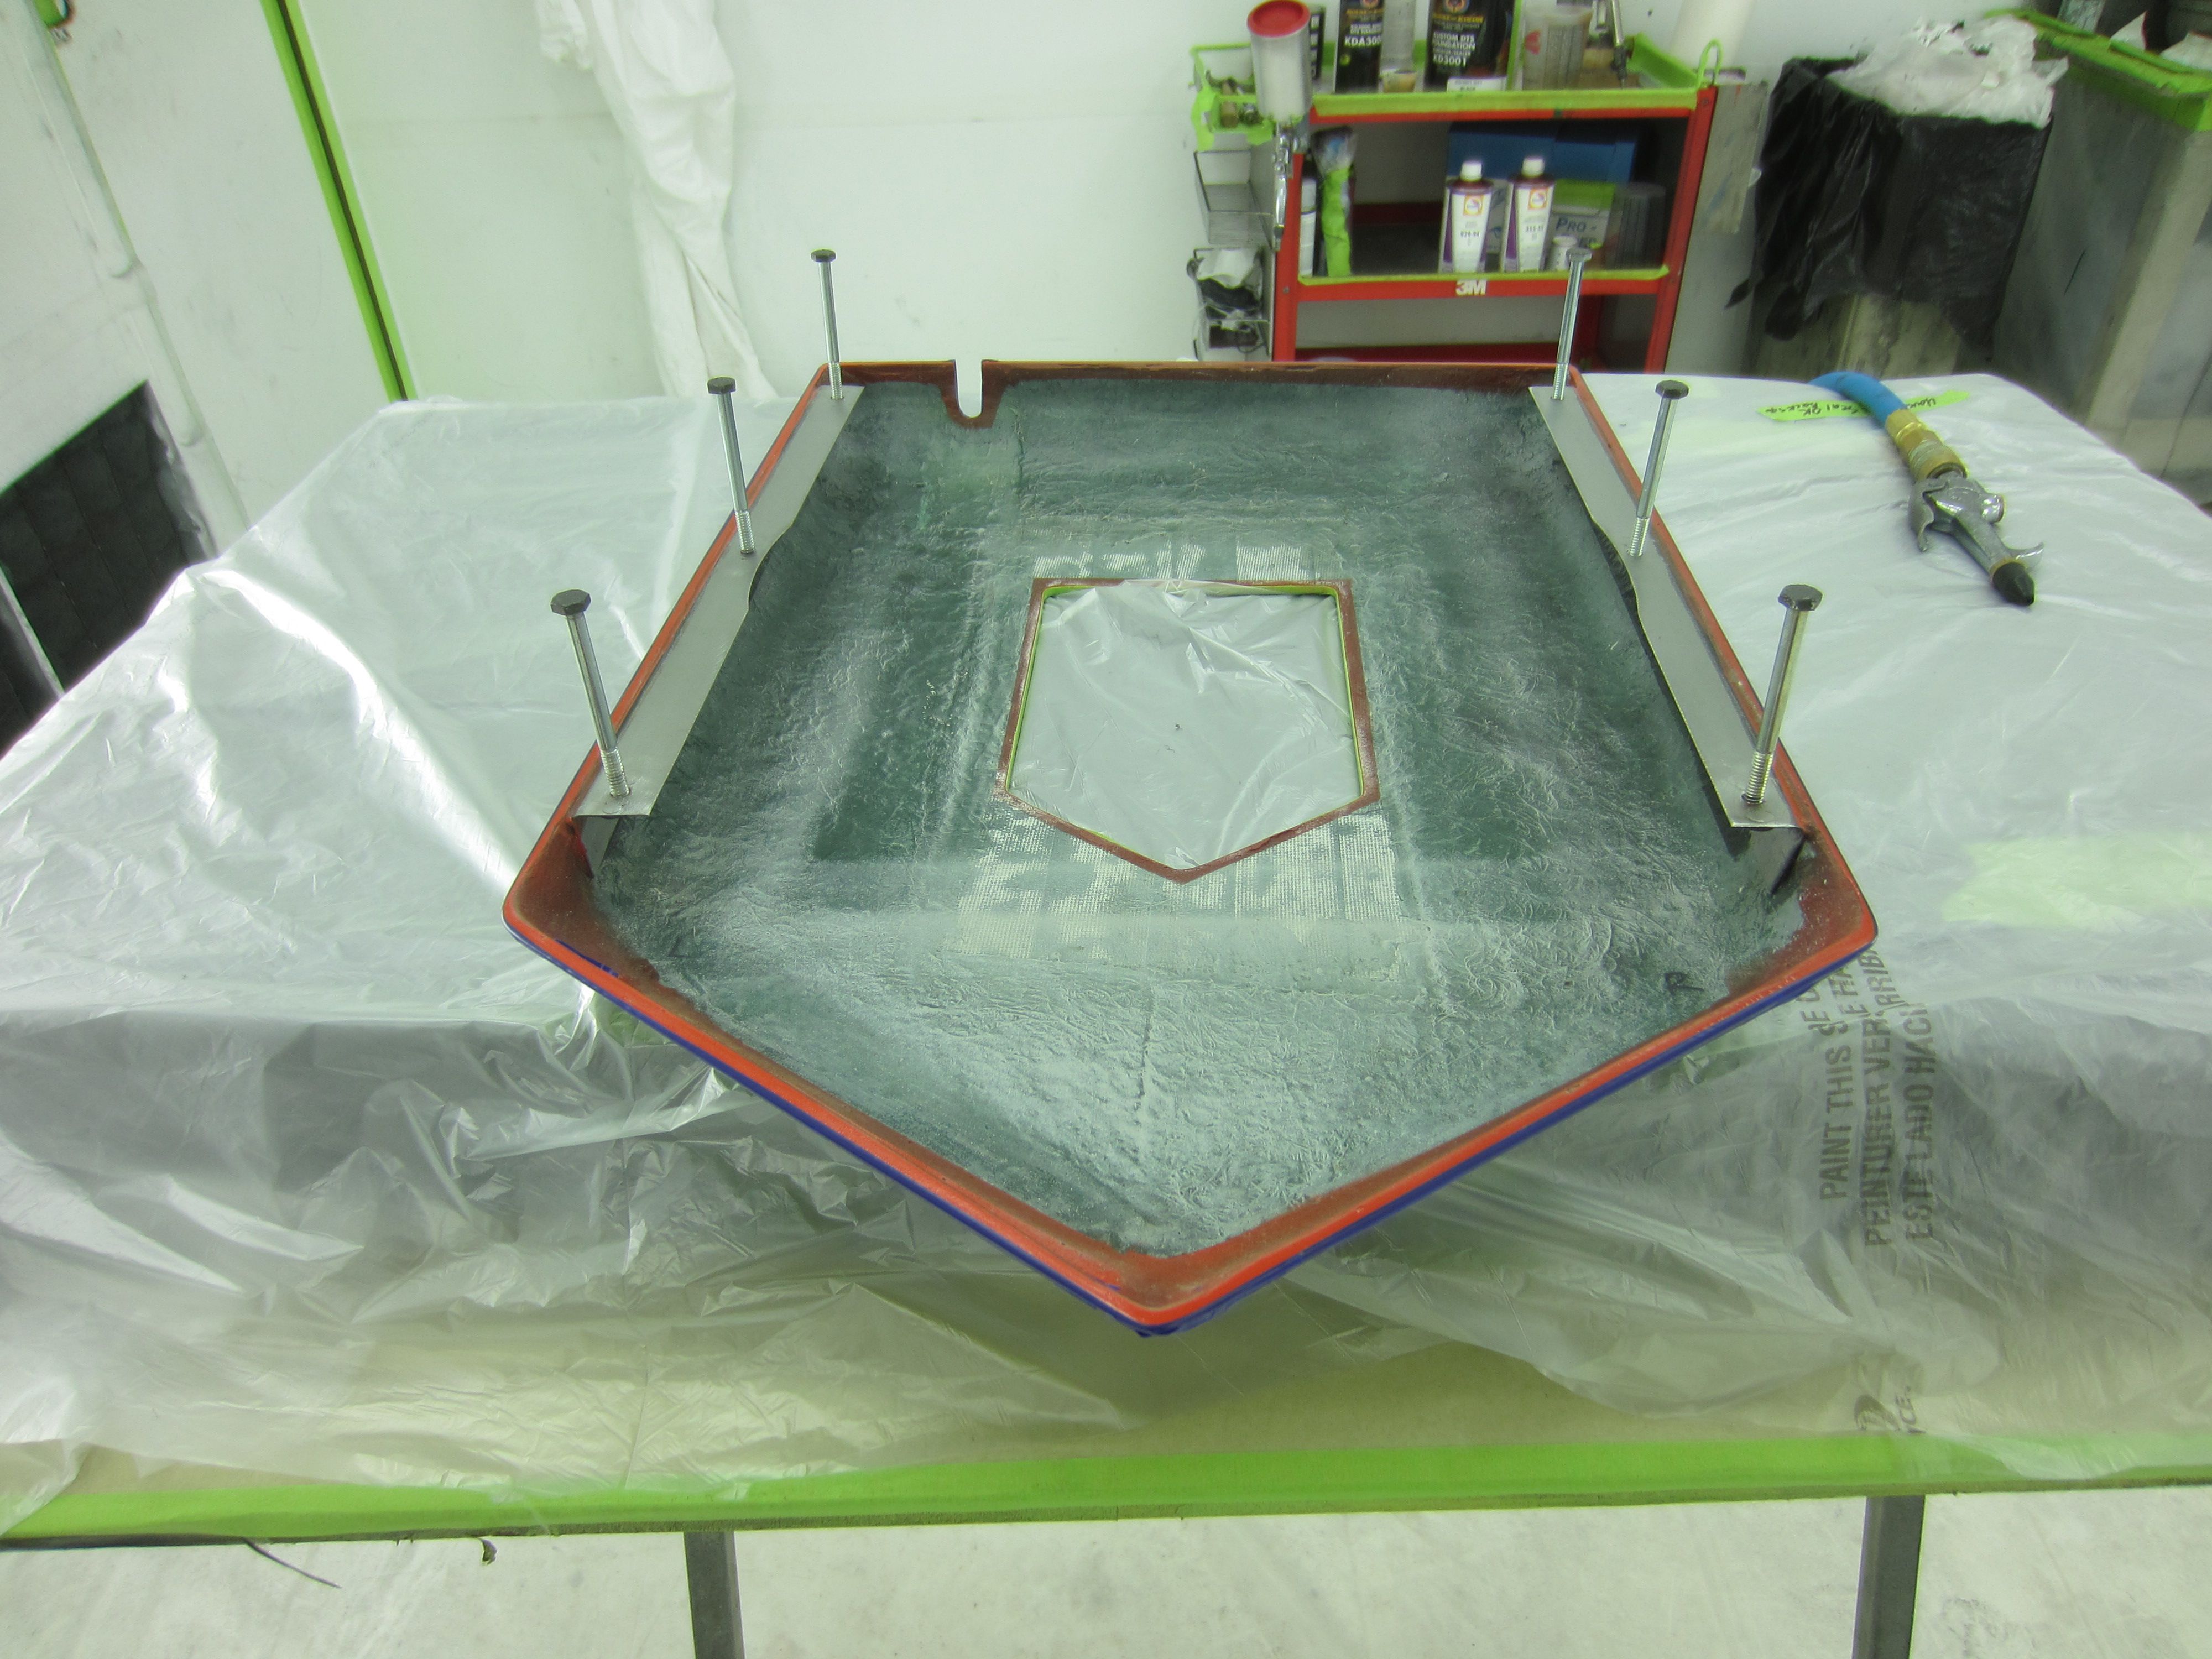
As seen we taped off the inside edge where the air cleaner has to fit around our base tightly. We are now adding strand mat for strength around our confines to " stiffen" it up. Simply use the same procedure add just enough resin to saturate strands and no more for max strength. We do all the reinforcement work on the back side so that the outer dimensions do not change in order to keep our hood clearance.

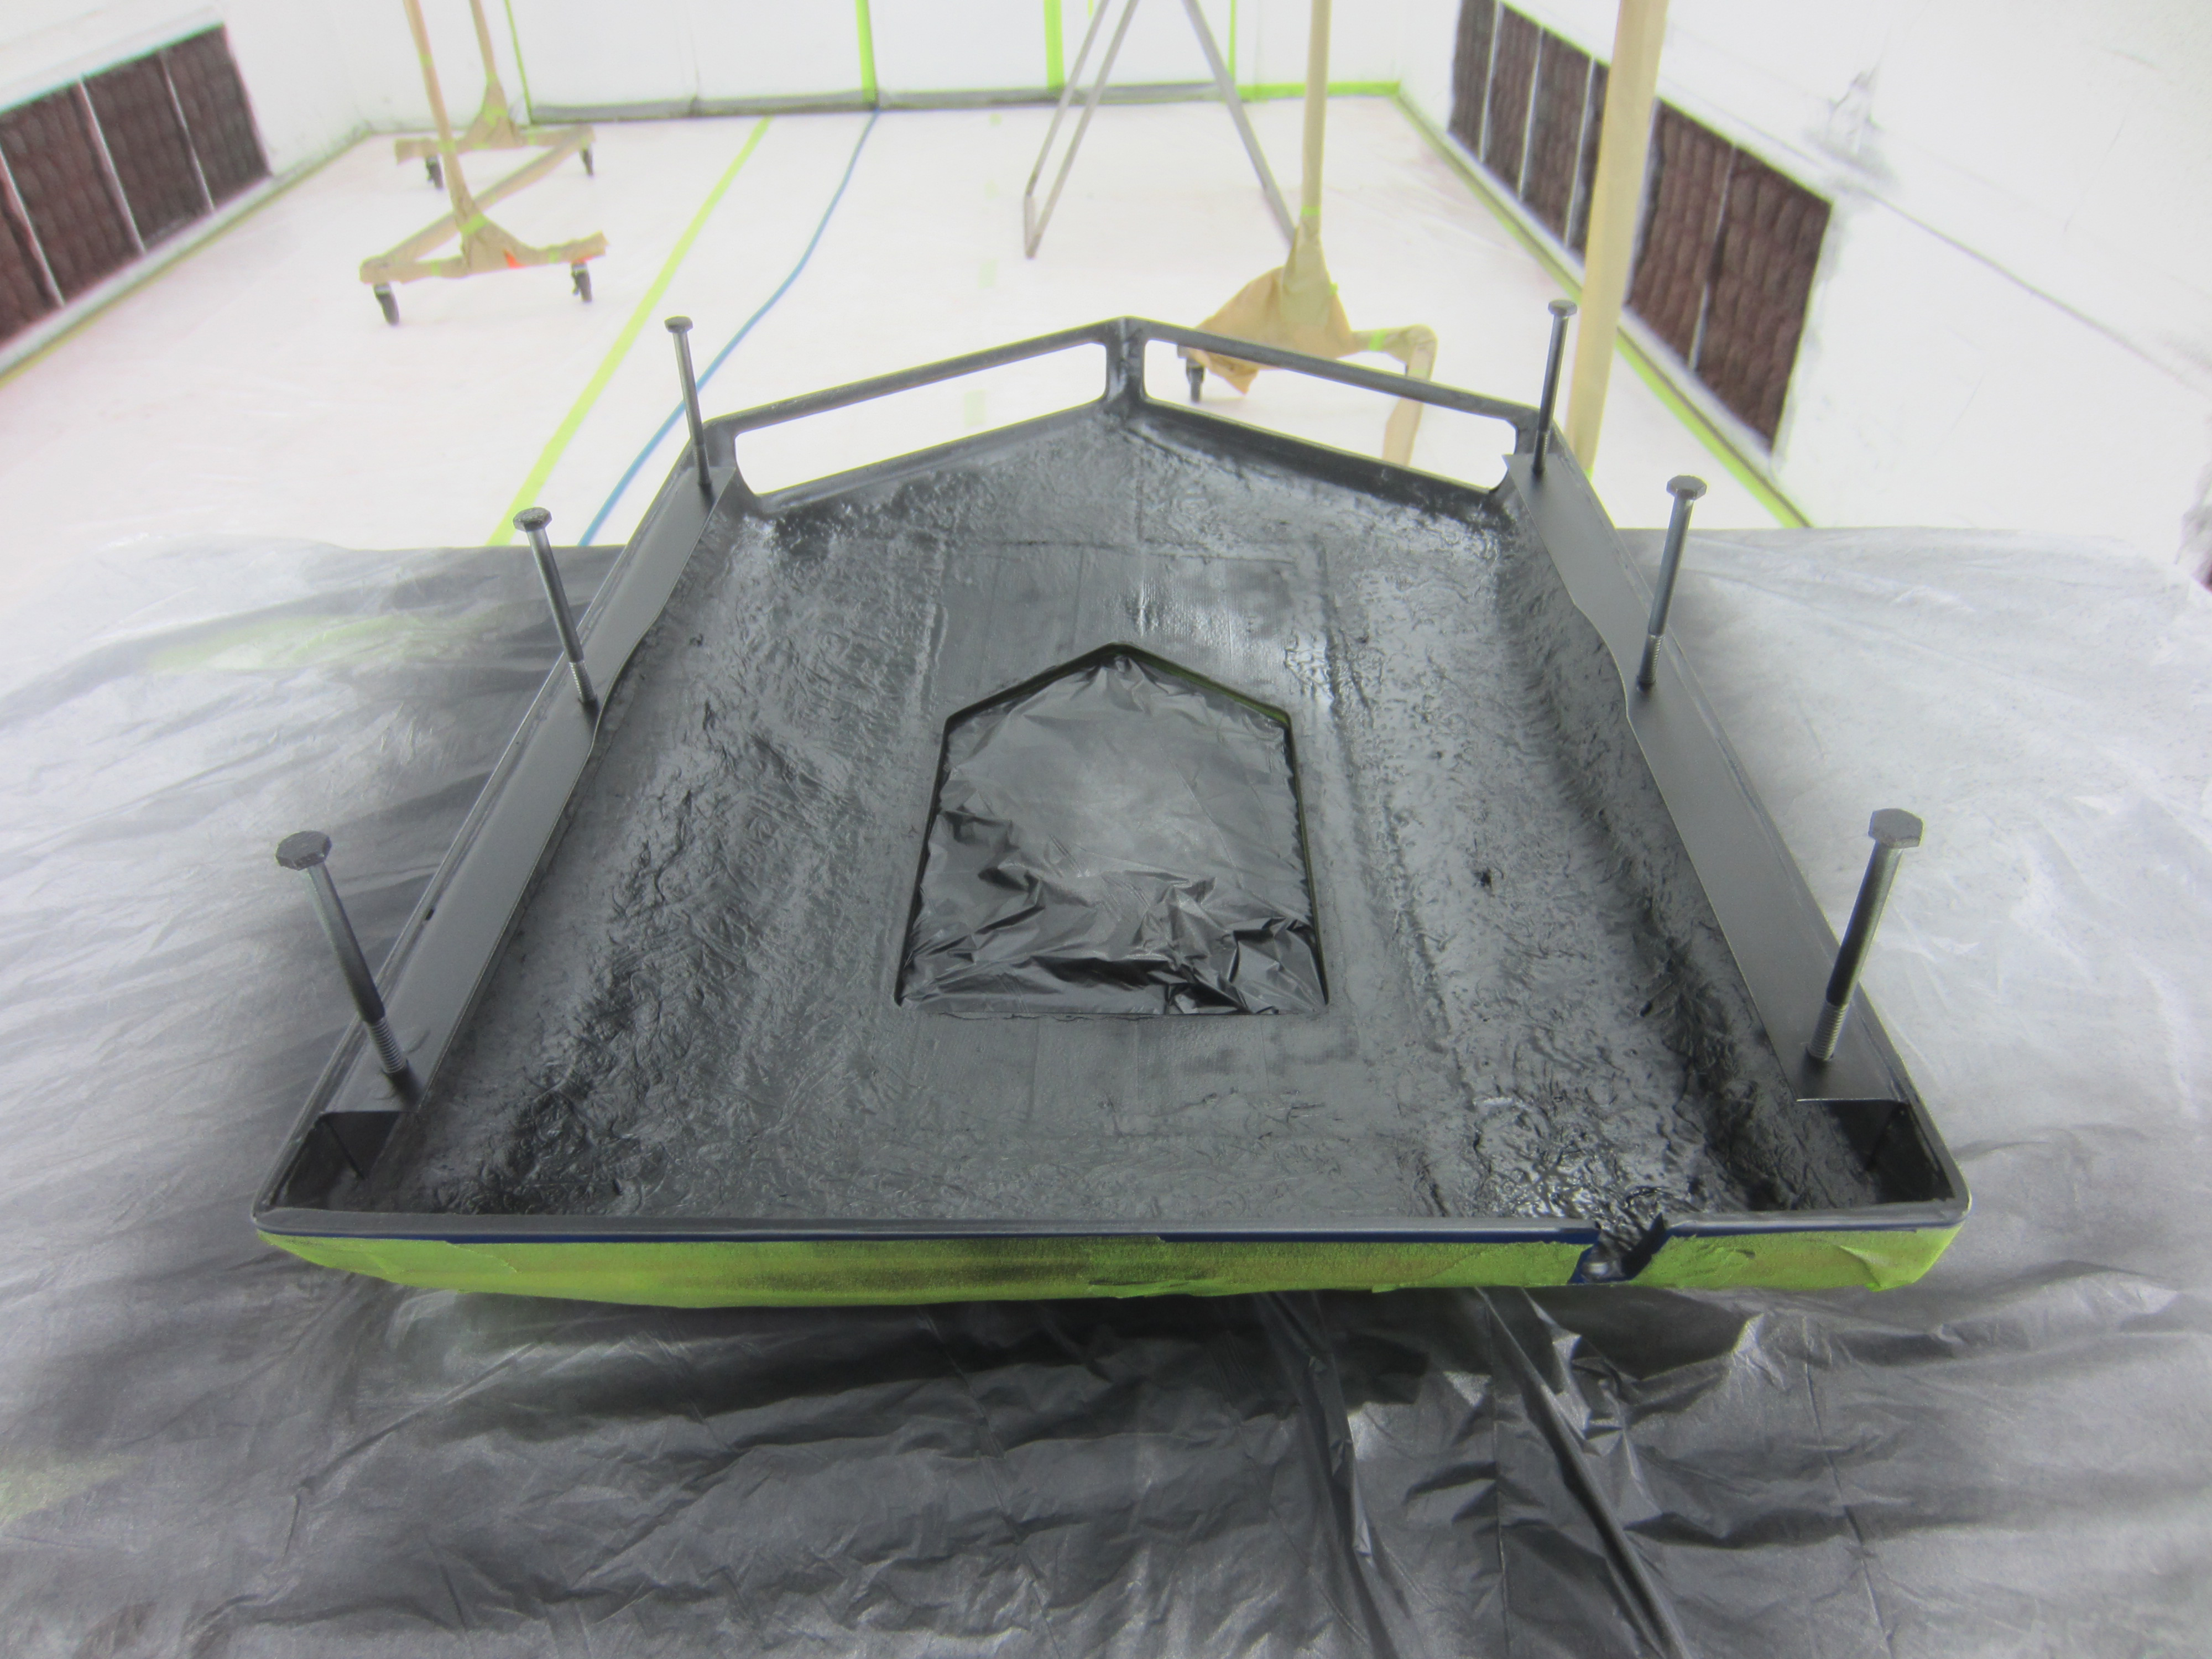
We took our base to the cabinet blaster and blasted all the foam away that was used for our mold then peeled off the base tape and are now blasting the steel to prime it. We will eventually satin black paint it. It will not be seen when installed so high cosmetics are not needed.
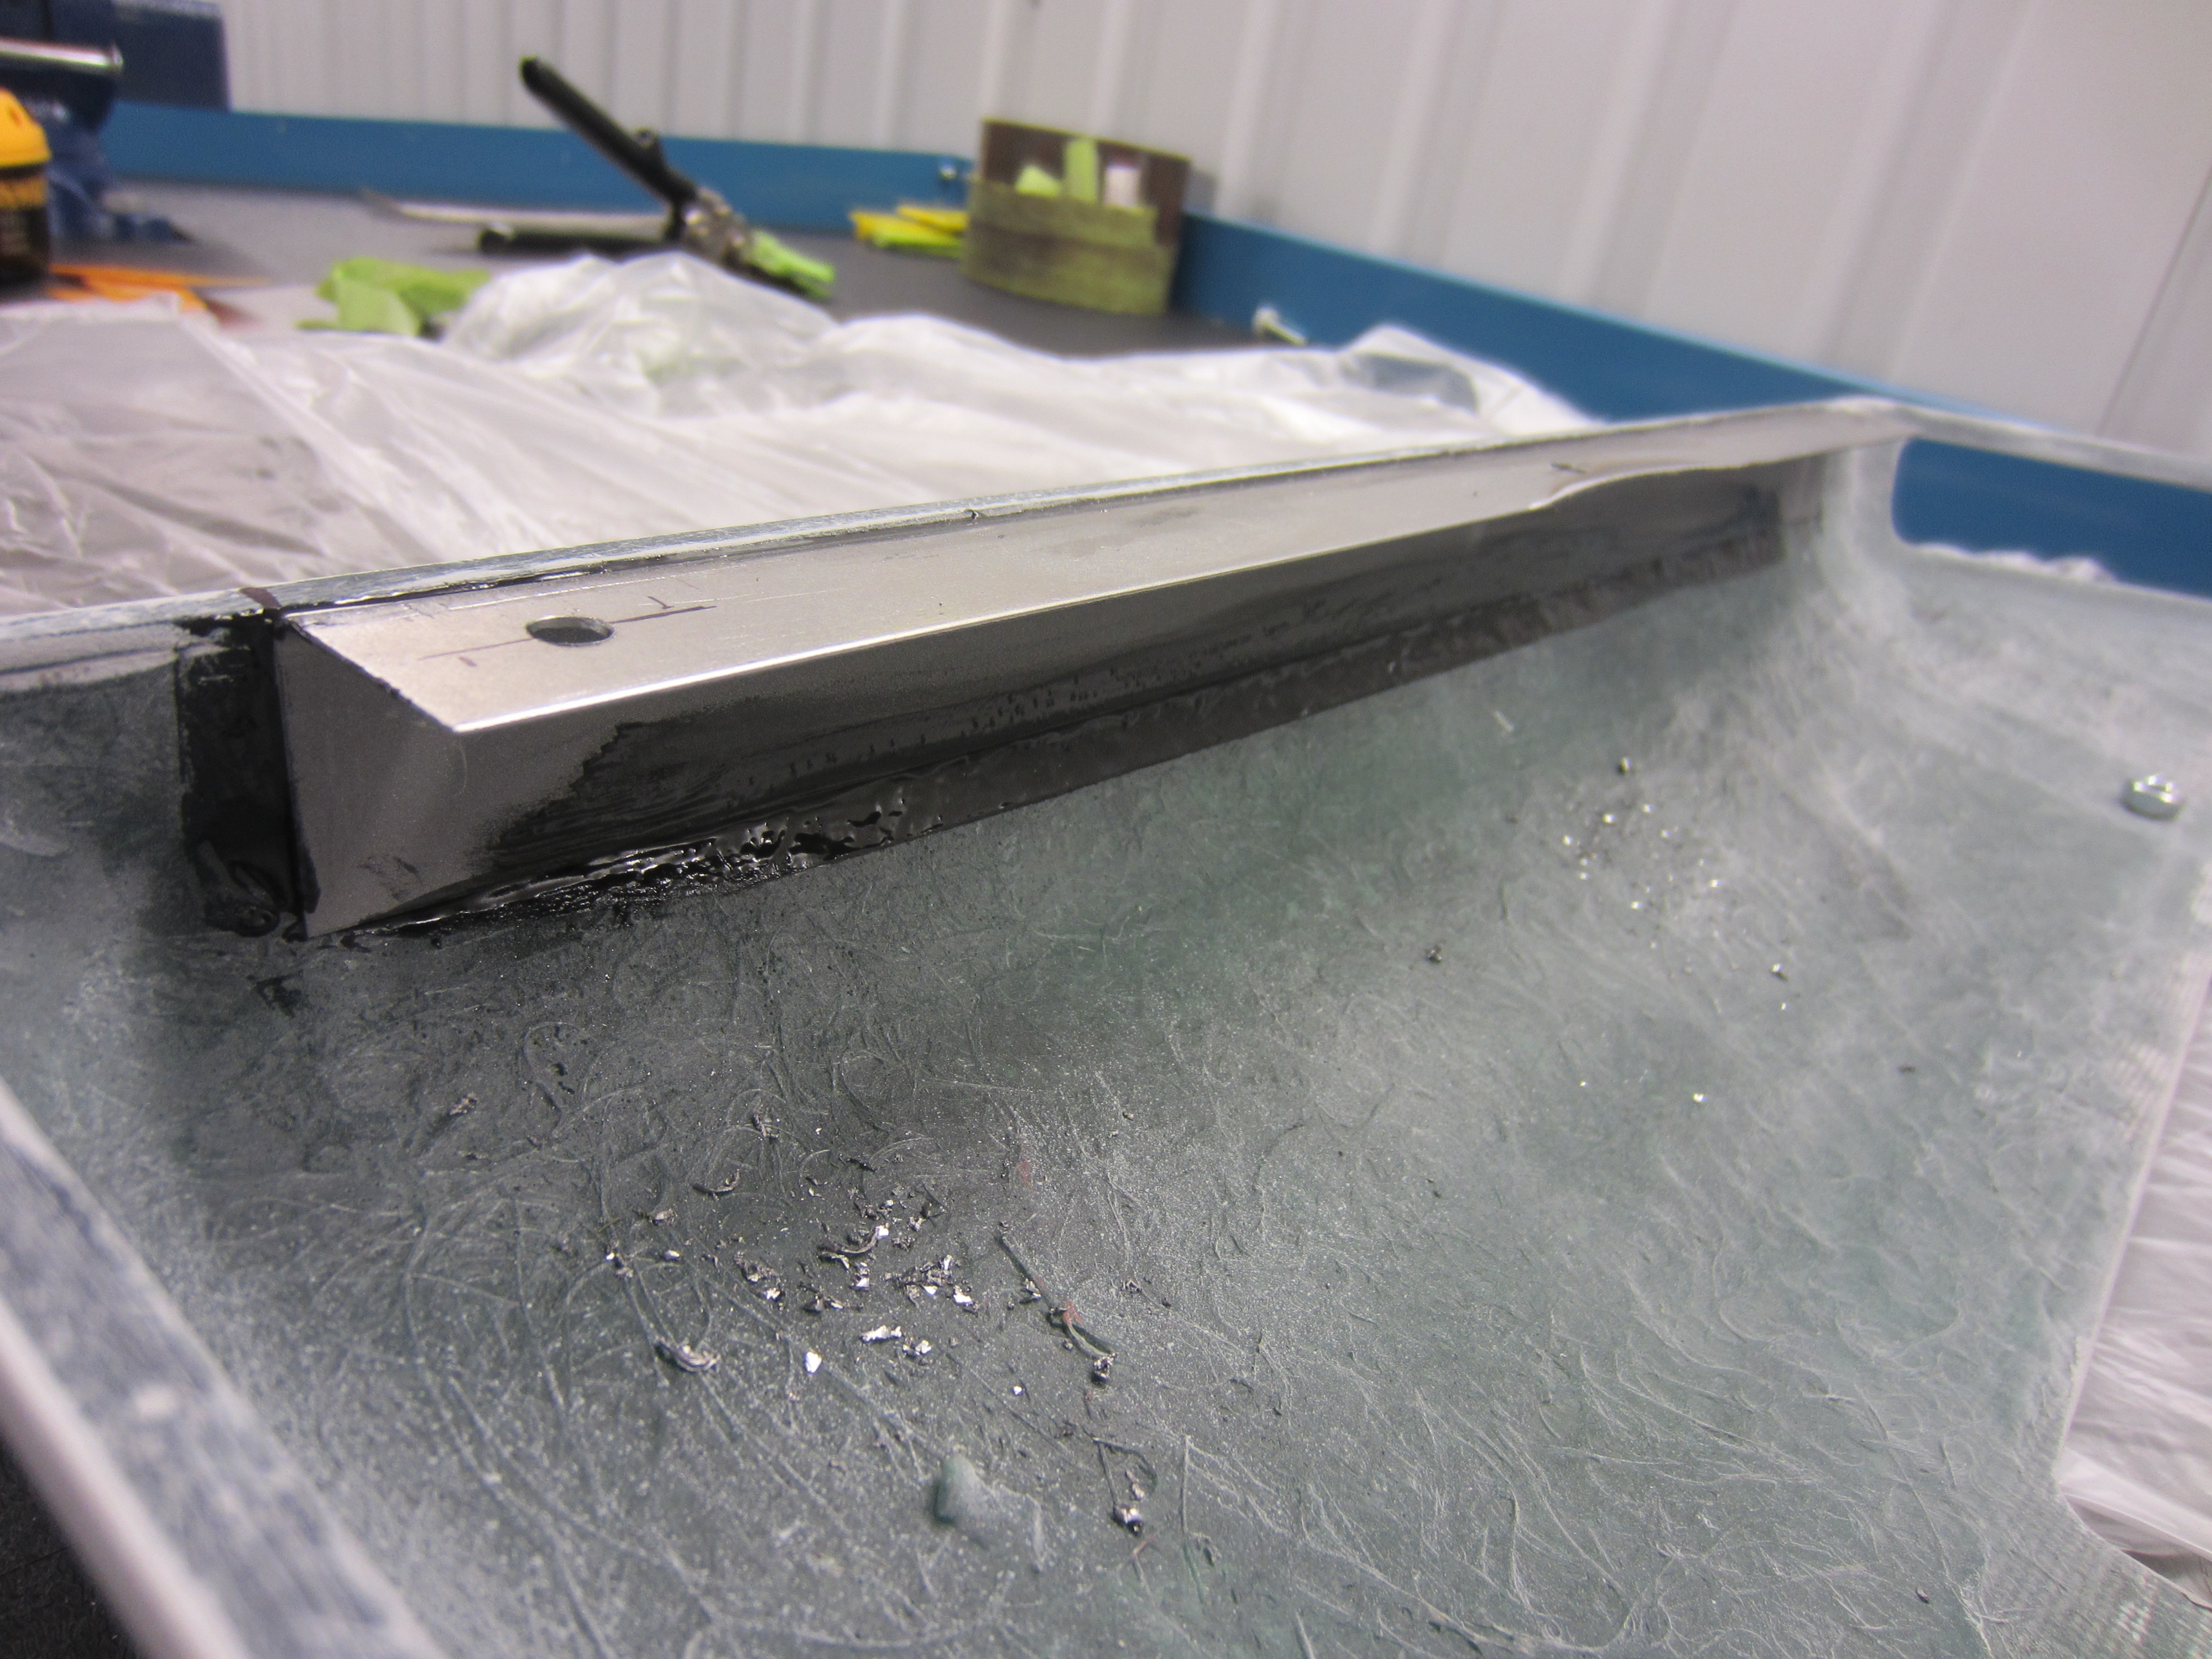
Eric fabbed a couple of 18 gauge / 90 degree brackets. He then media blasted both surfaces and placed them on the back side of the fiberglass air cleaner cover. He properly aligned to the steel base then adhered them using 3M epoxy seen in caption 43. He will now tack weld some nuts on the back side of the brackets and he will be done with the mounting system.
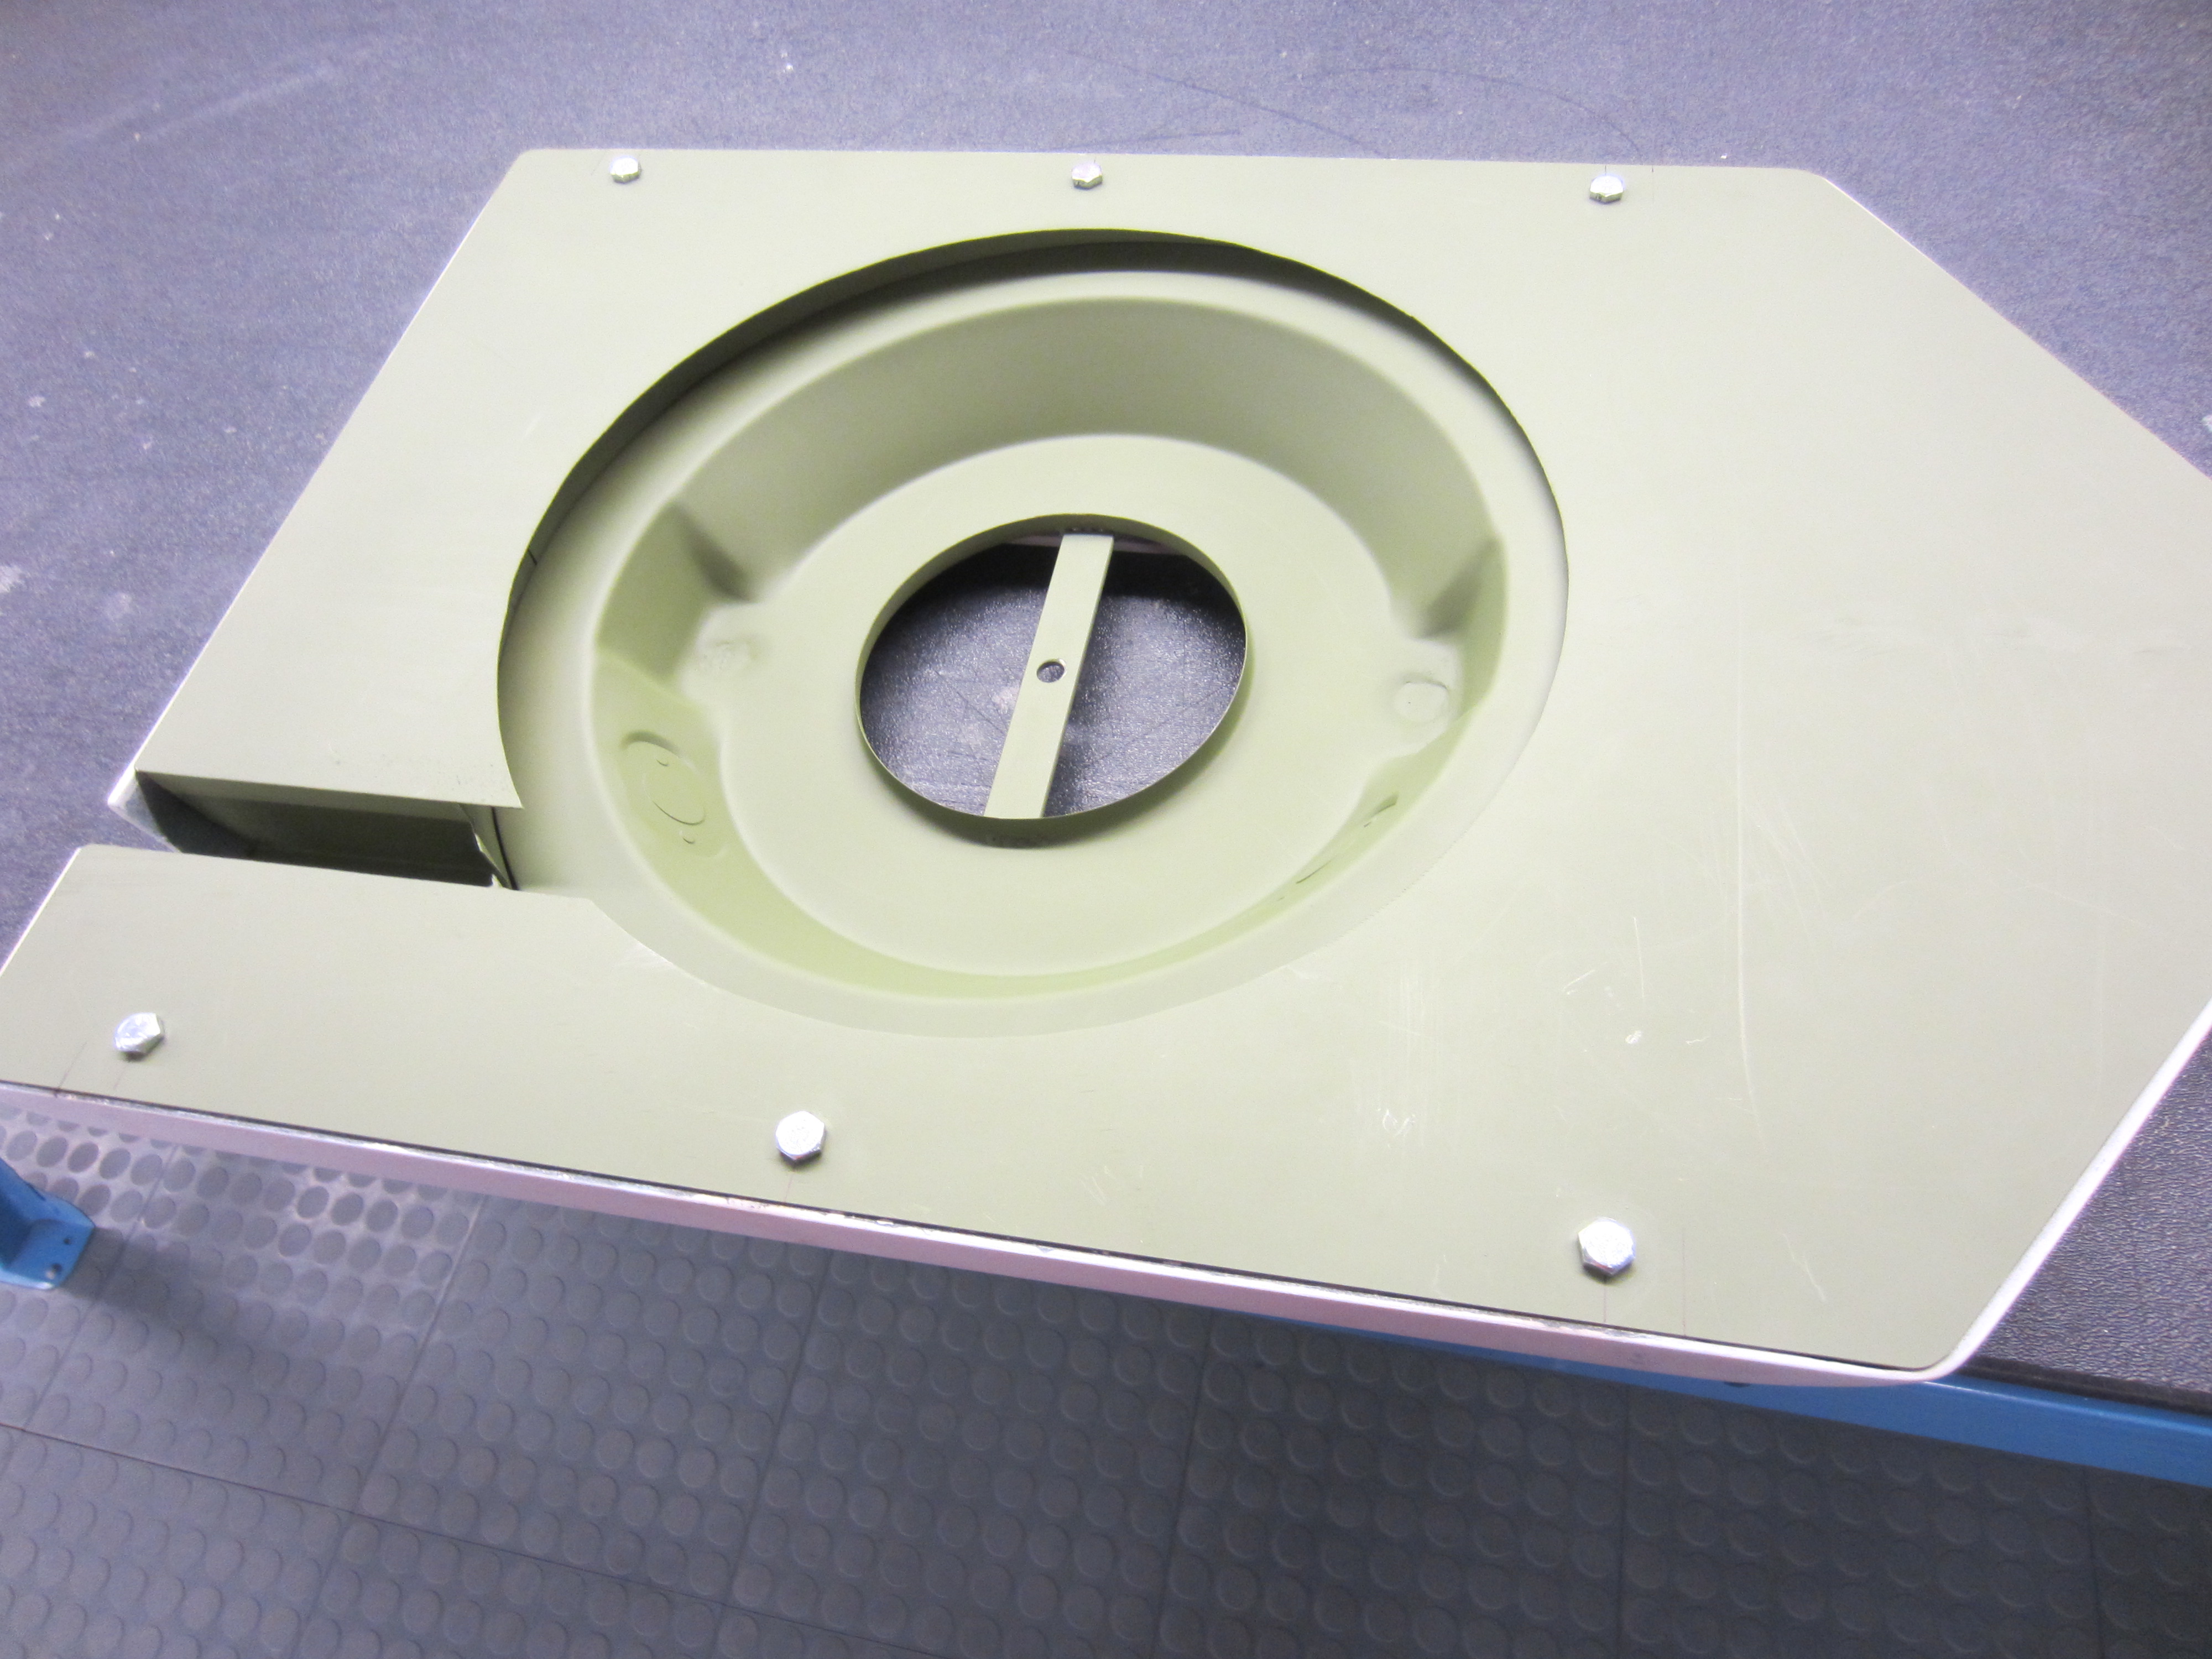
The set up is quite simple, 6 bolts to remove the top cover and one center bolt under the foam element to remove it from the carb/engine quickly.
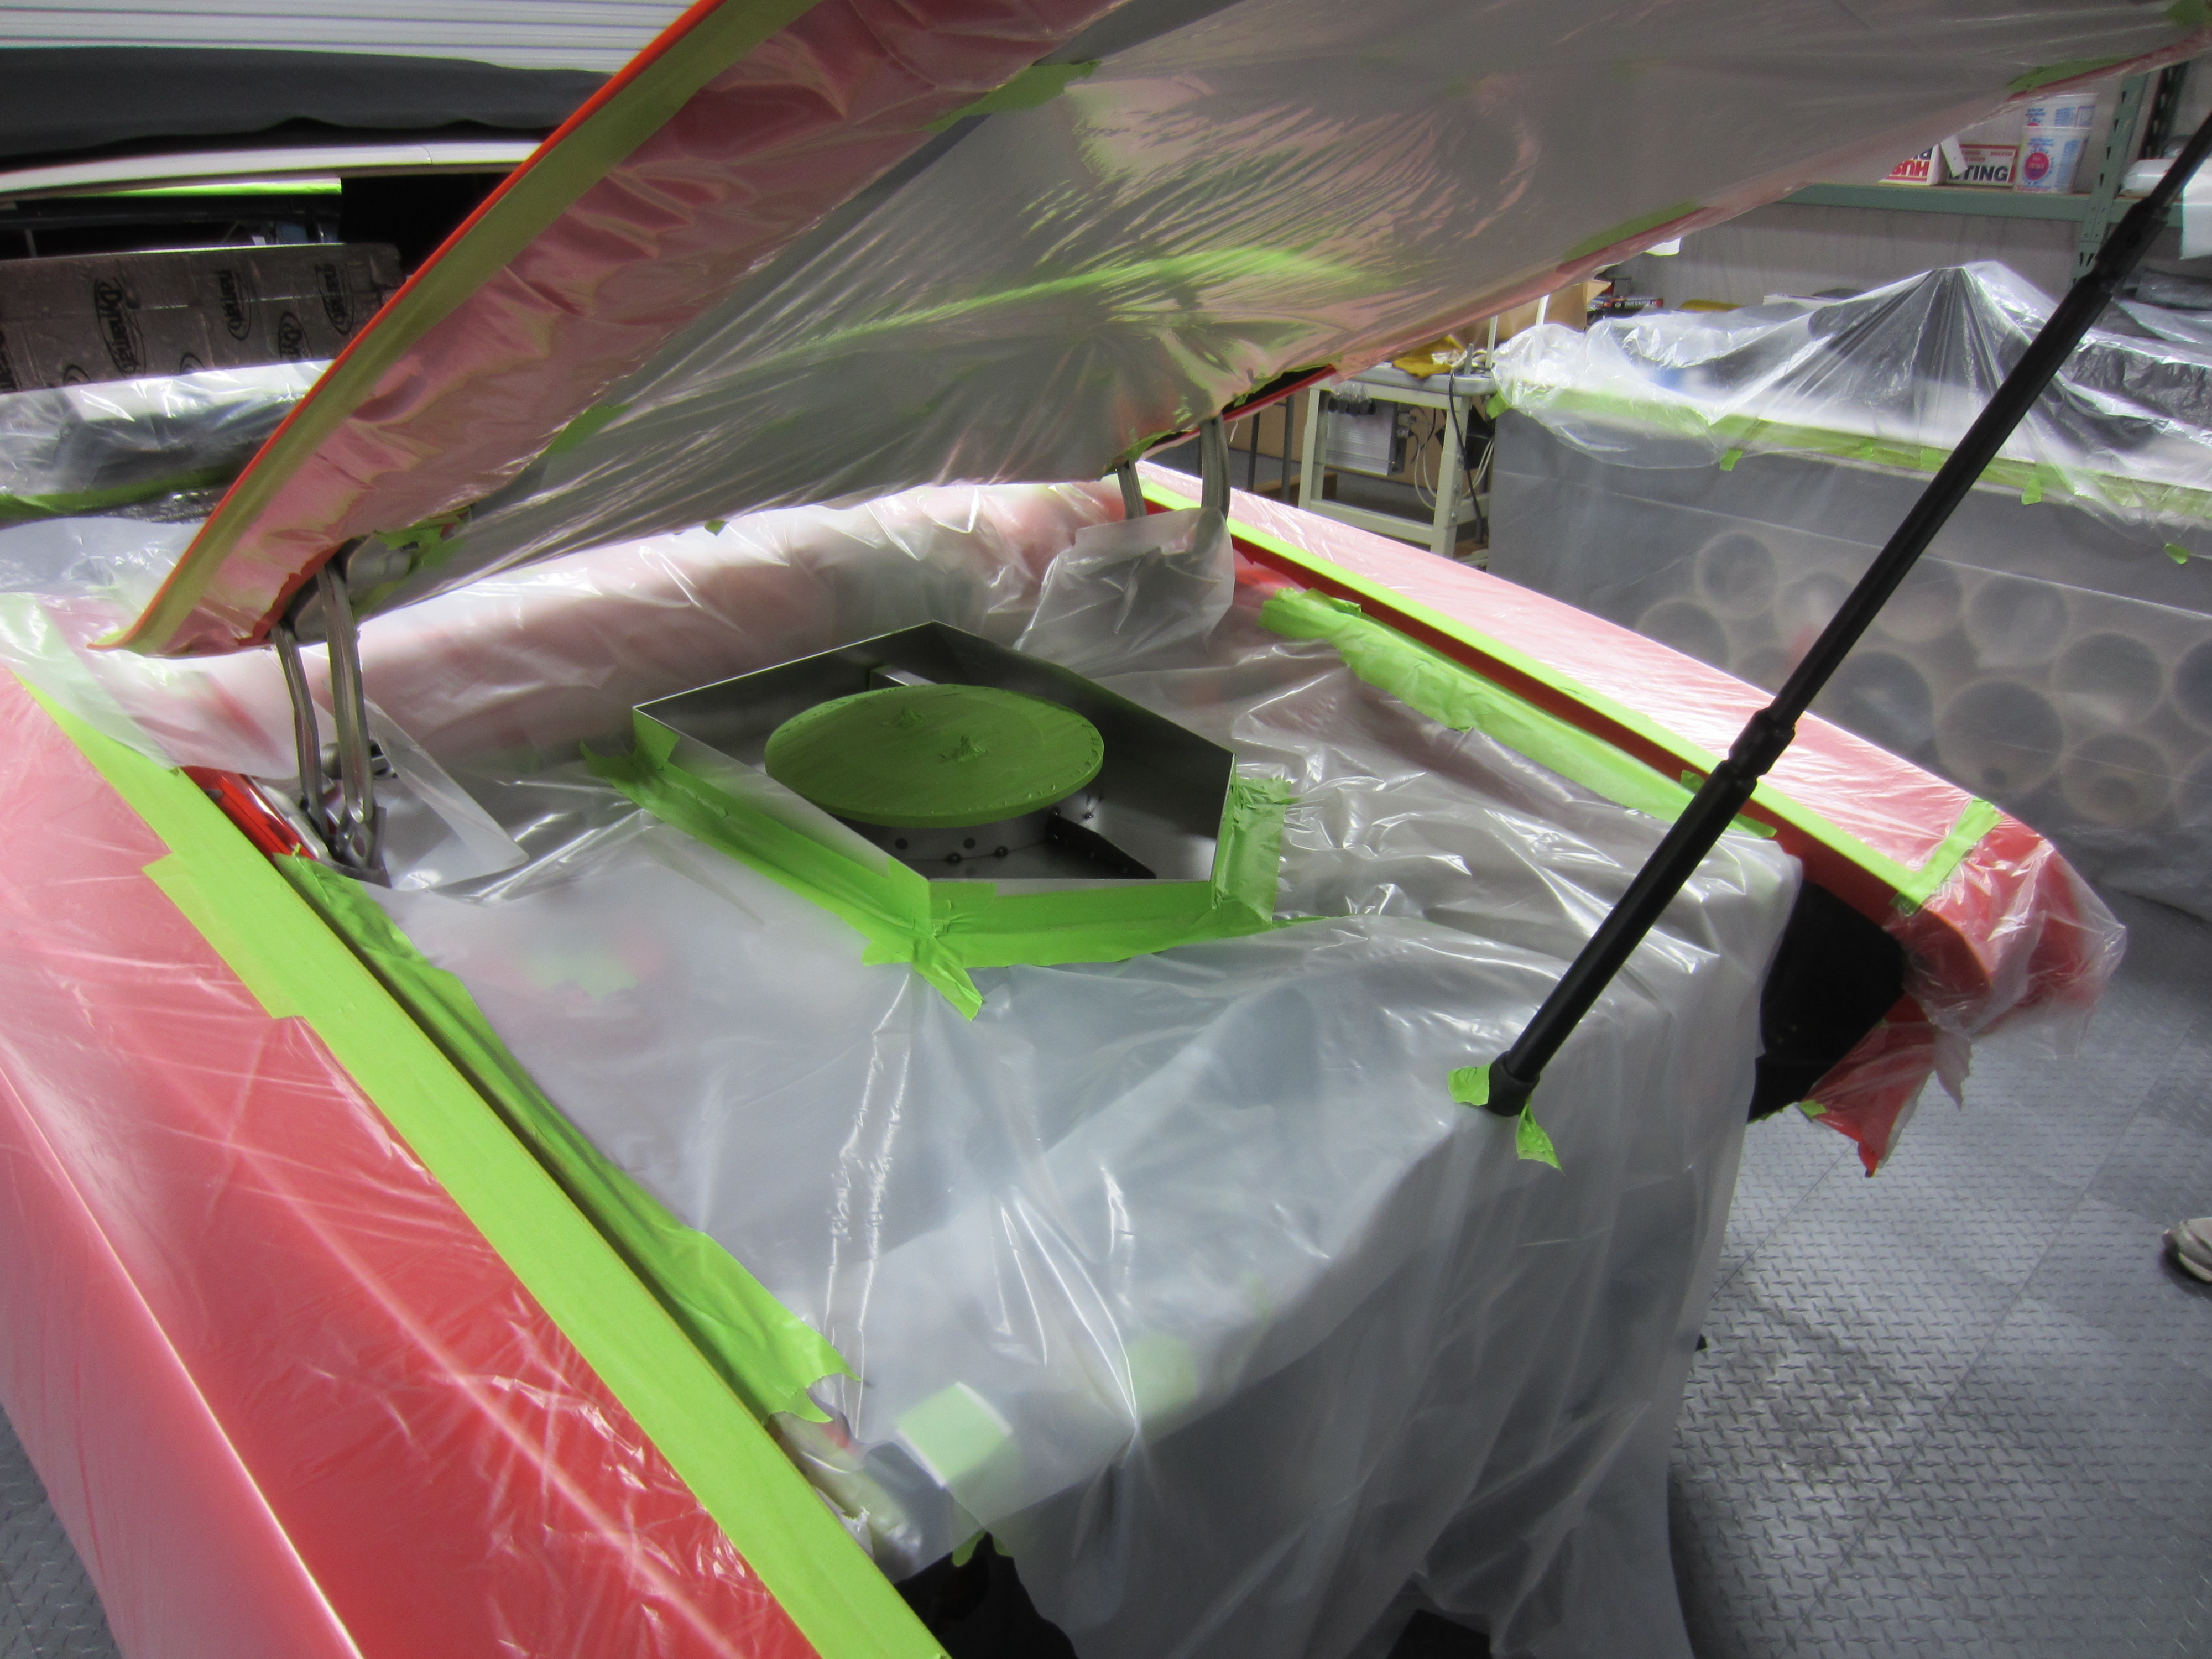
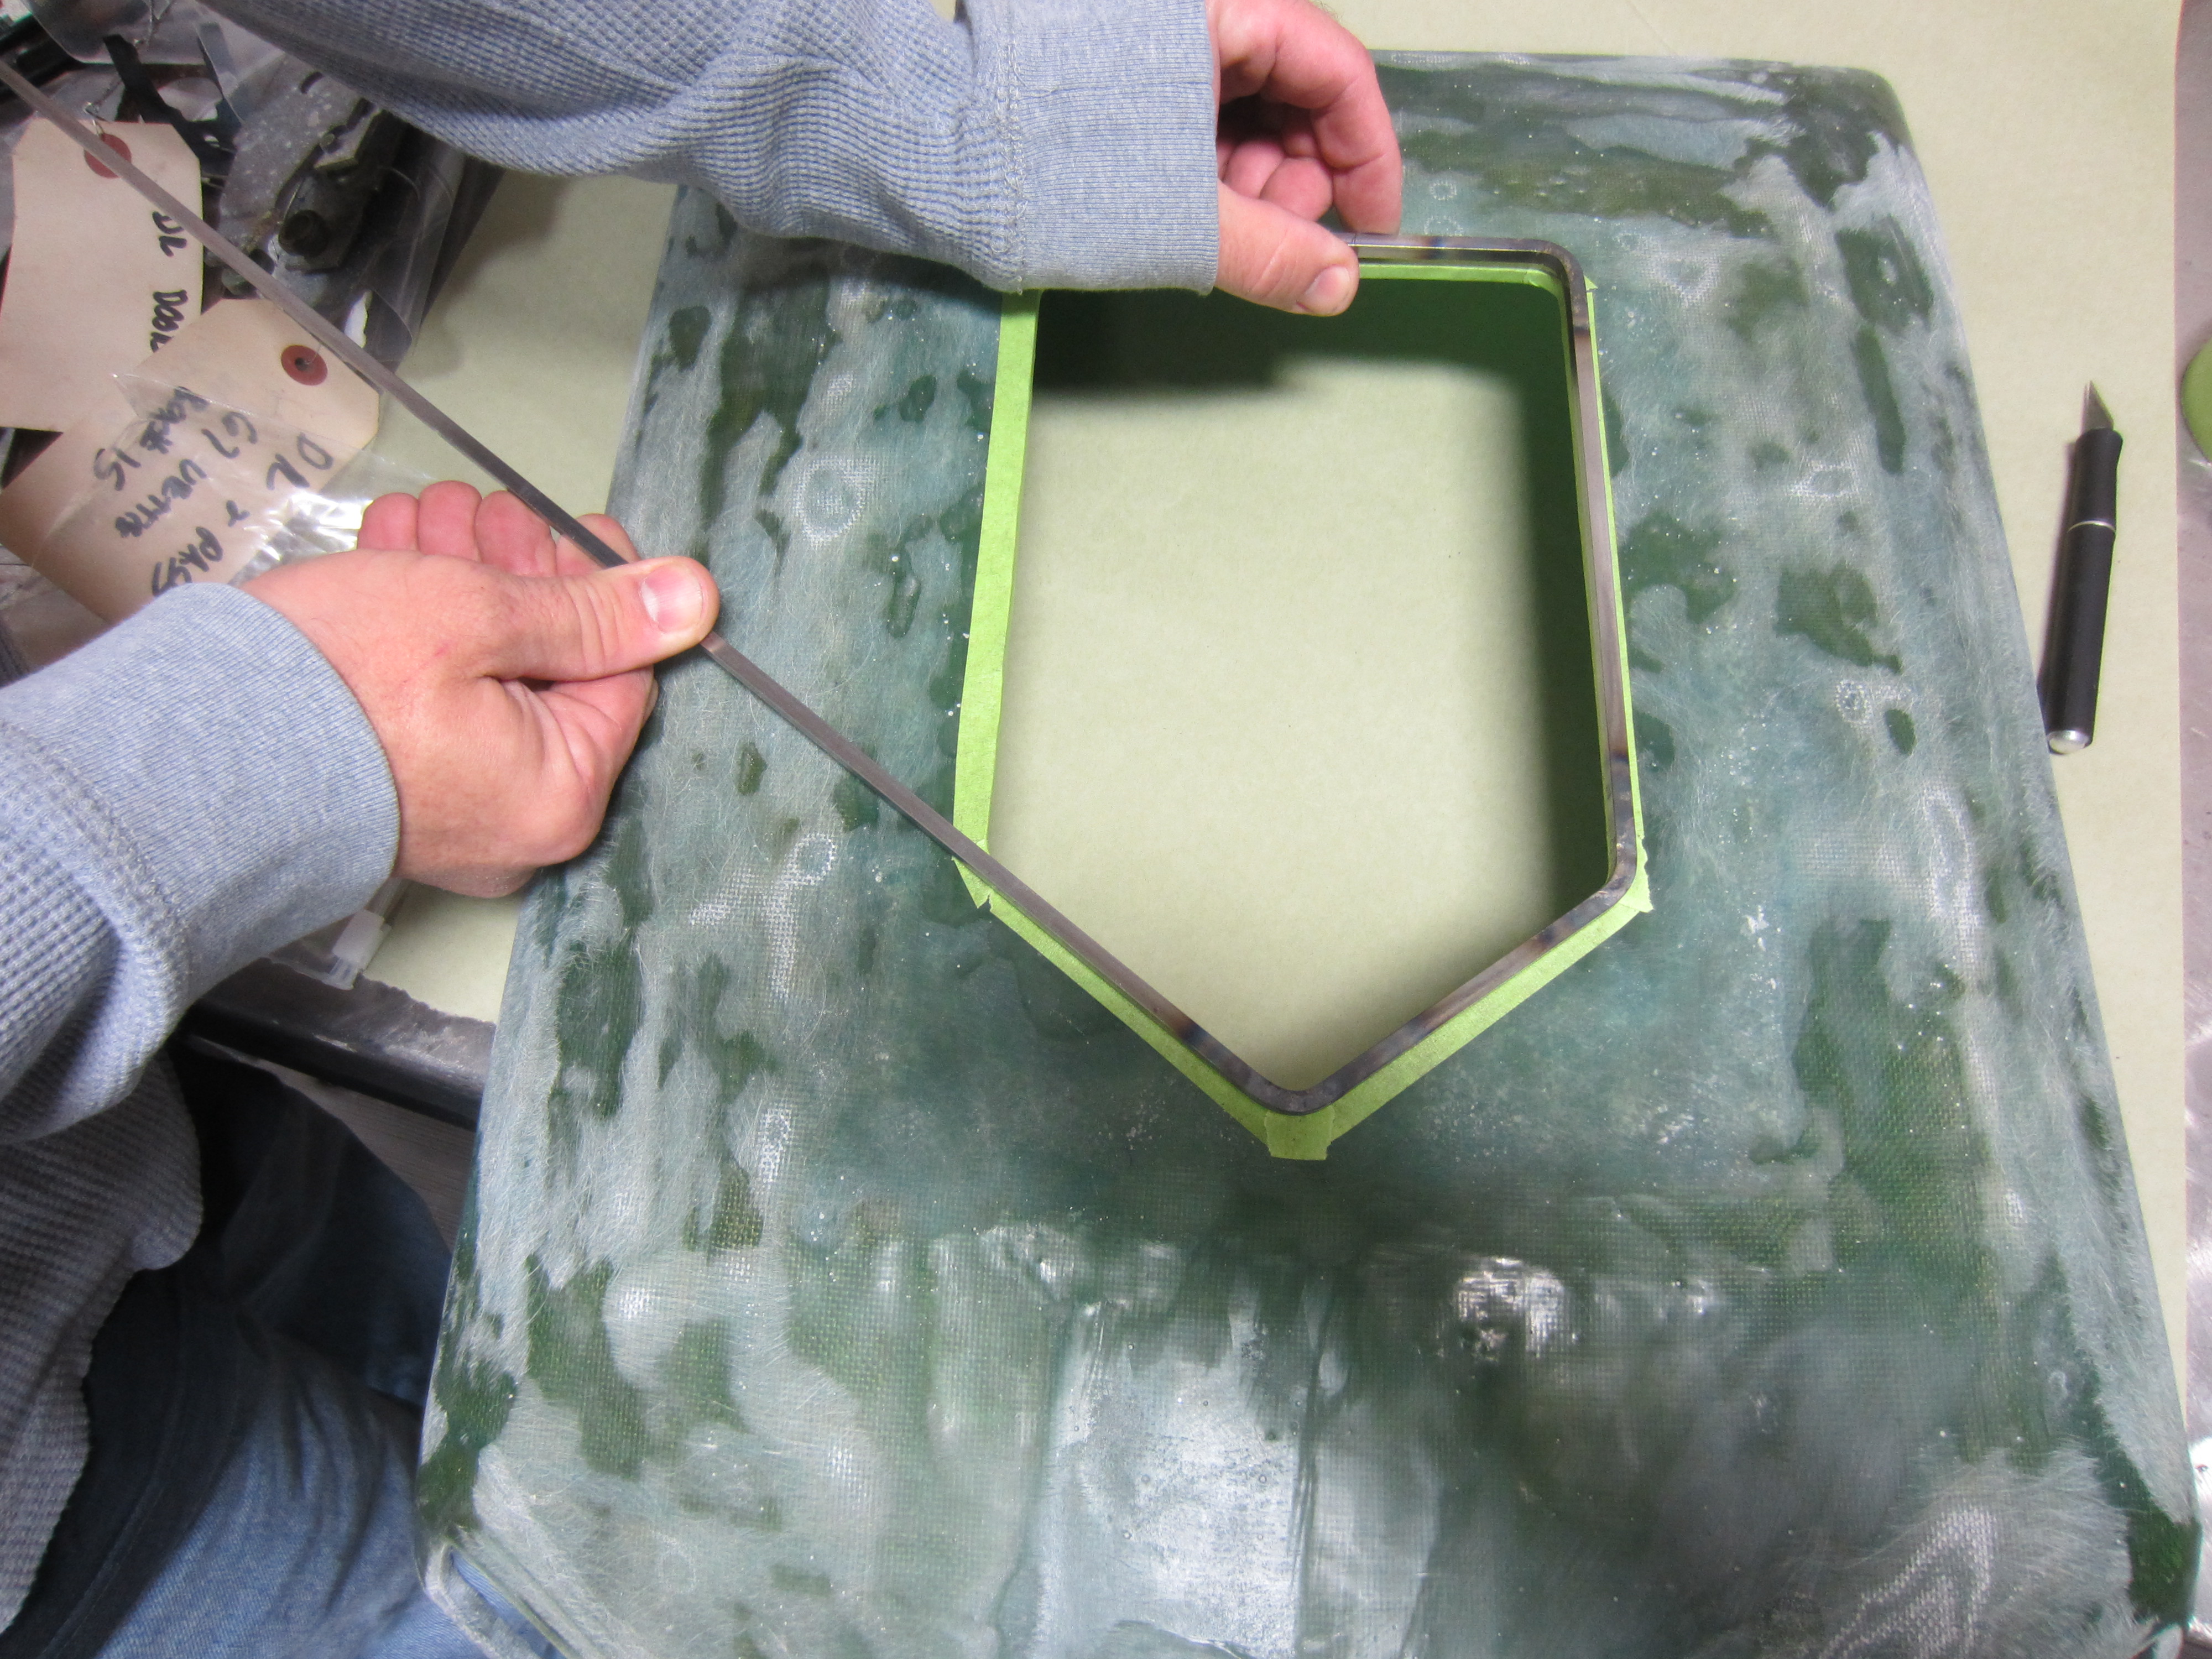
We mounted the fiberglass air cleaner outer cover to the metal base and refitted it to the engine to check clearances one last time. We also drew out the cut out areas for the air intake foam and screens.
Eric is cutting out the front end holes for the screens using an air saw. The top cut out is for the fresh air to the carb and will have K&N foam inserted in to the confines.
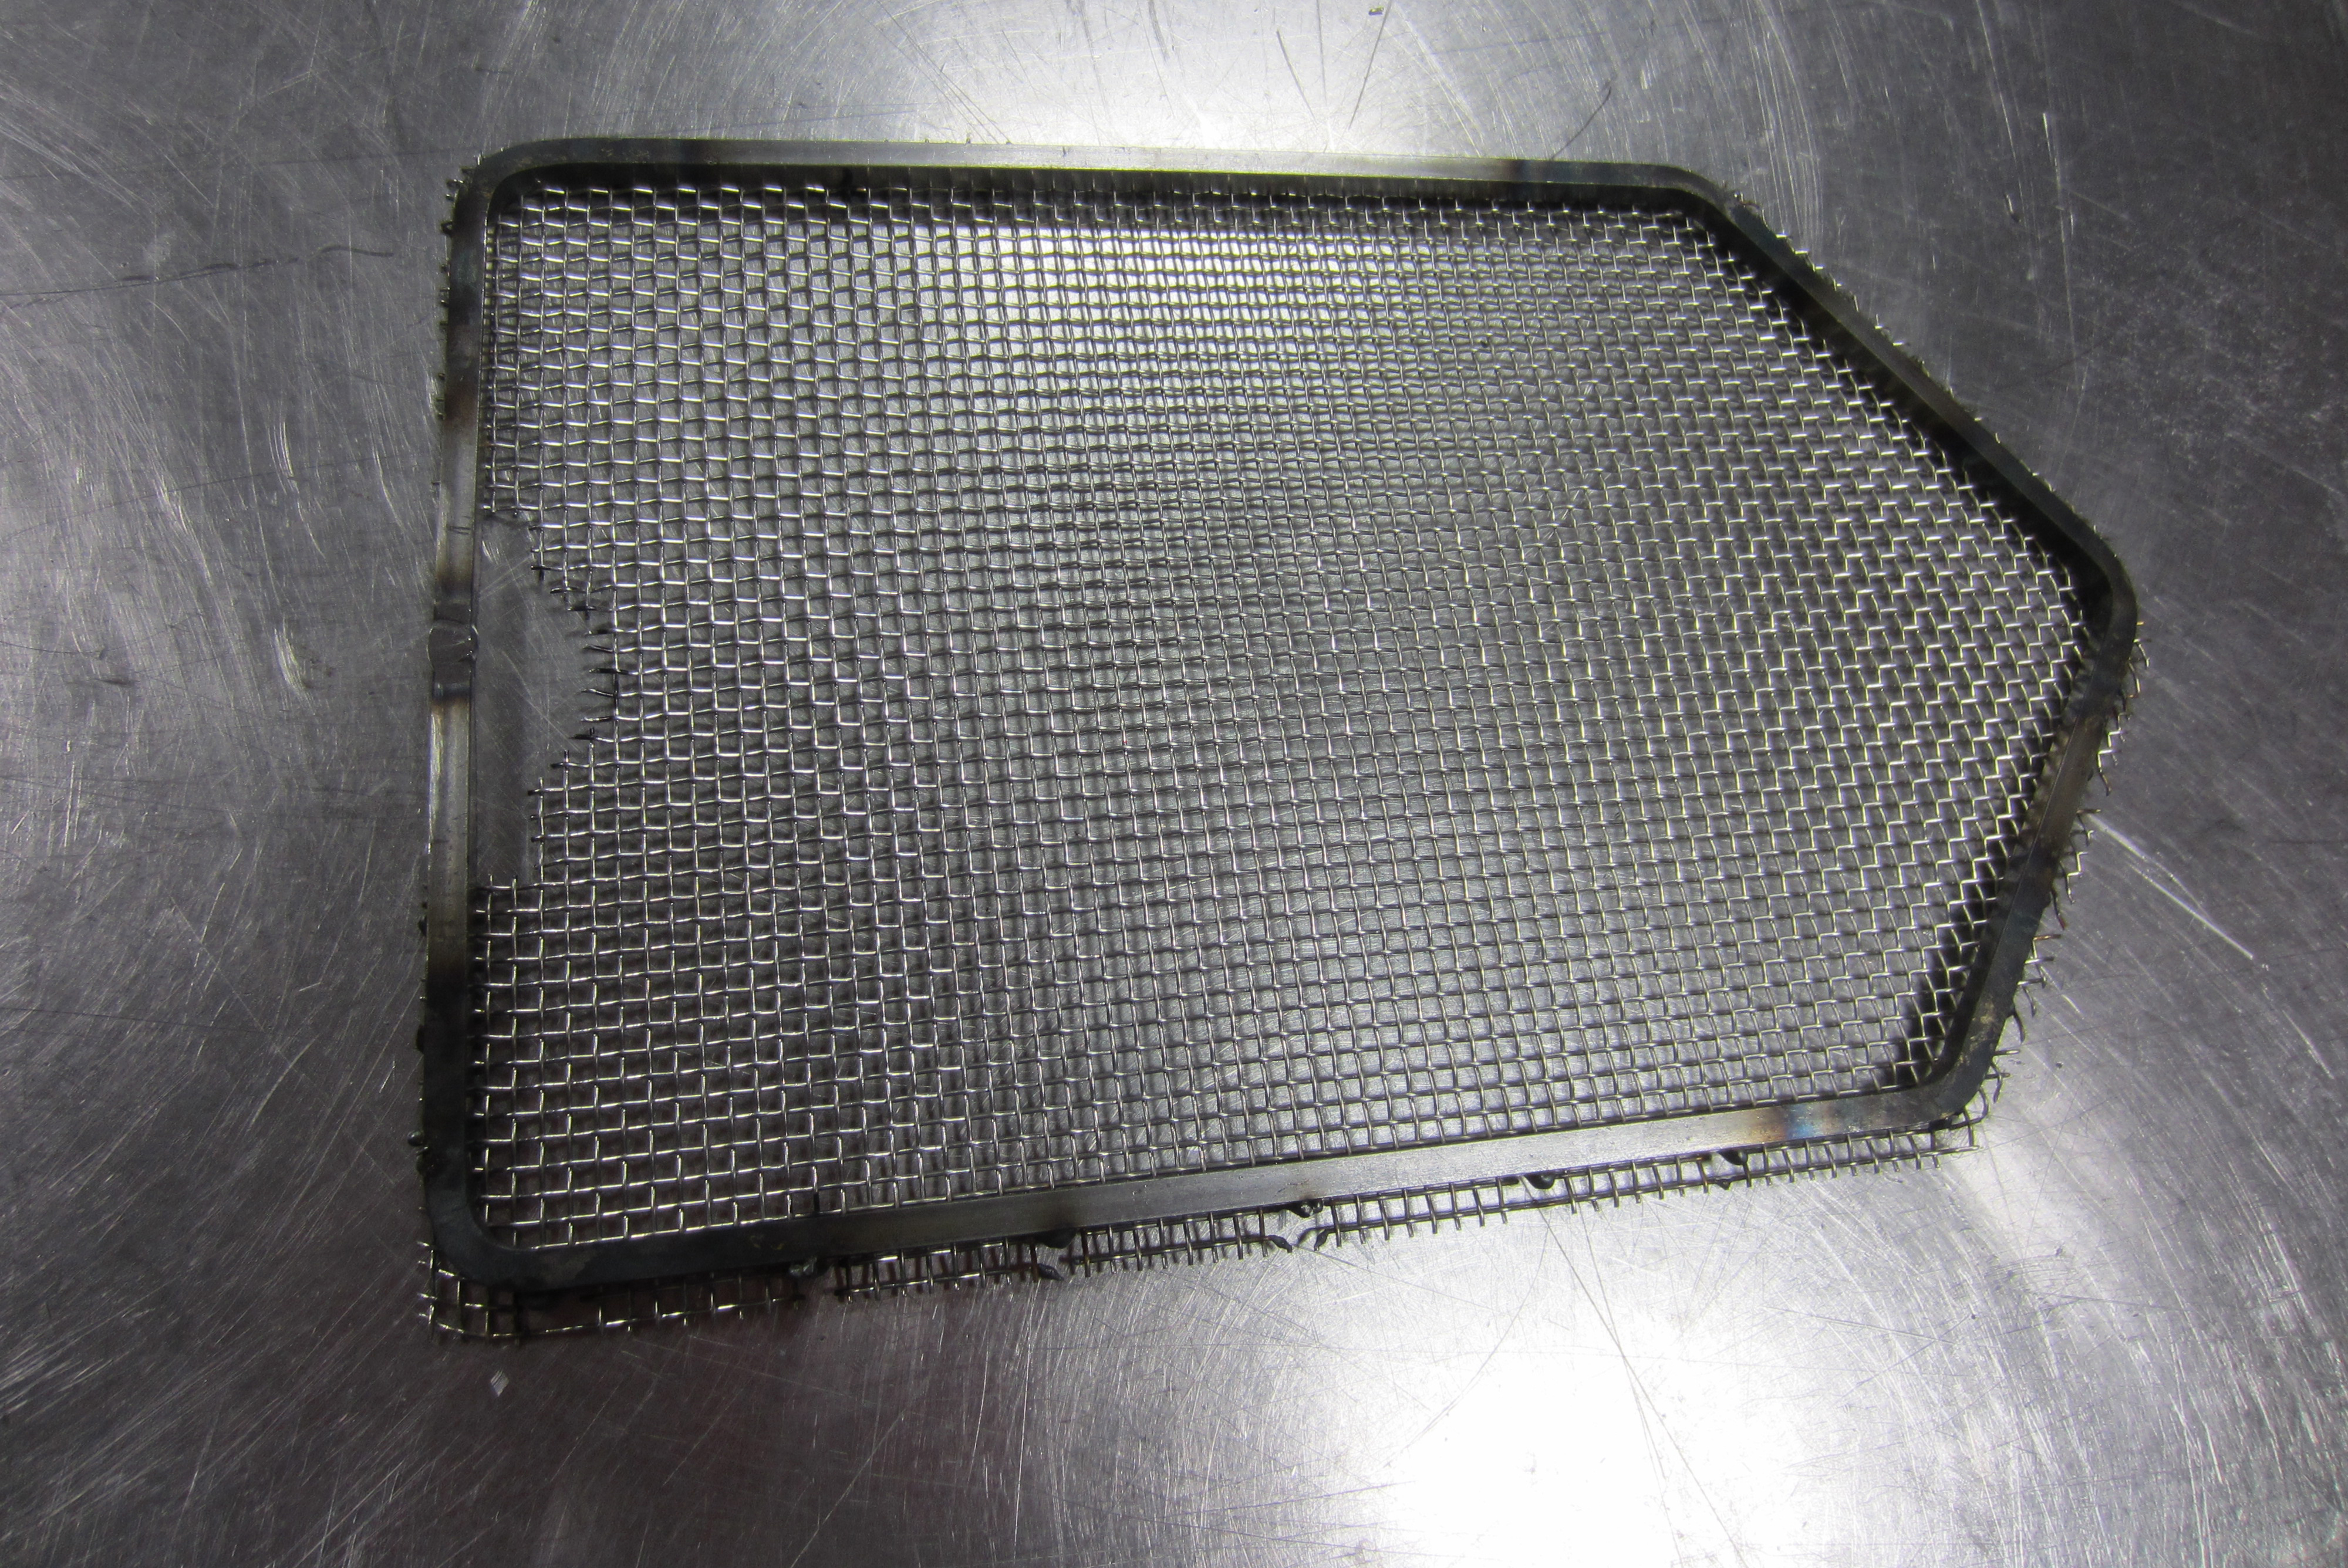
As seen we have them all cut out and it is starting to take on its character.
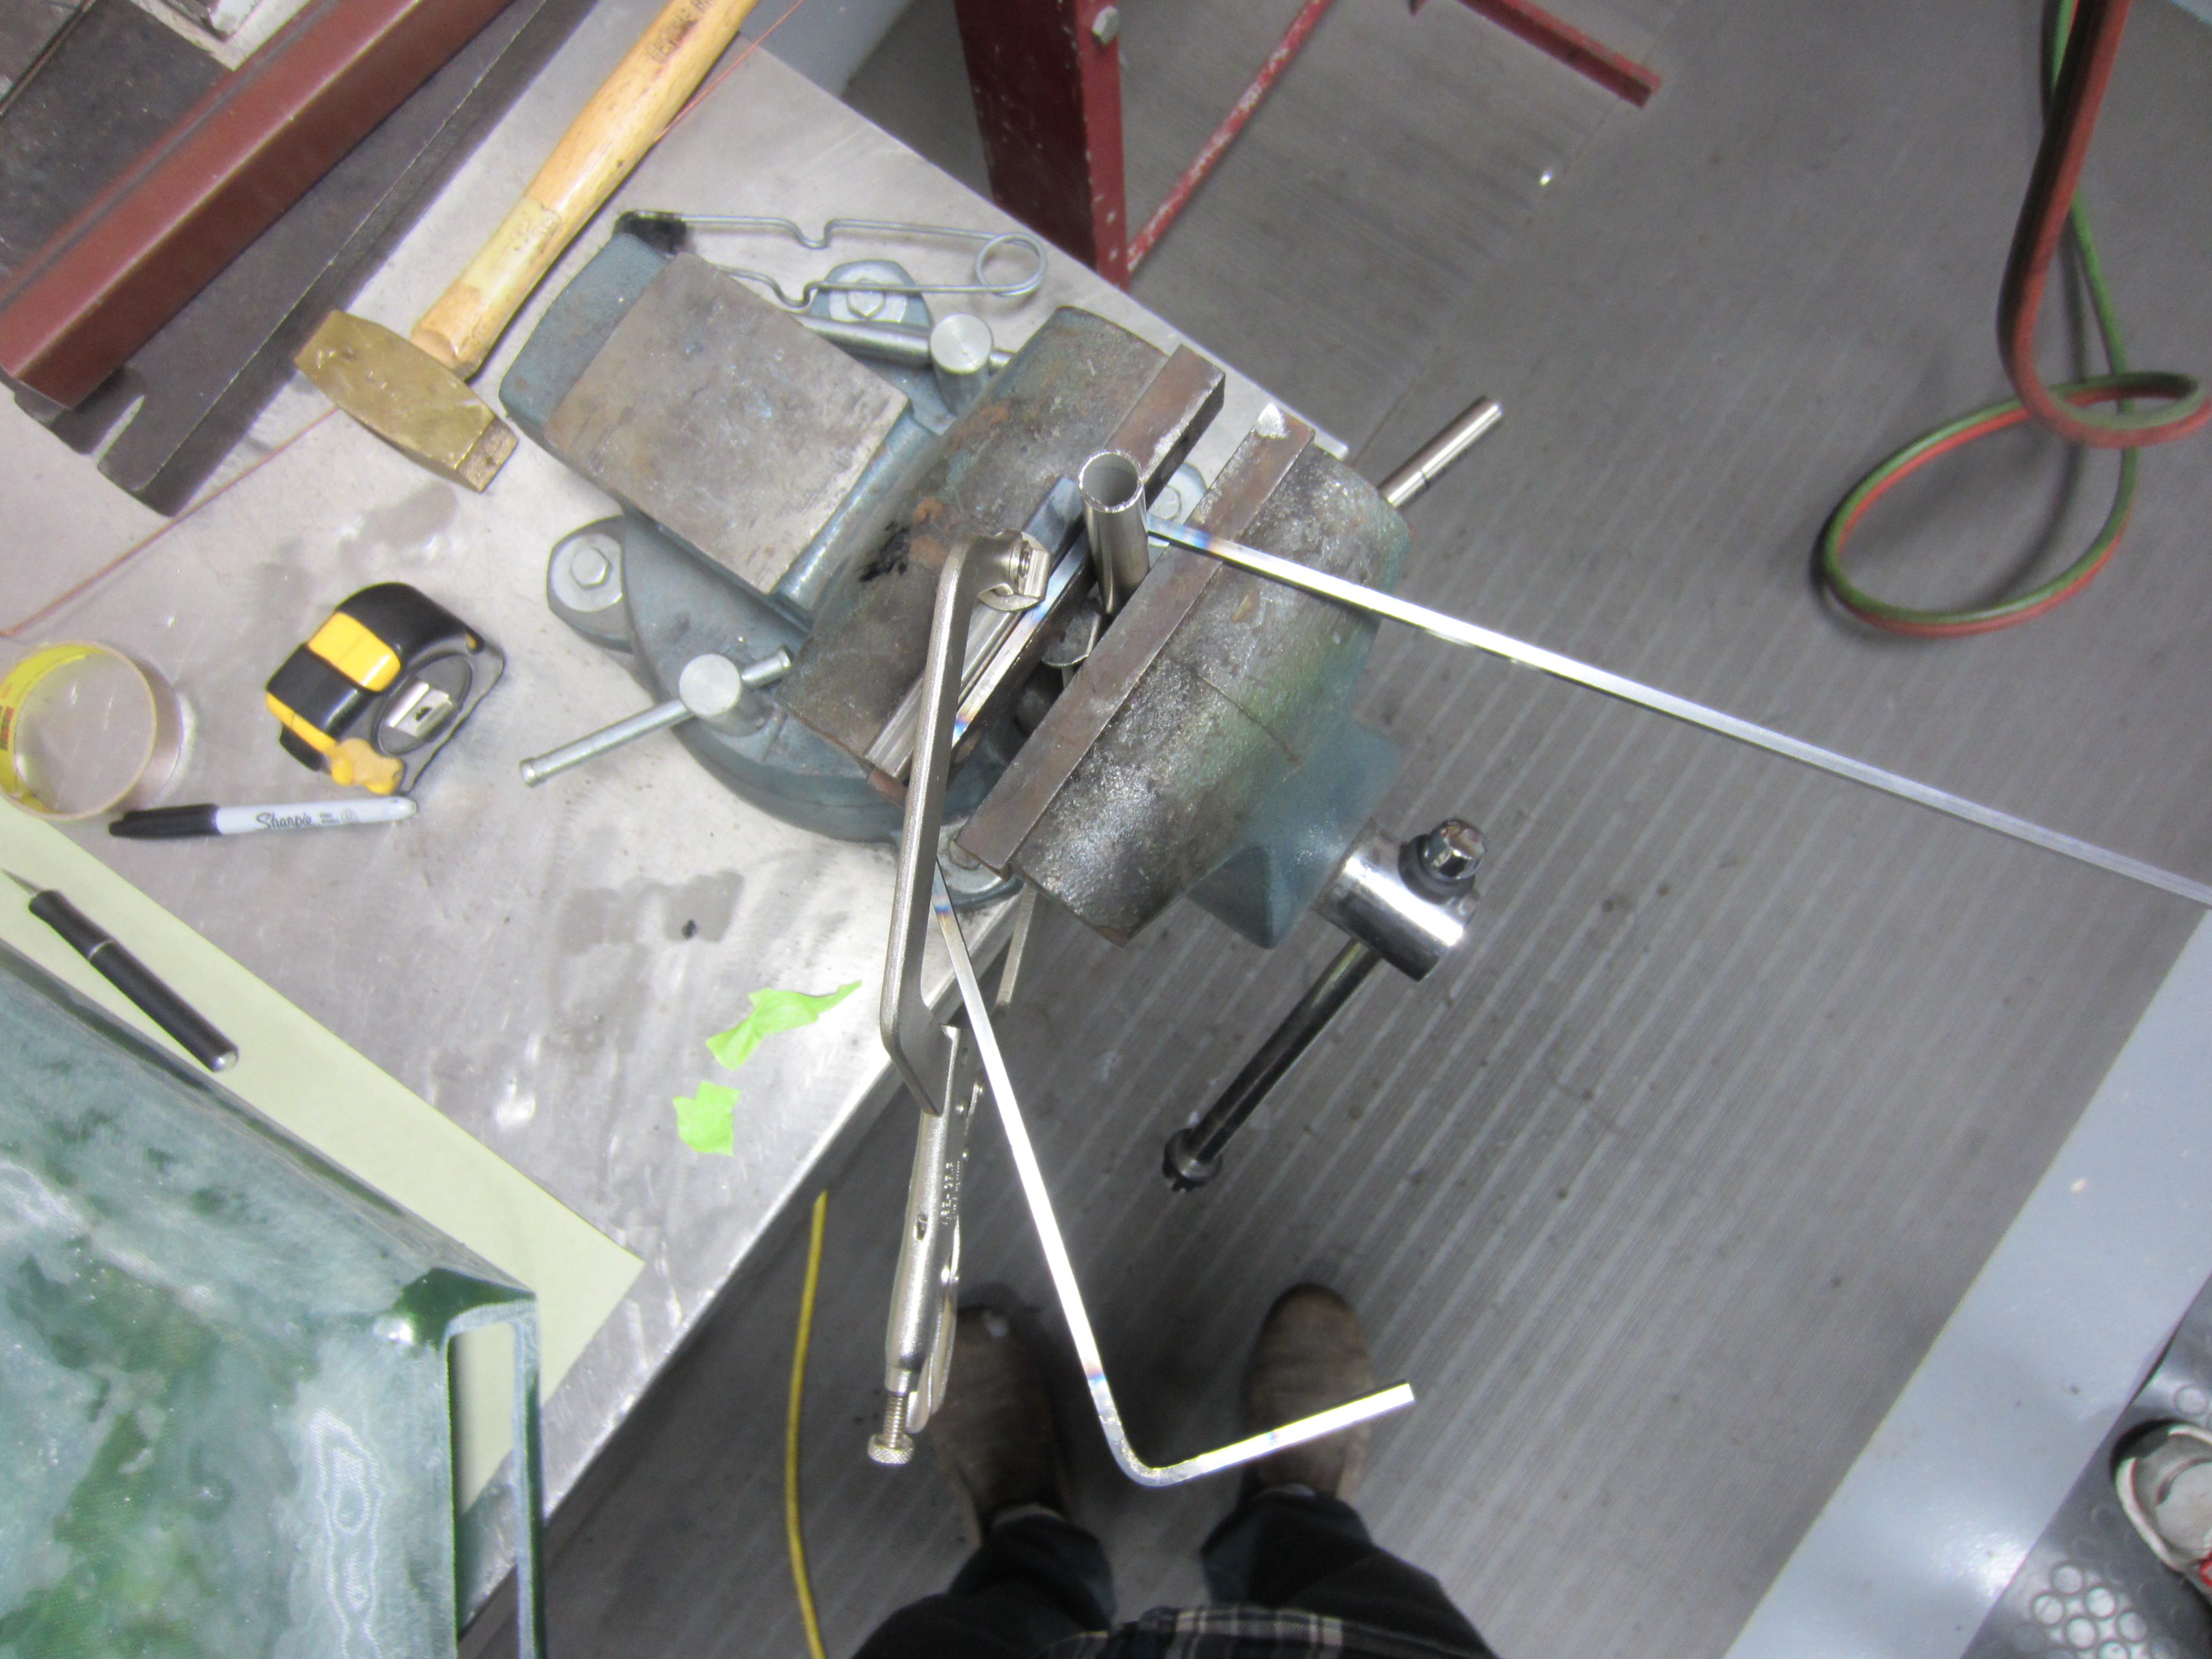
Eric bends up some square rod stock to back up and reinforce our foam air intake opening.
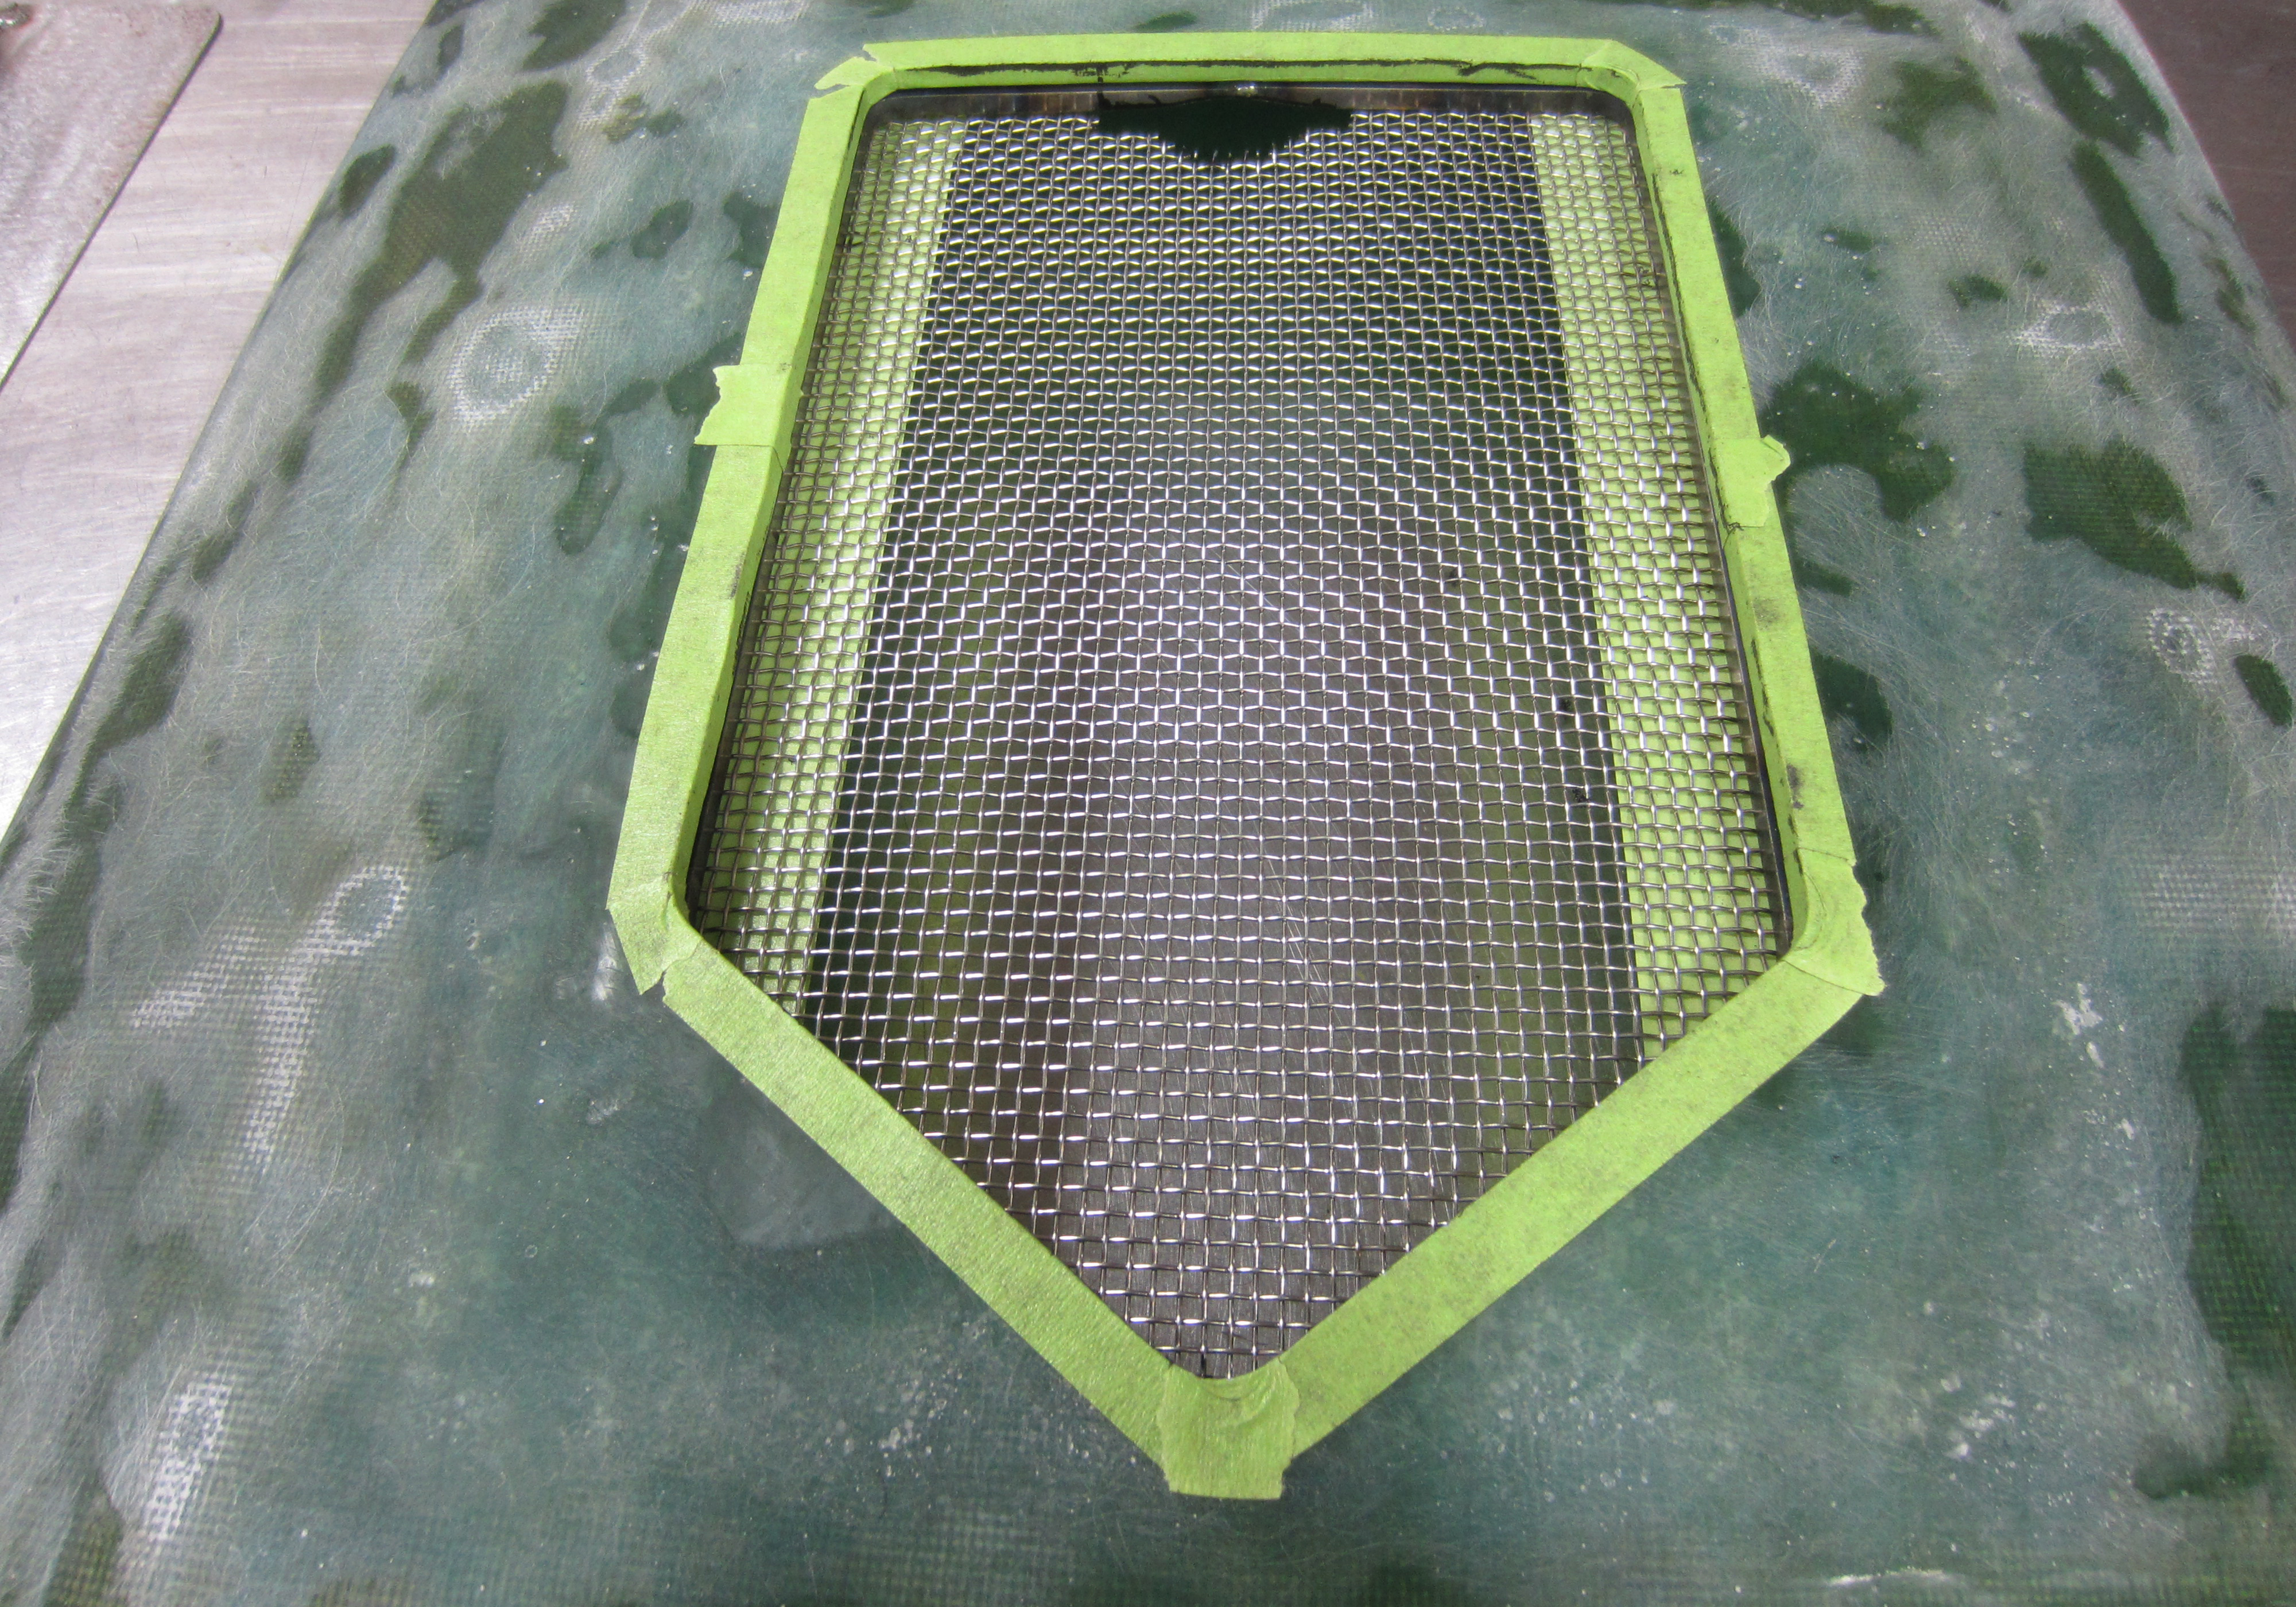
Final fitting to the opening, it is coming around and looking good.
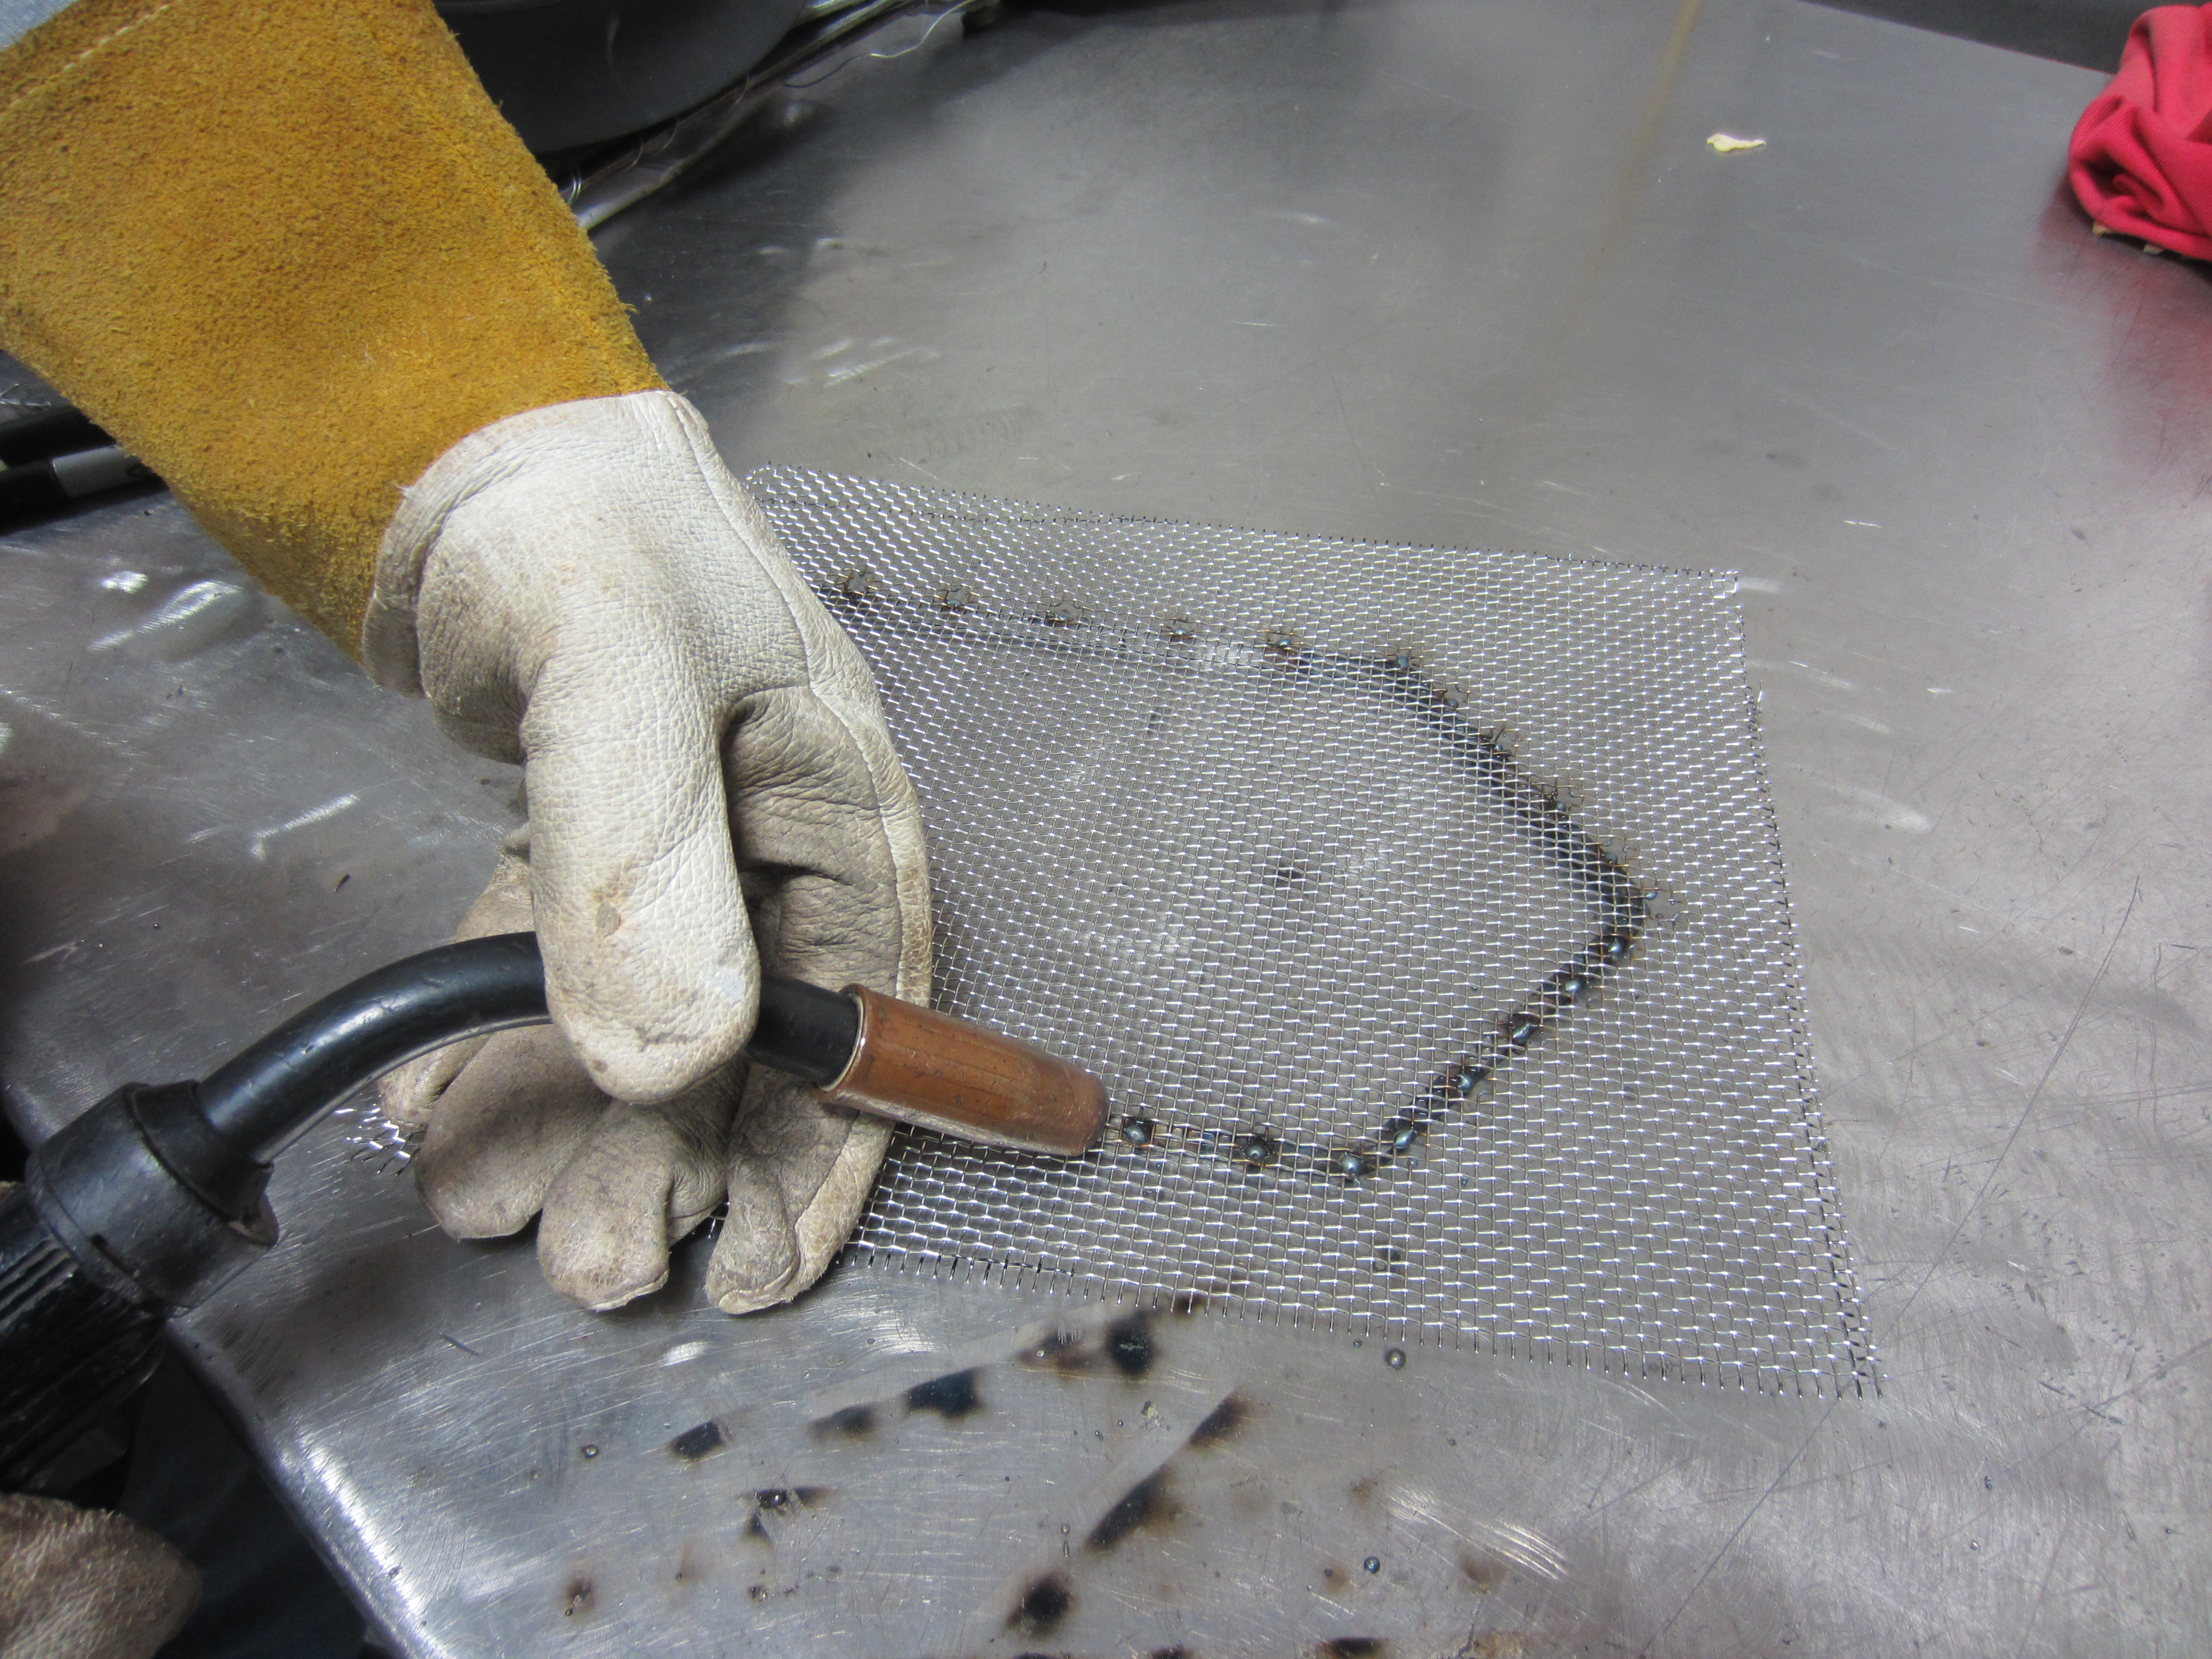
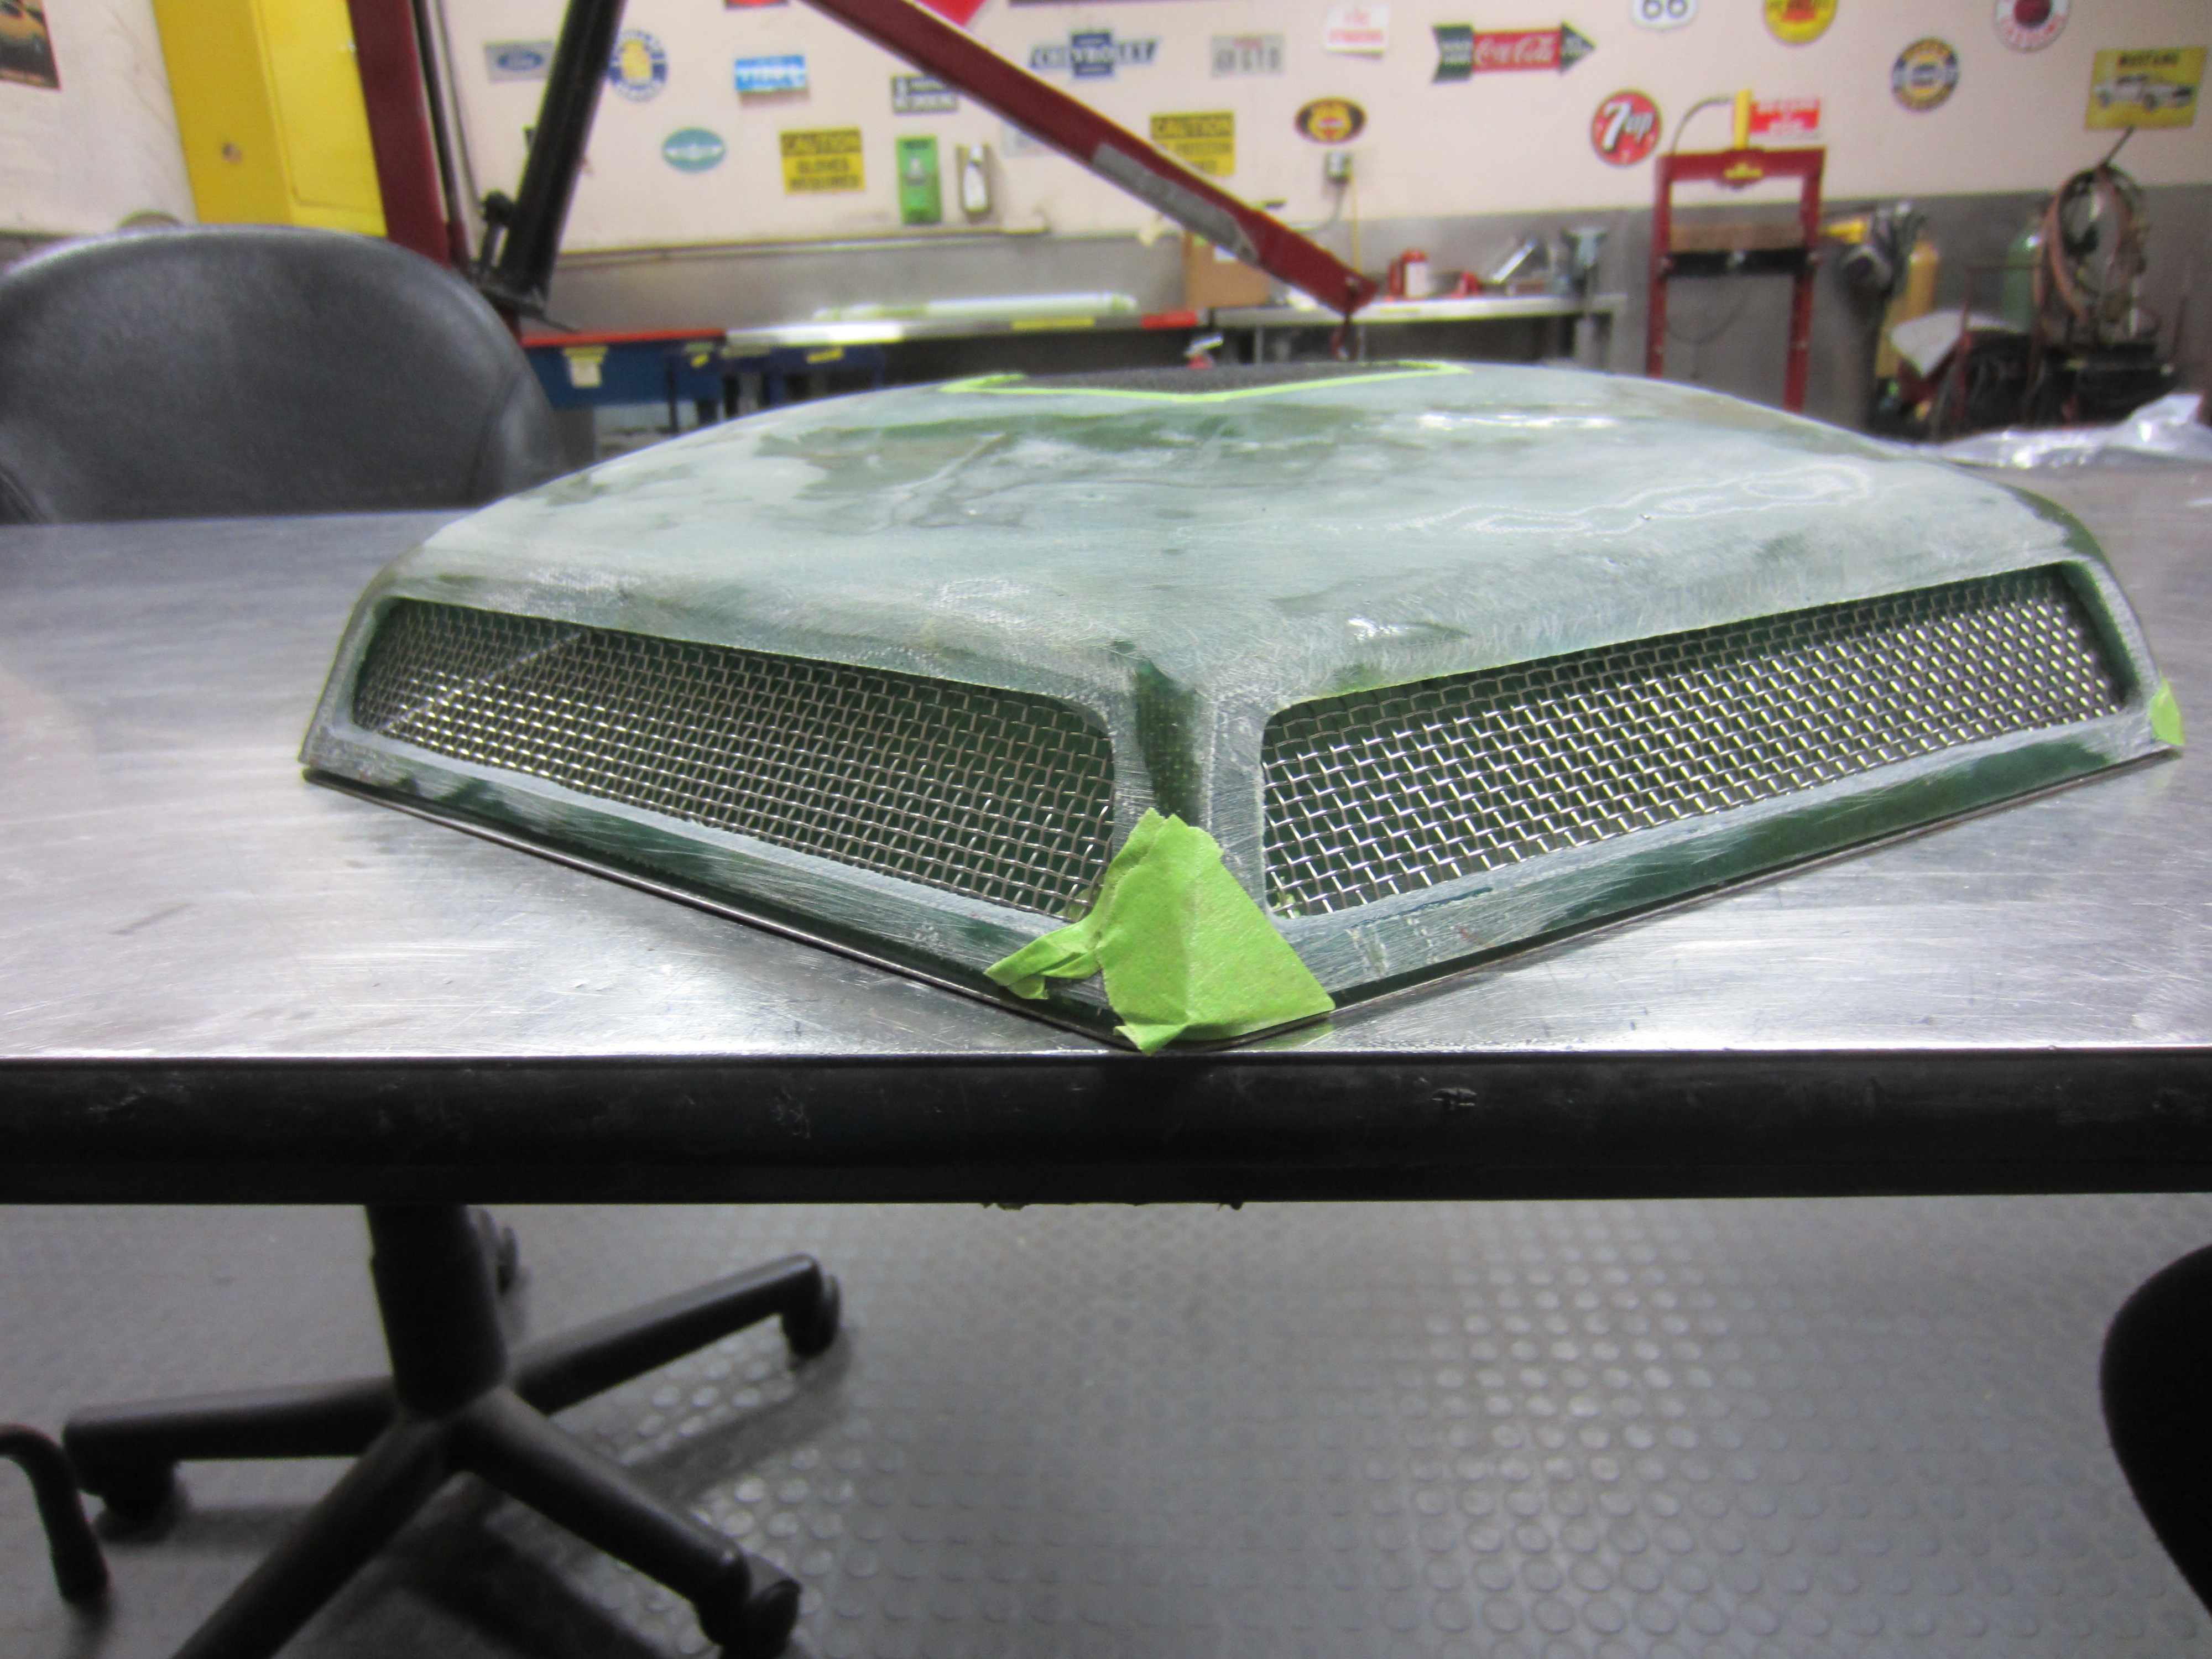
Next he adds some screen to back up our foam element and to secure it level in to the air cleaner.
Ready to trim up the screen a bit on the outer edges. Note the cut out on one end for the carbs vent tube clearance.
We media blasted both the base and the back side of the air cleaner as we will permanently adhered it to the fiberglass.
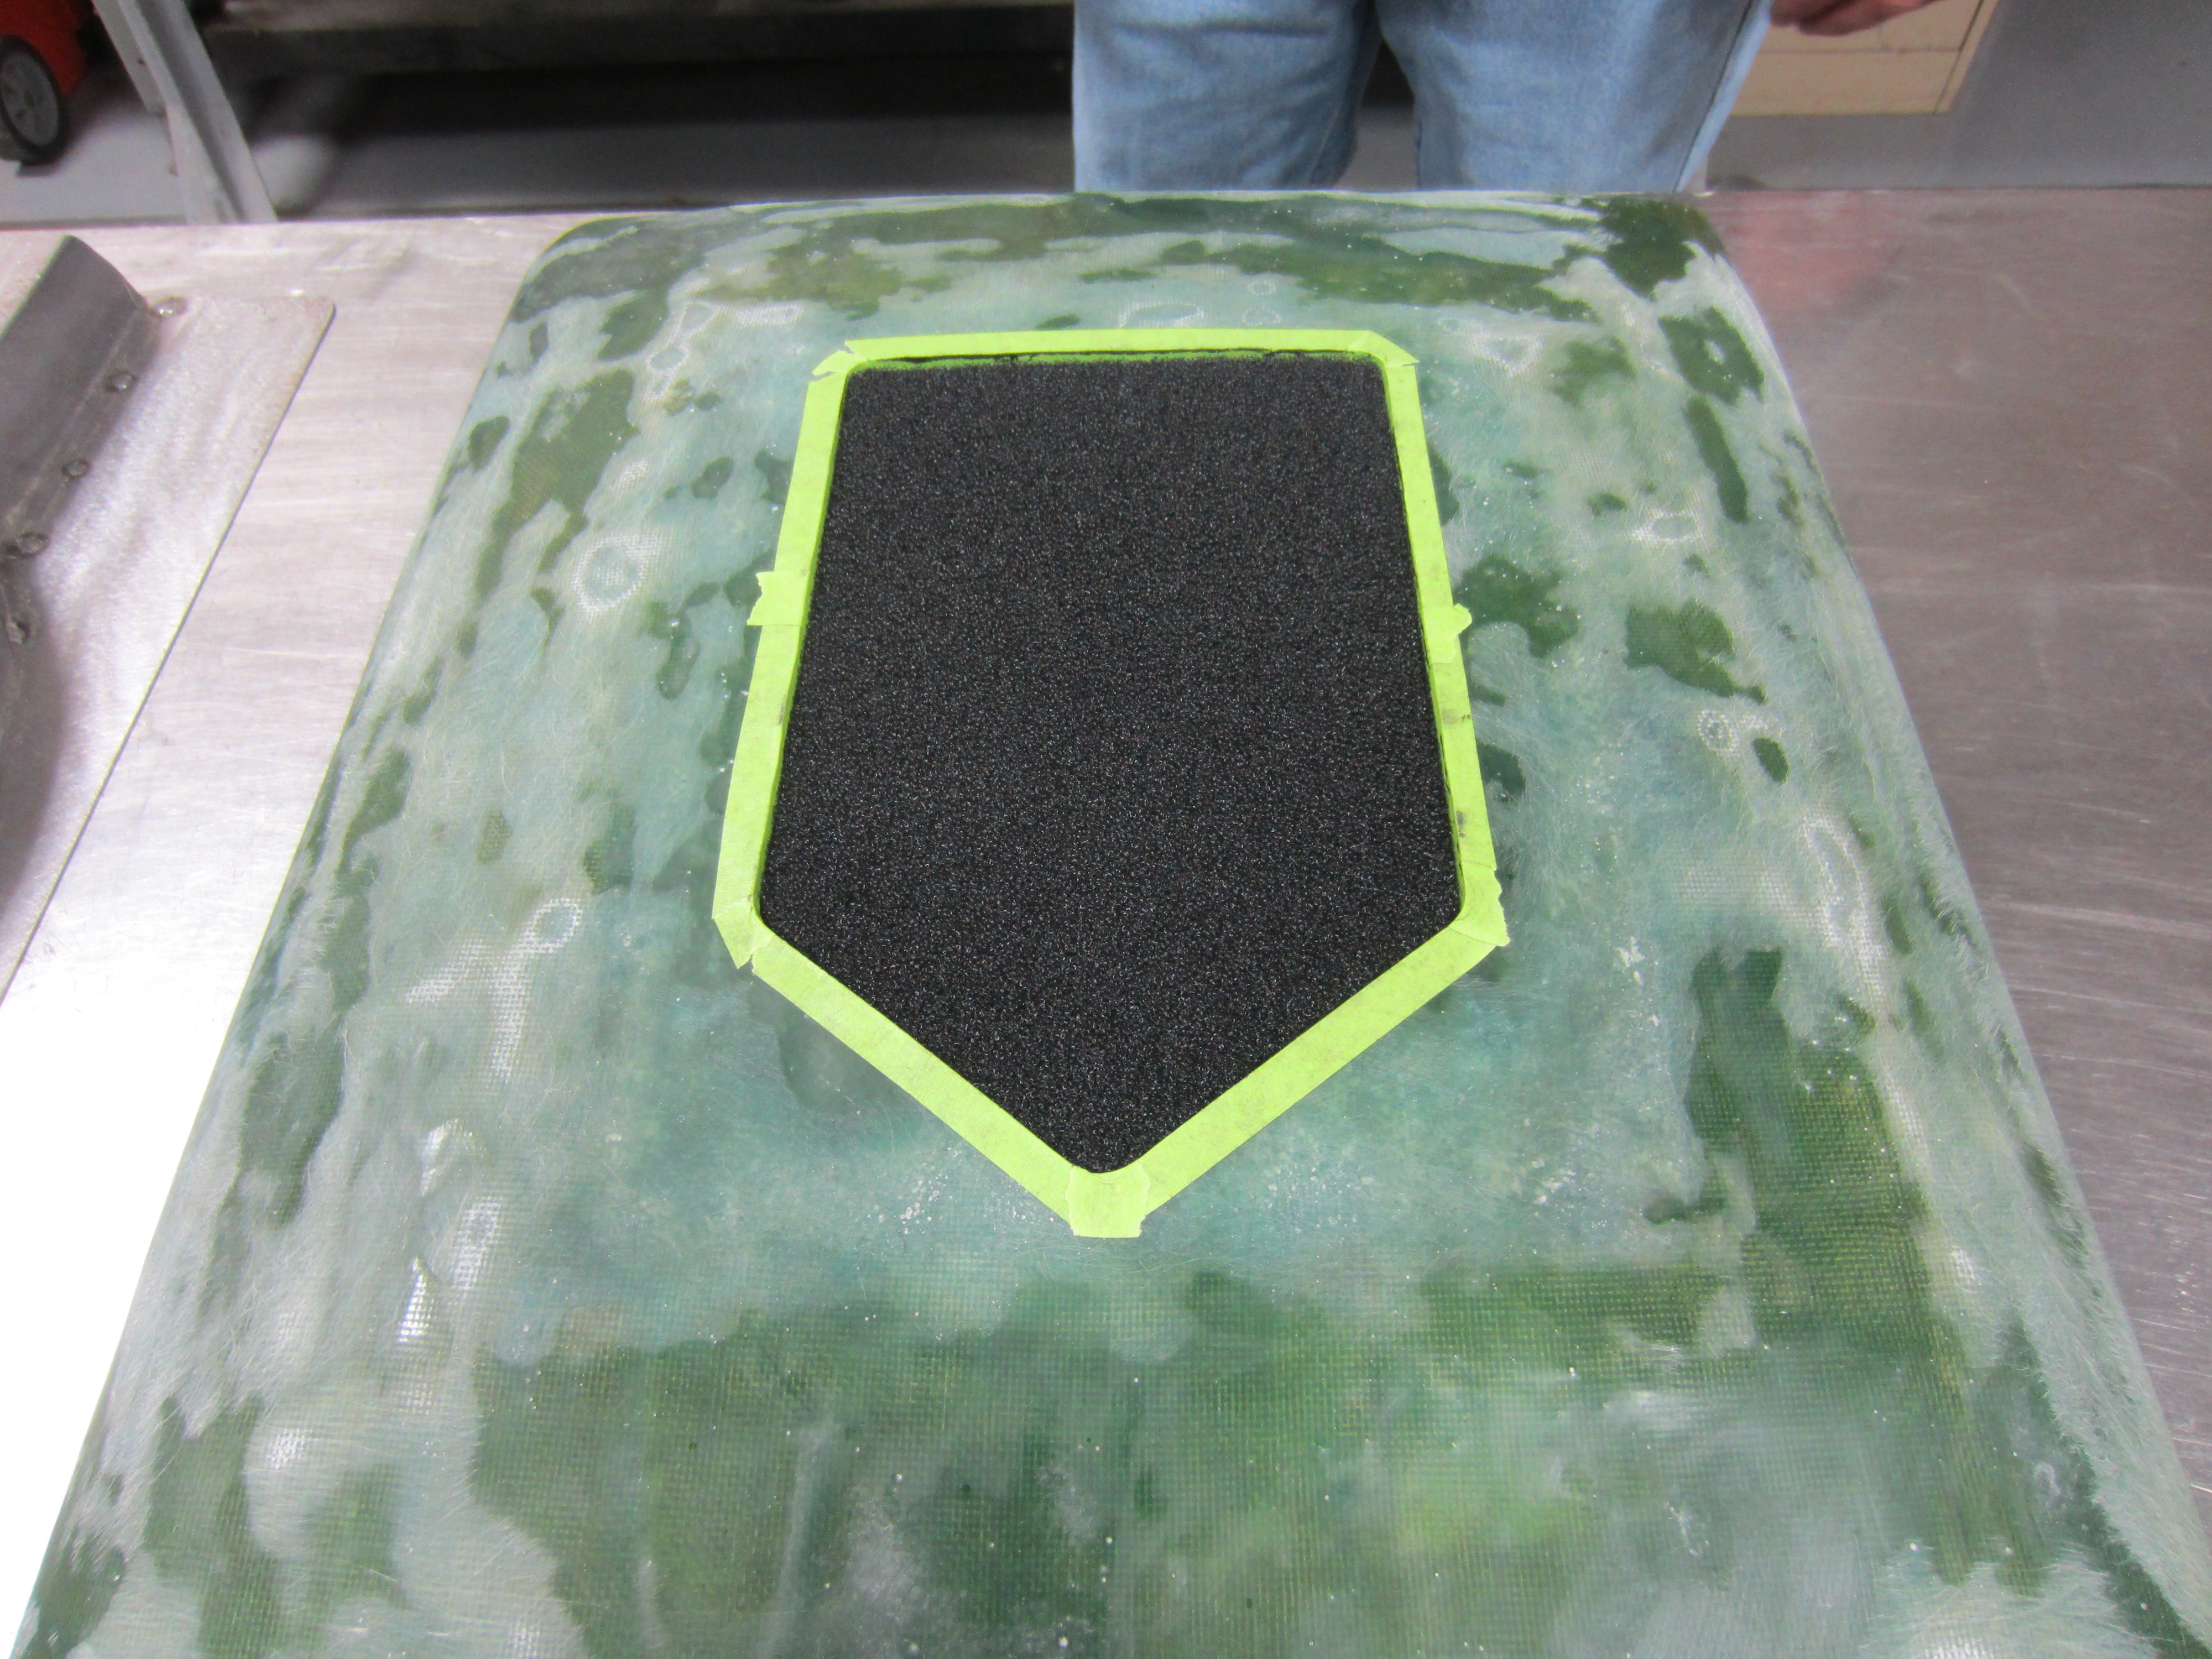
We took foam from K & N and cut it to fit in the confines of our opening.
The front screens are cut out and fitted also. They will be painted satin black and installed after the air cleaner is painted and polished.
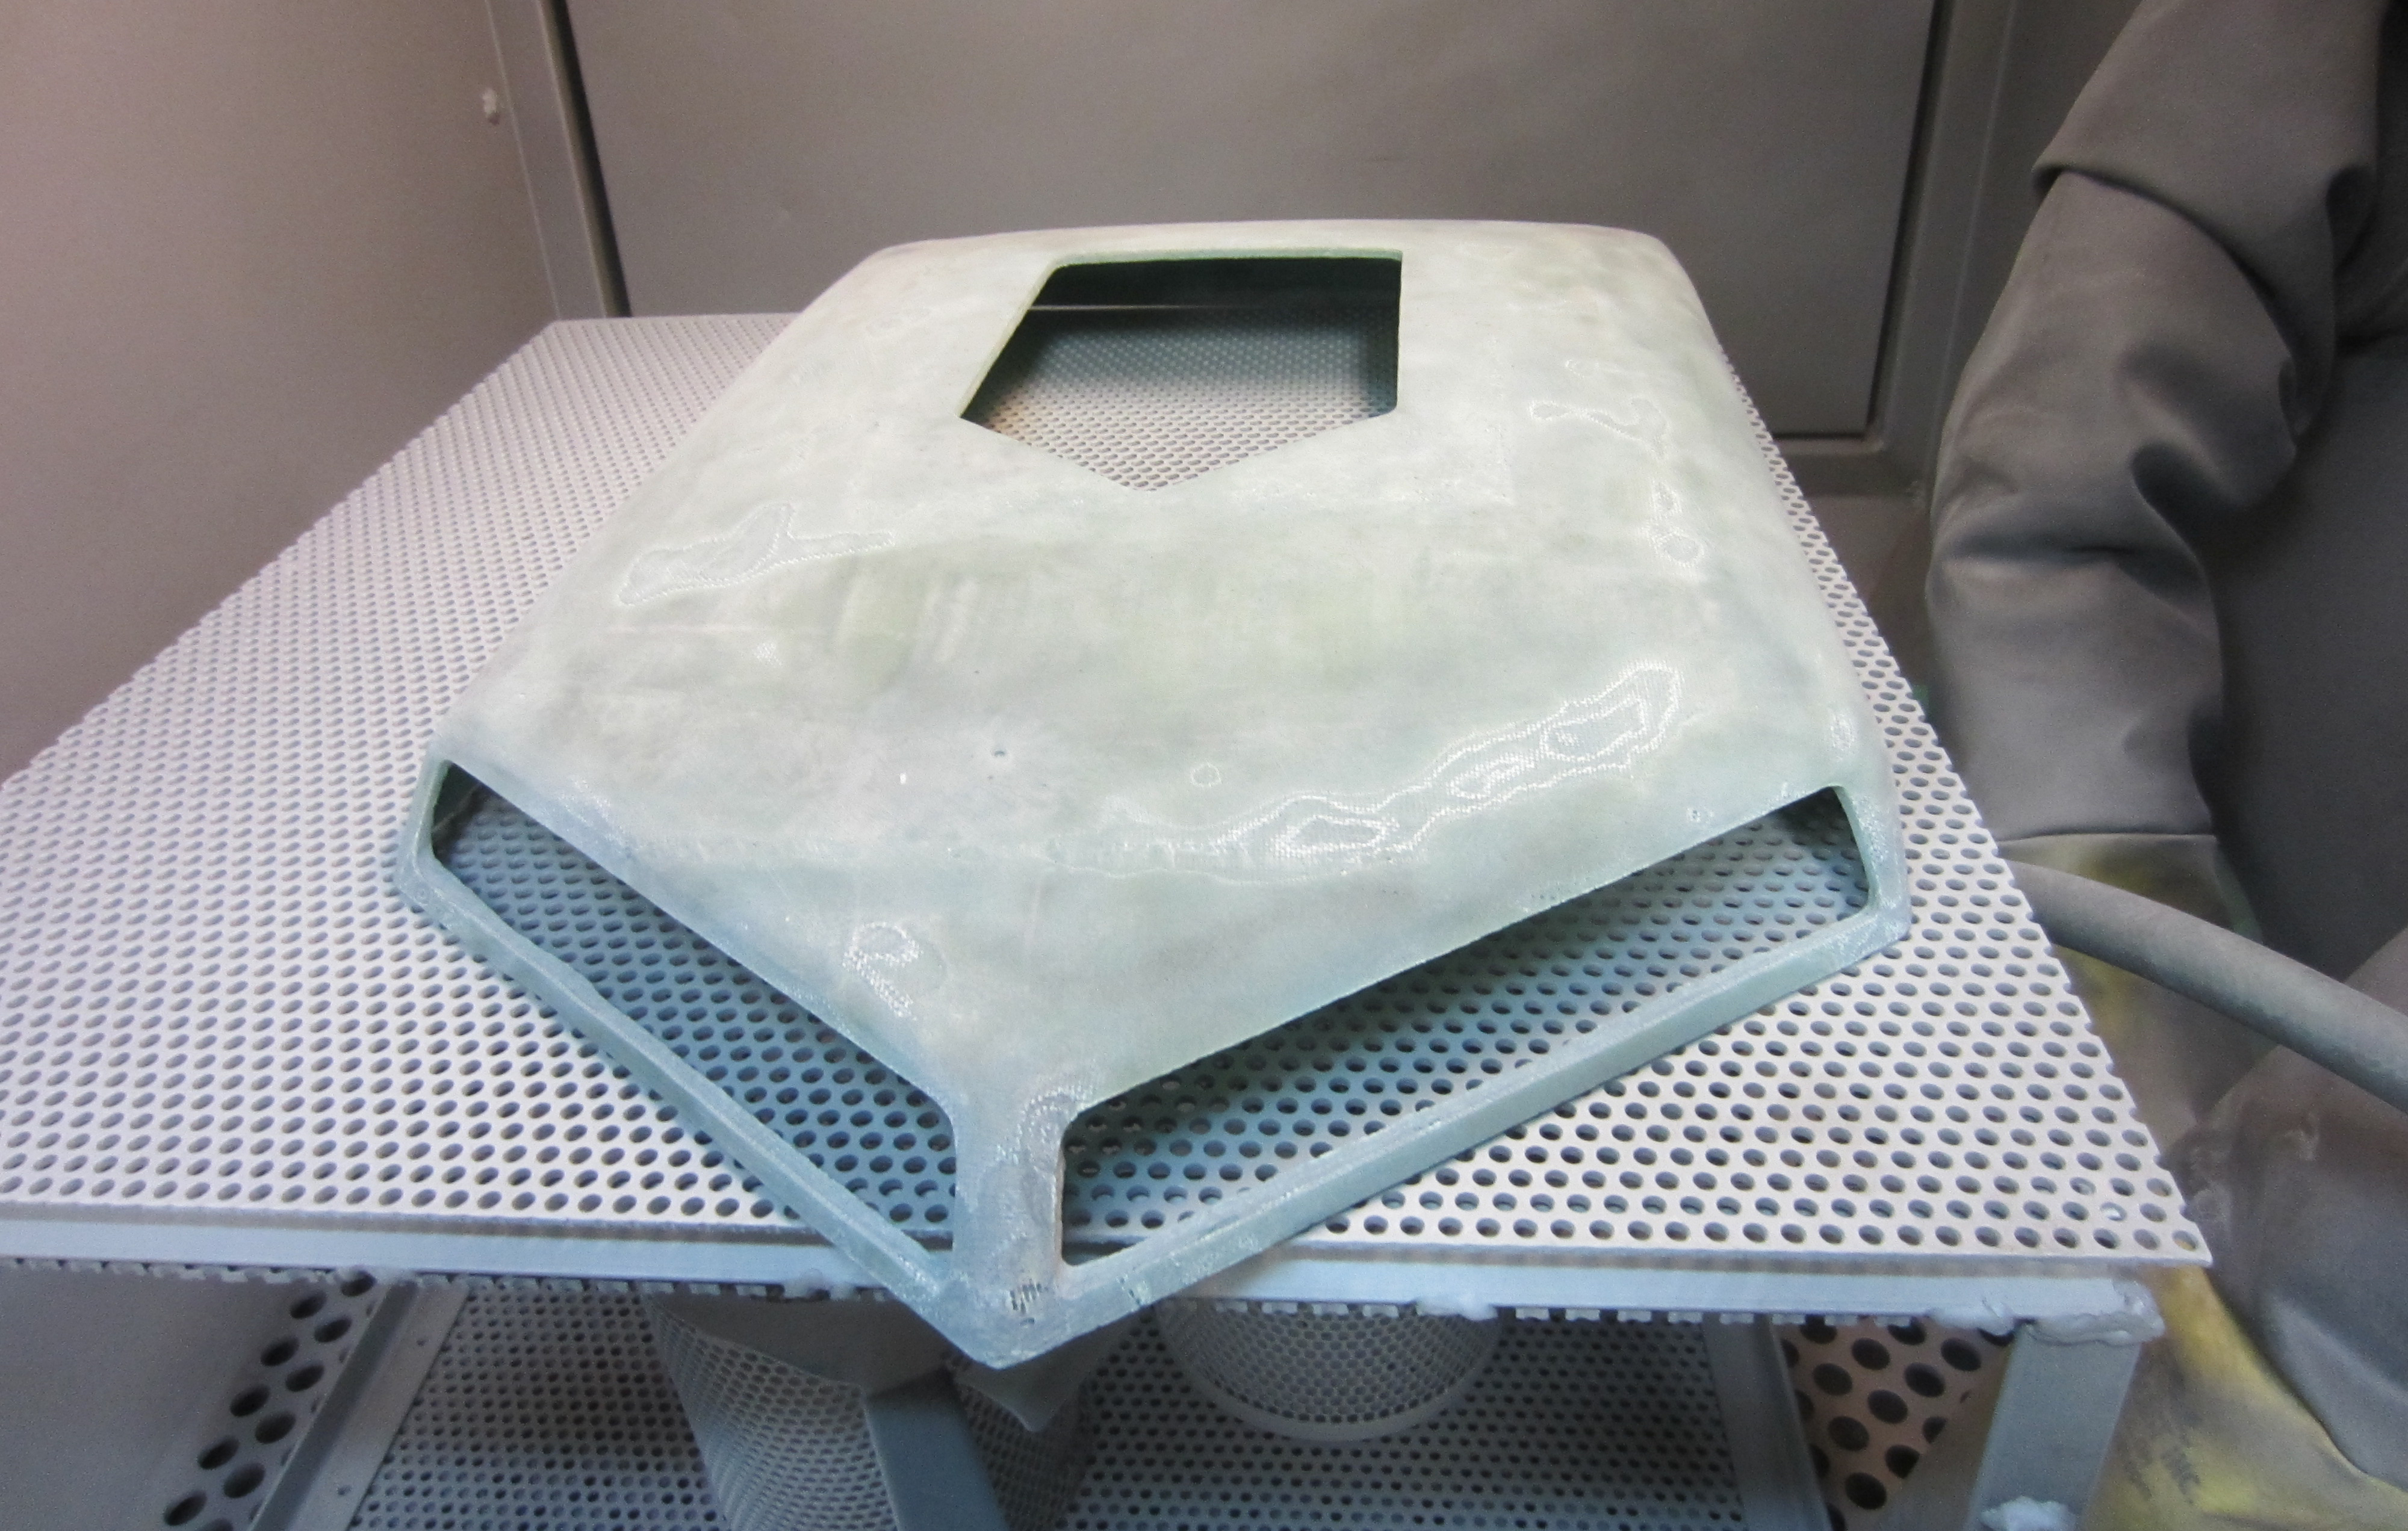
We media blasted it at low pressure for adhesion to get it ready for the cosmetic steps and to check for any small areas and or pin holes needing touched up with fiberglass beforehand.
As seen we only needed a thin coat of filler because our mold was so close to a finished product itself. We are now ready for primer.
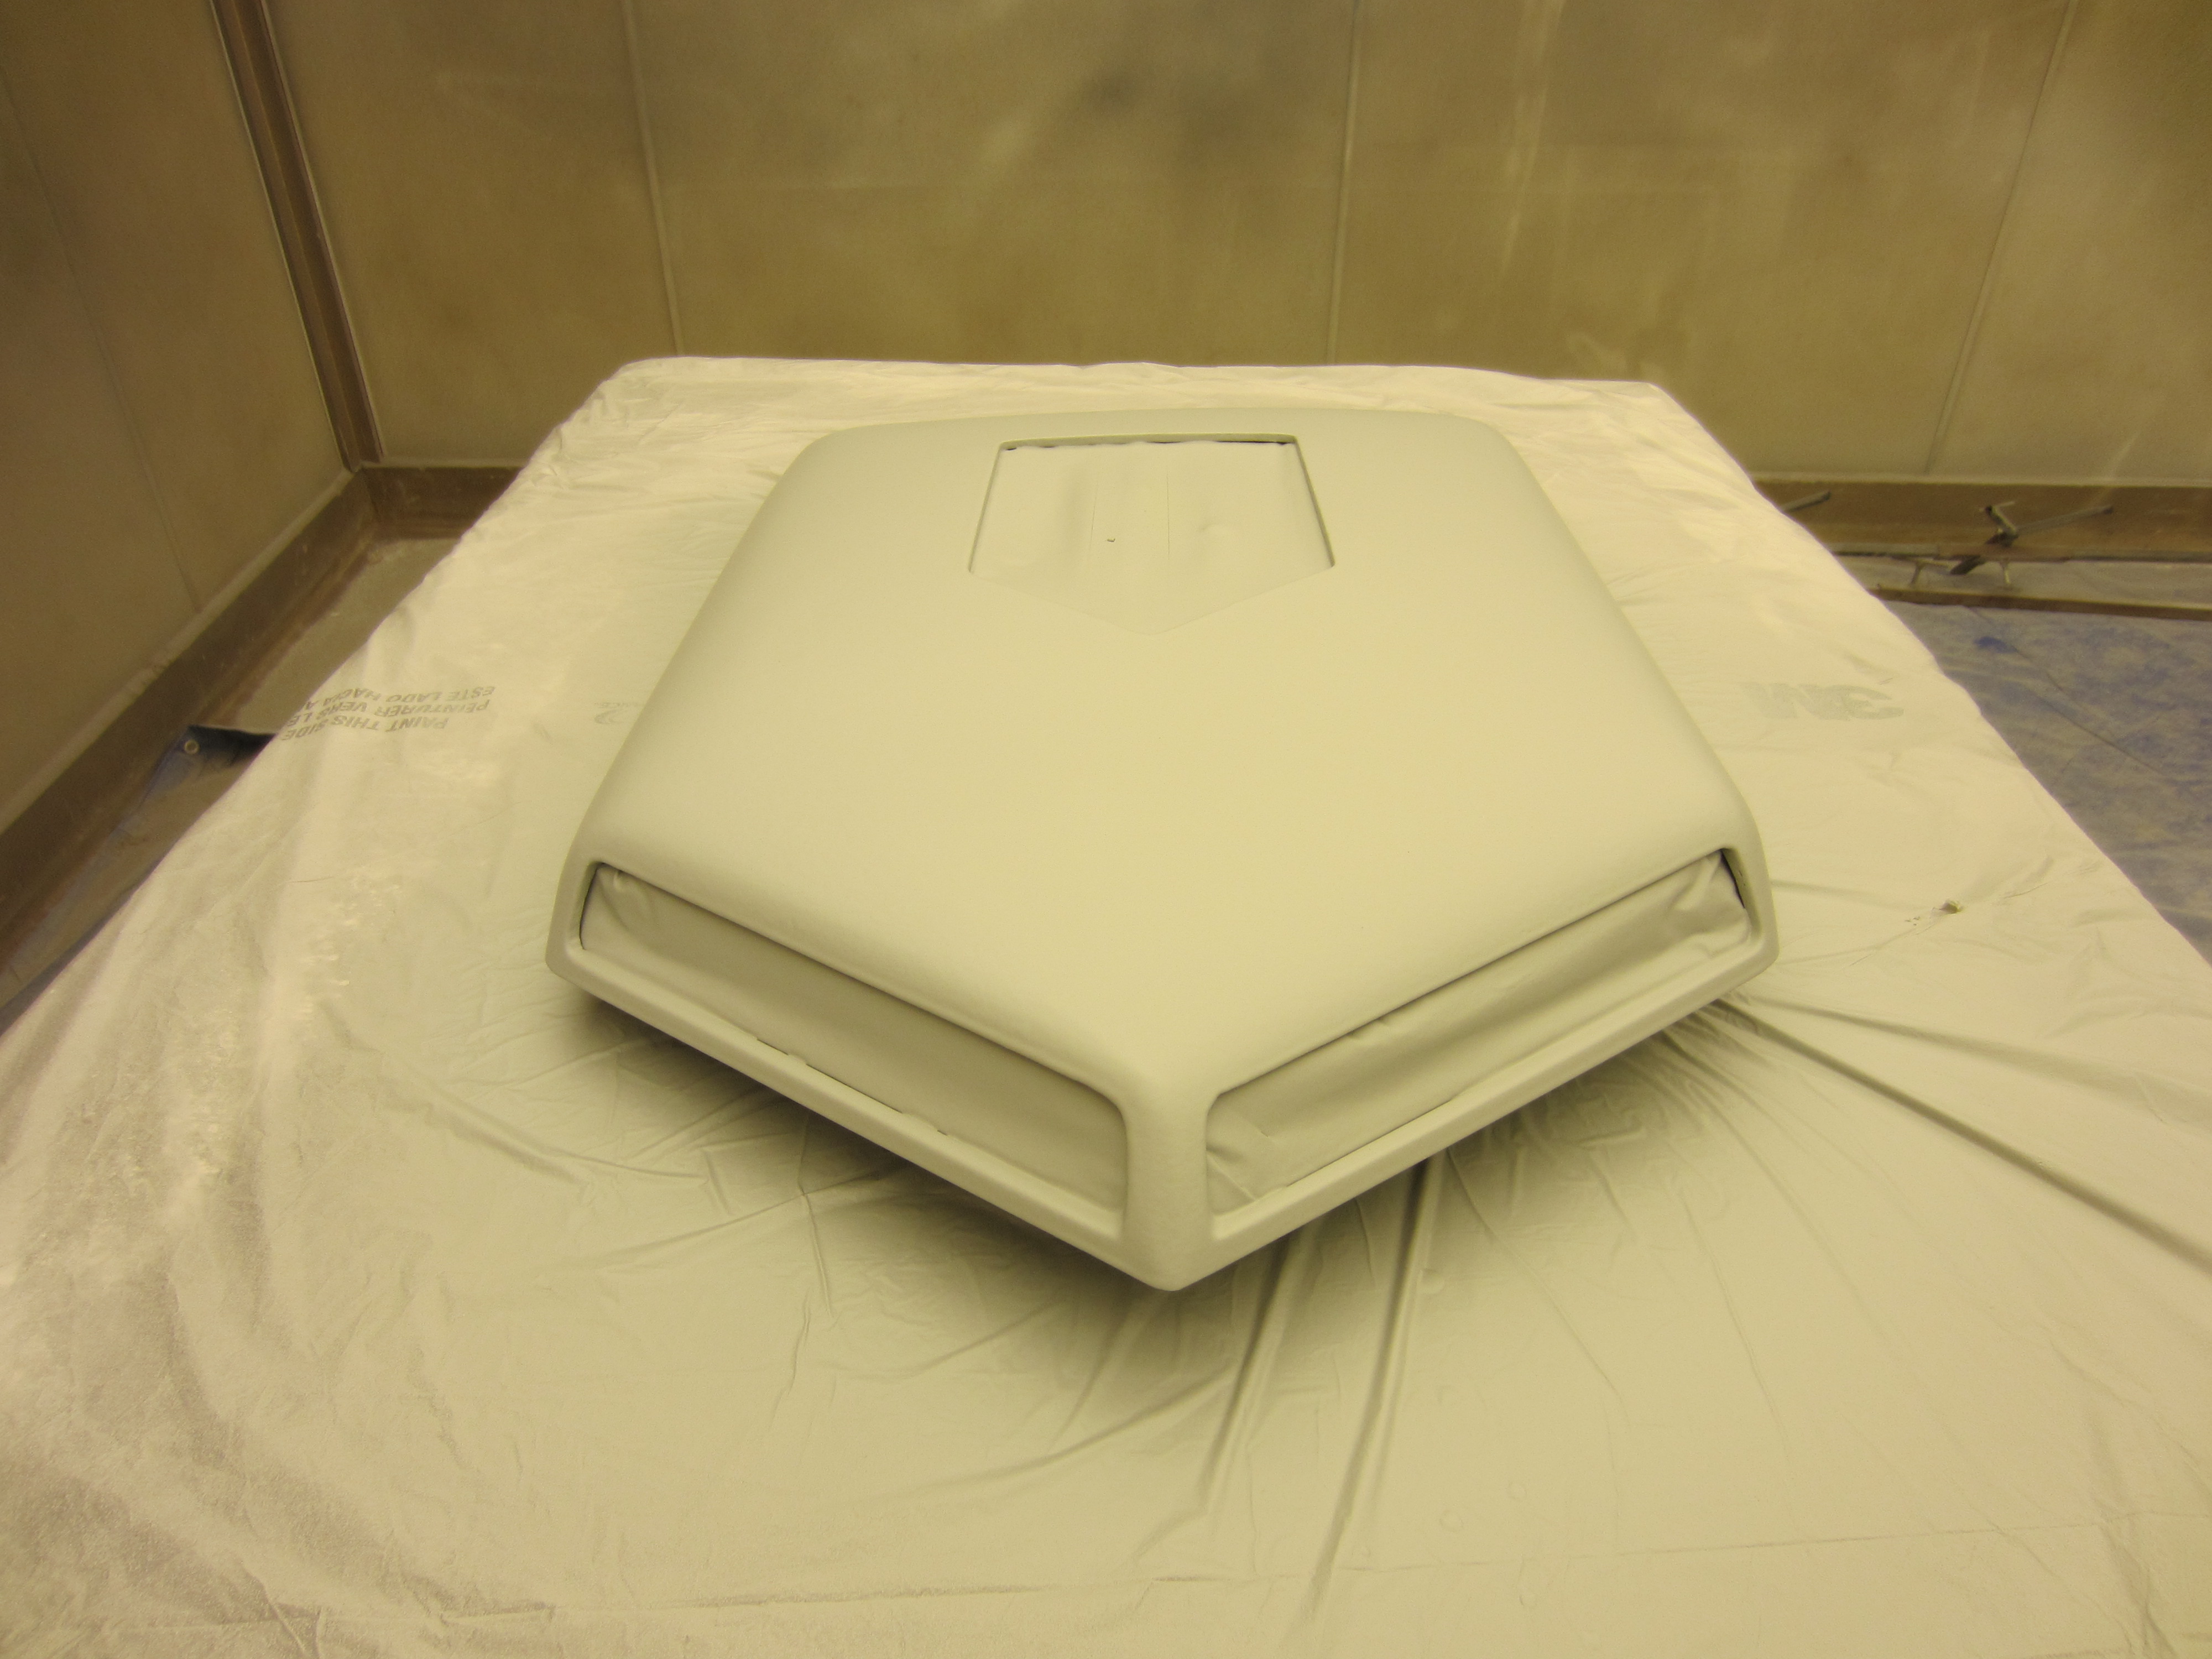
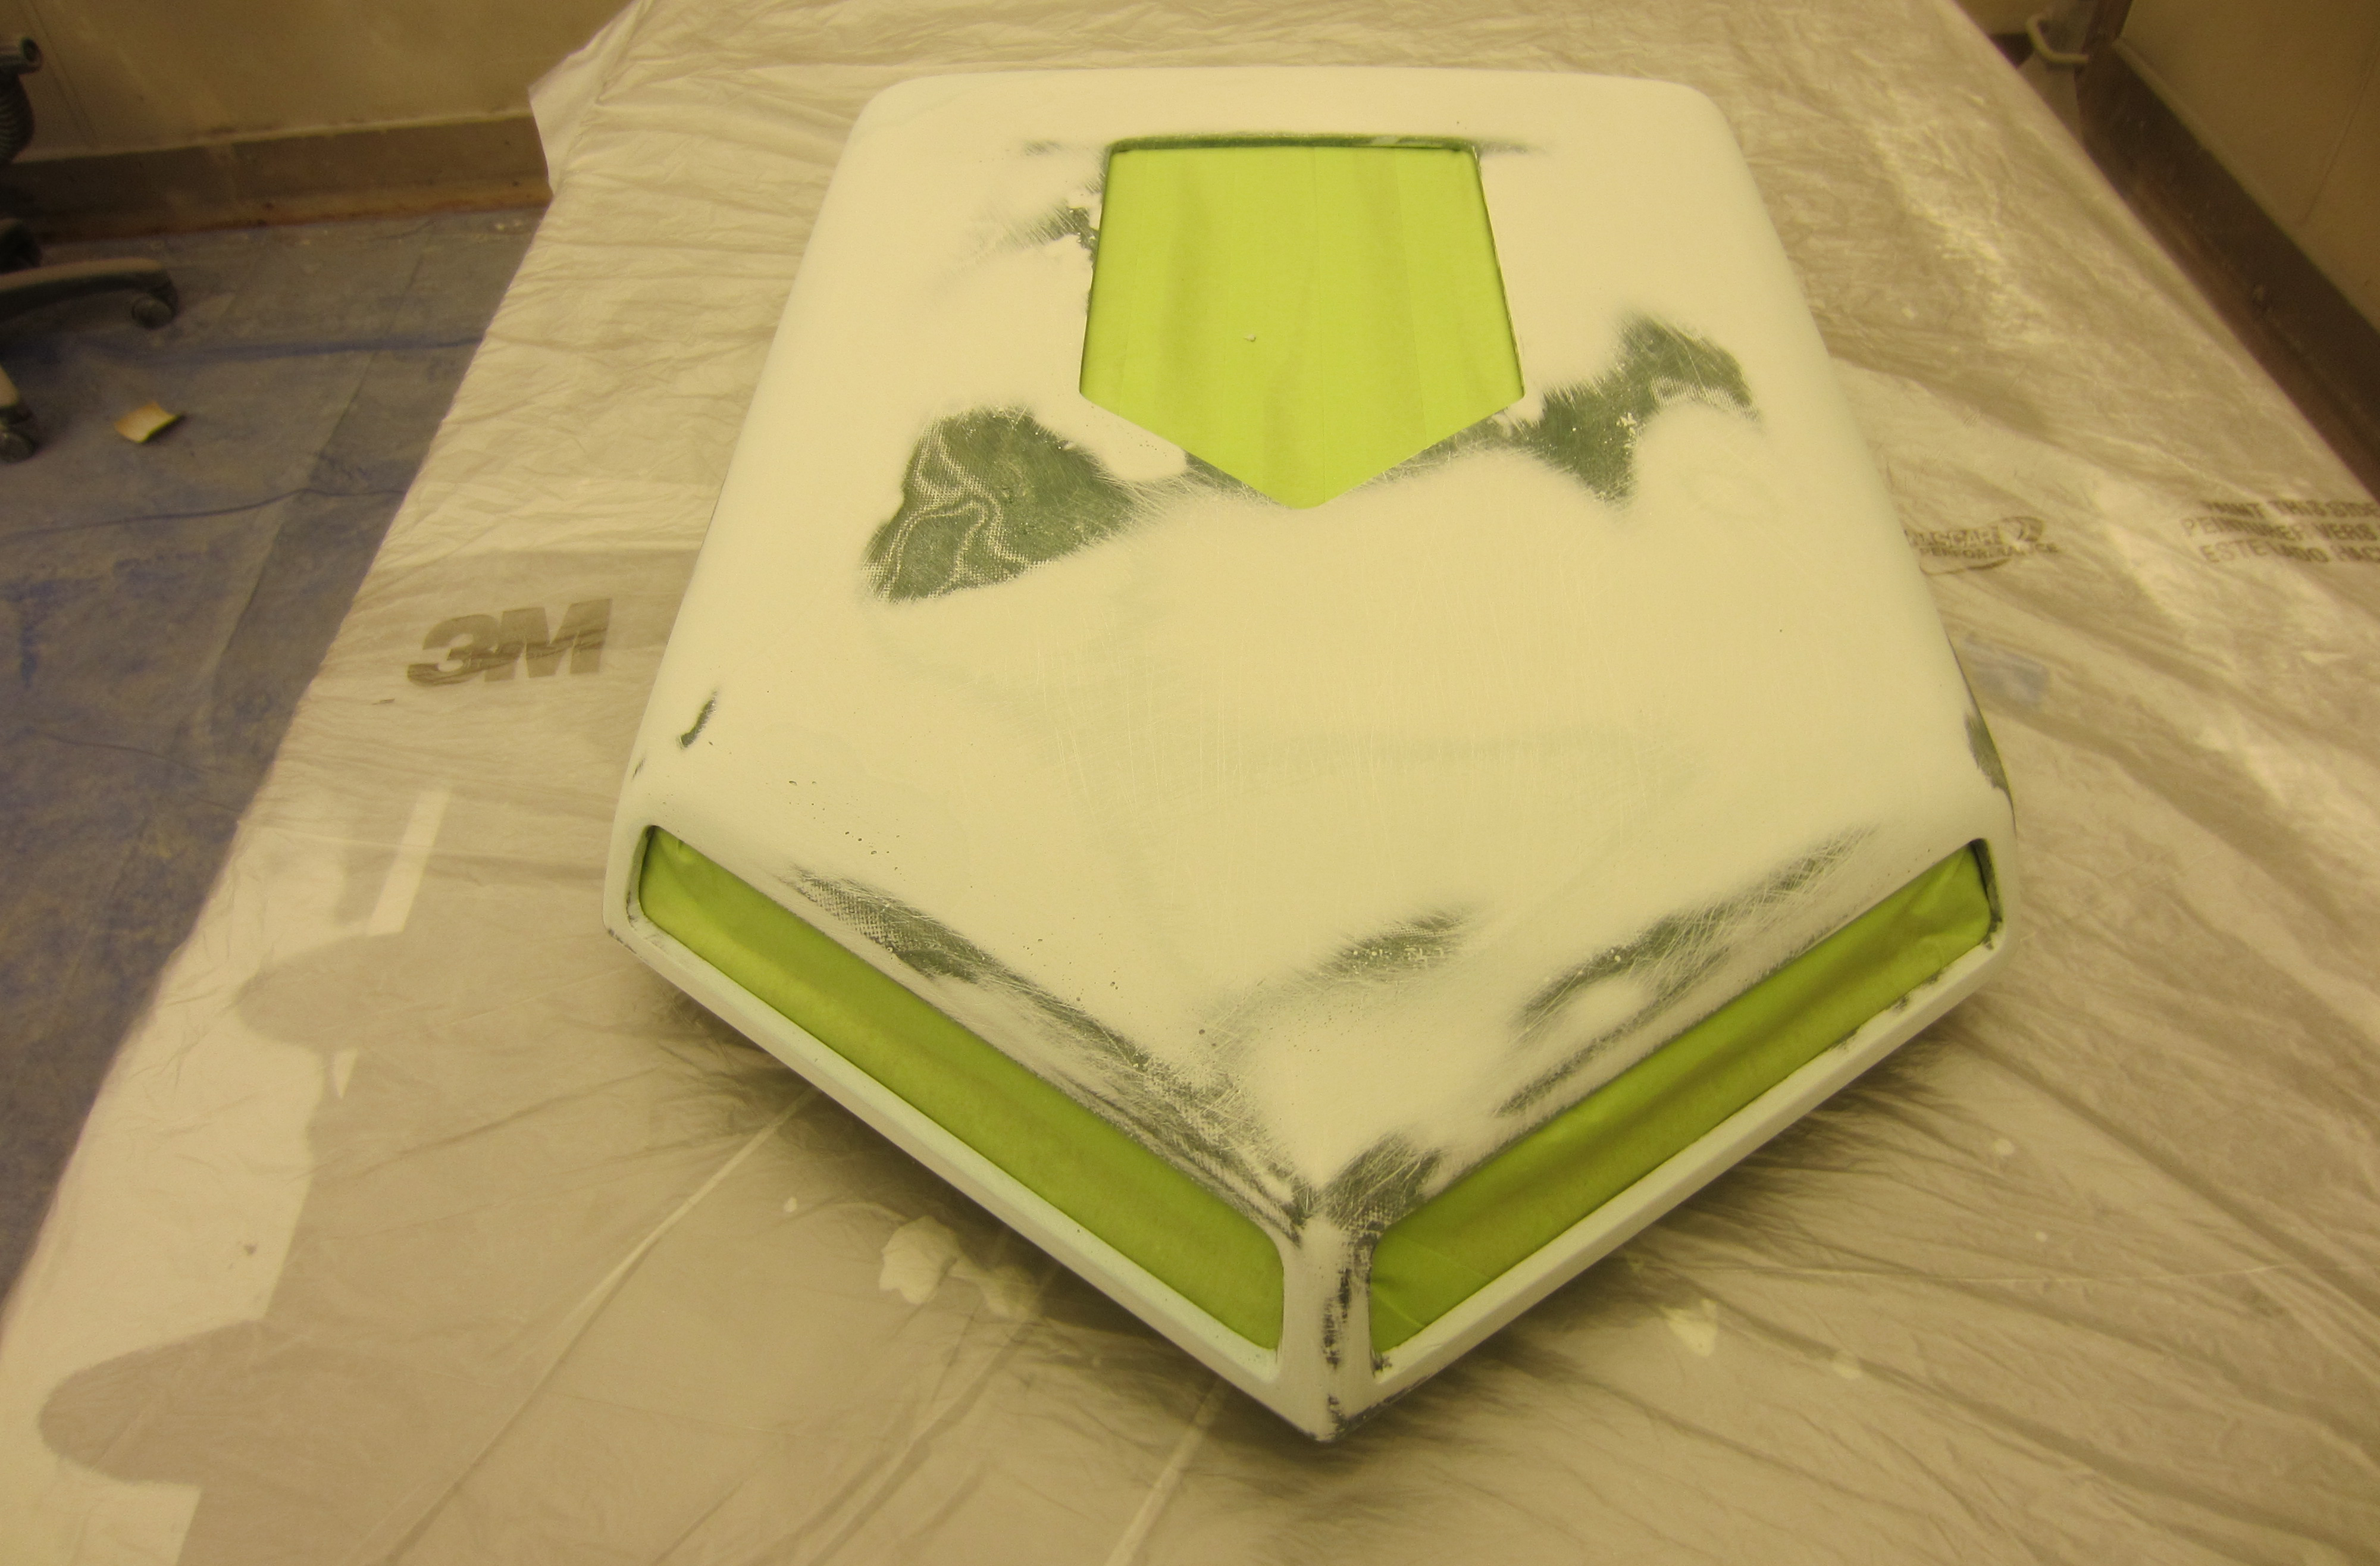
2 coats of hi build primer was applied. Now we will let it cure a few days before blocking it out.
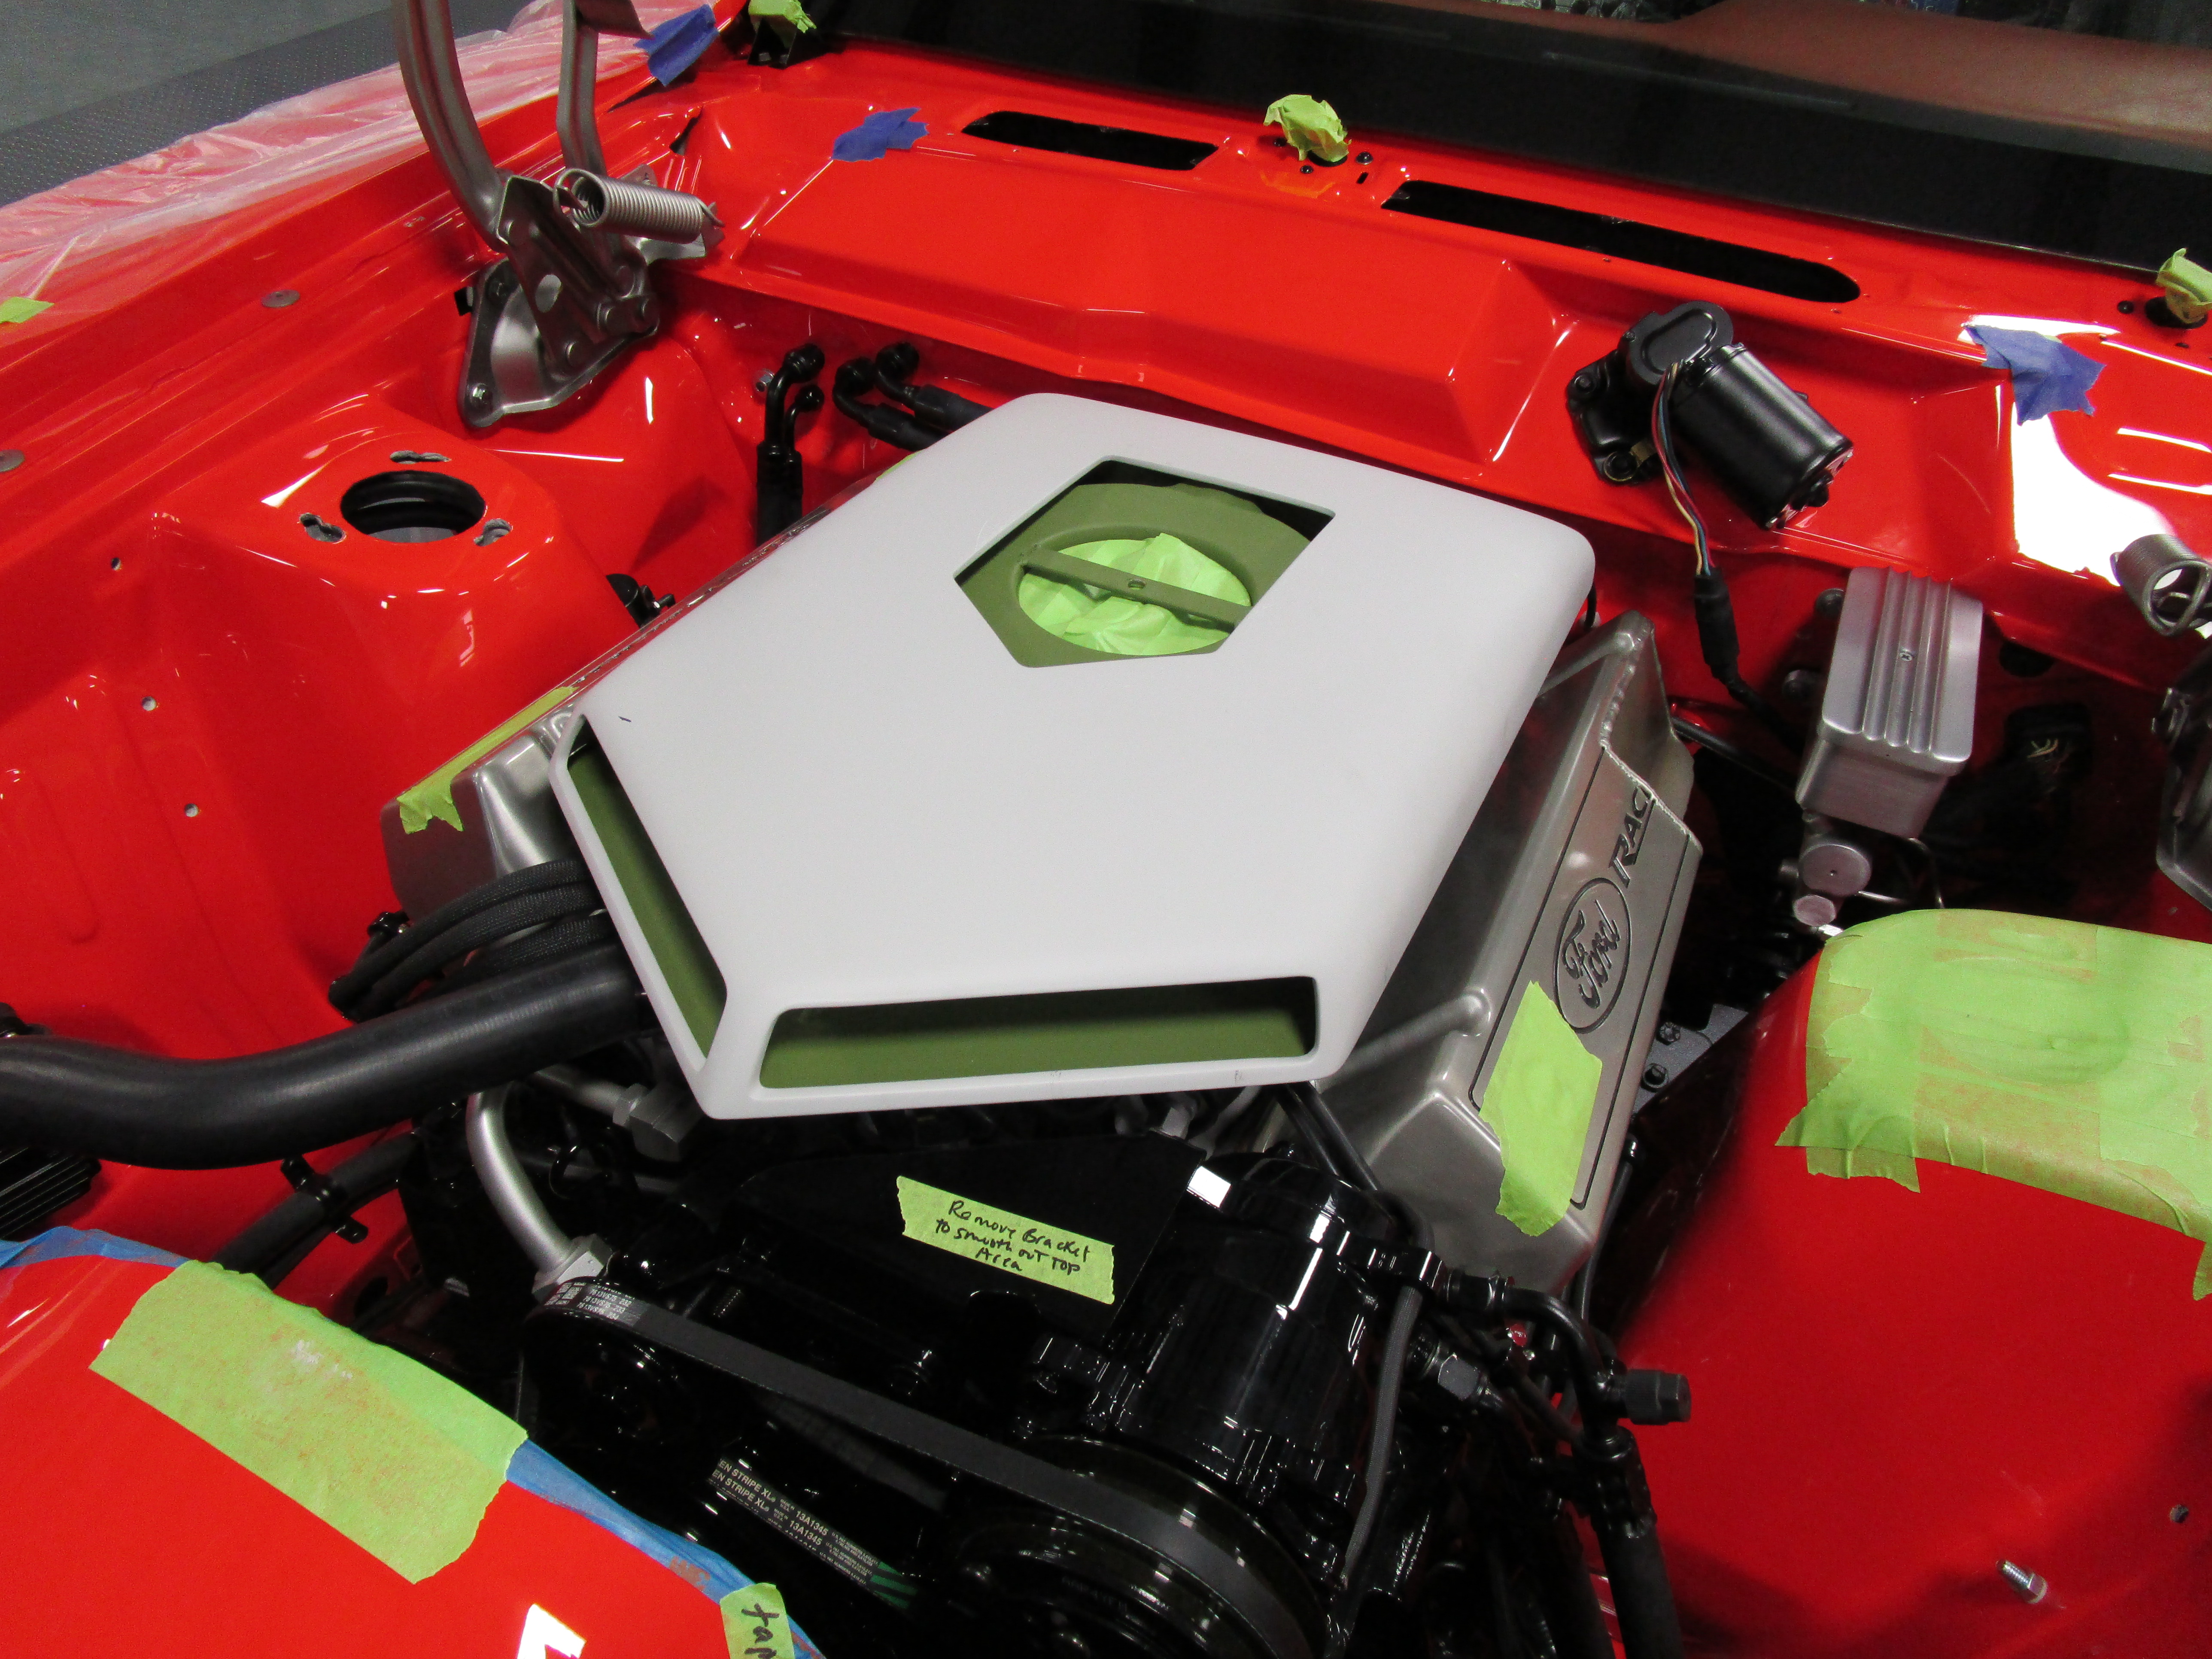
Final fit to check a few things and to be sure we like the curb appeal, it looks sweet so on to the paint and polish stage.
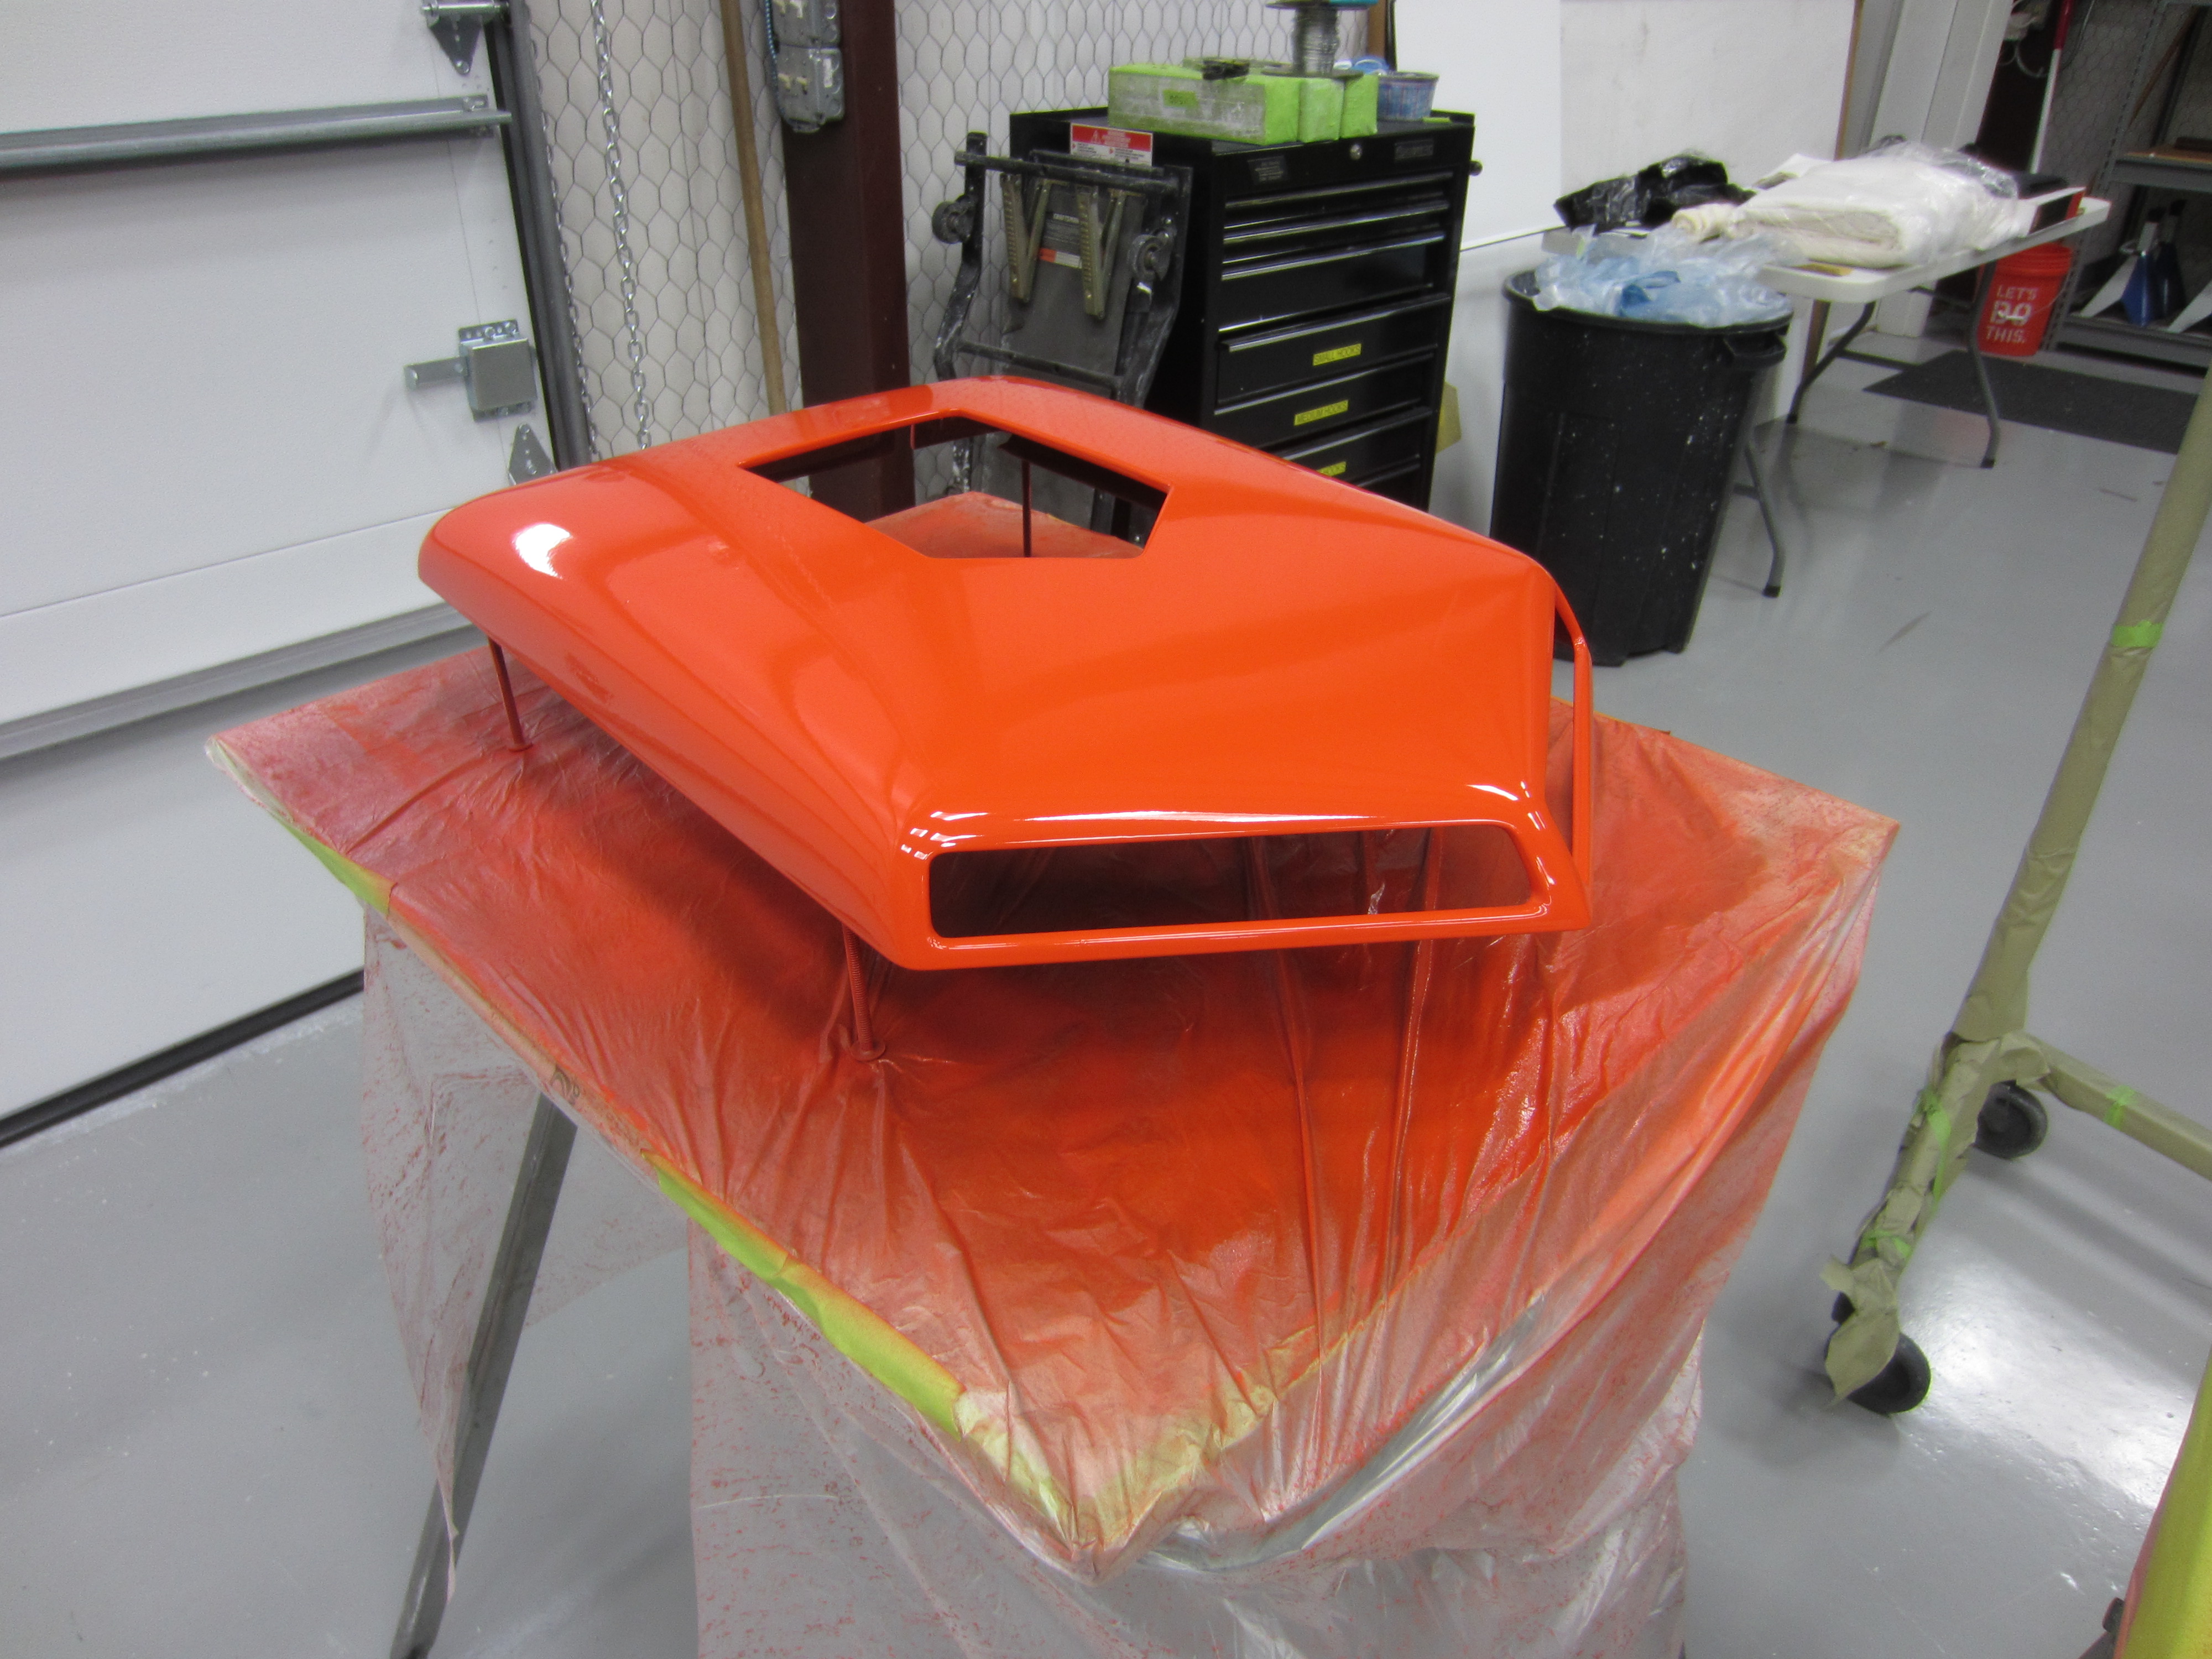
After blocking out the primer we took it in to the booth, prepped it then sprayed out our Orange-Appetite.
We prepped the back side and will now spray some black epoxy primer just to seal up the fiberglass for longevity.
Primed and sealed.
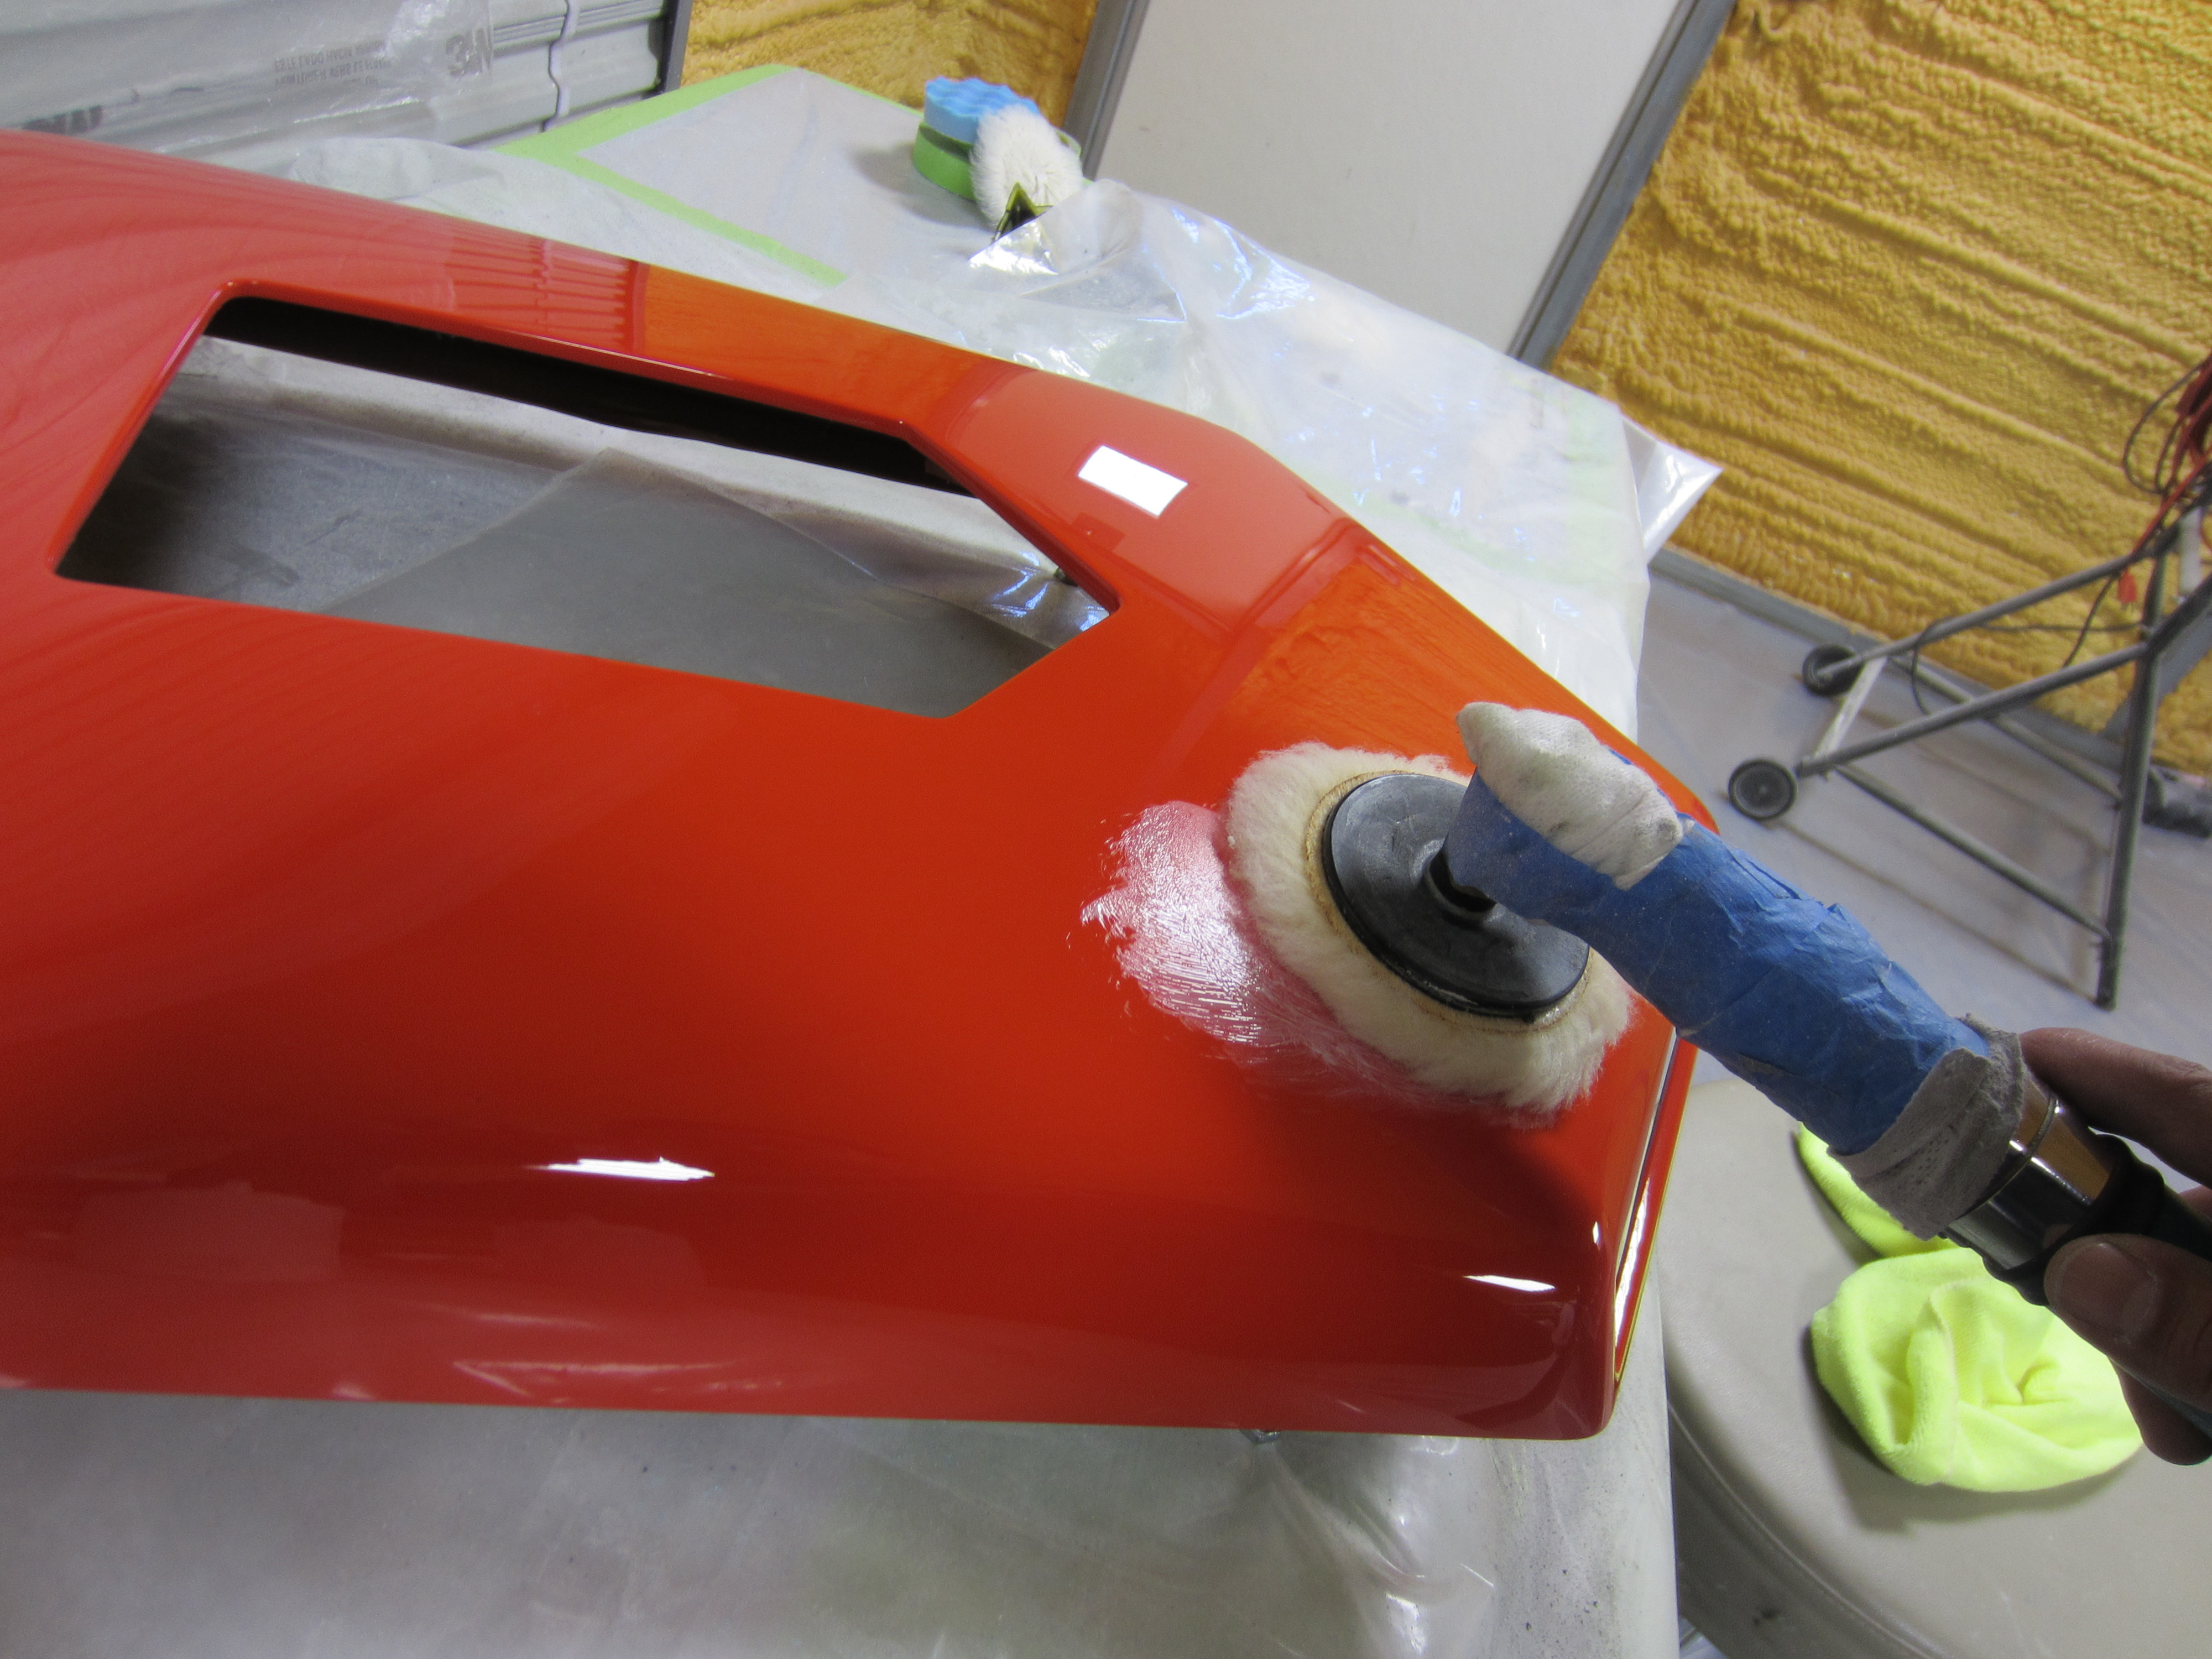
Color sand and polish the air cleaner to a high luster like the rest of the car.

Pretty sweet, shiny man.
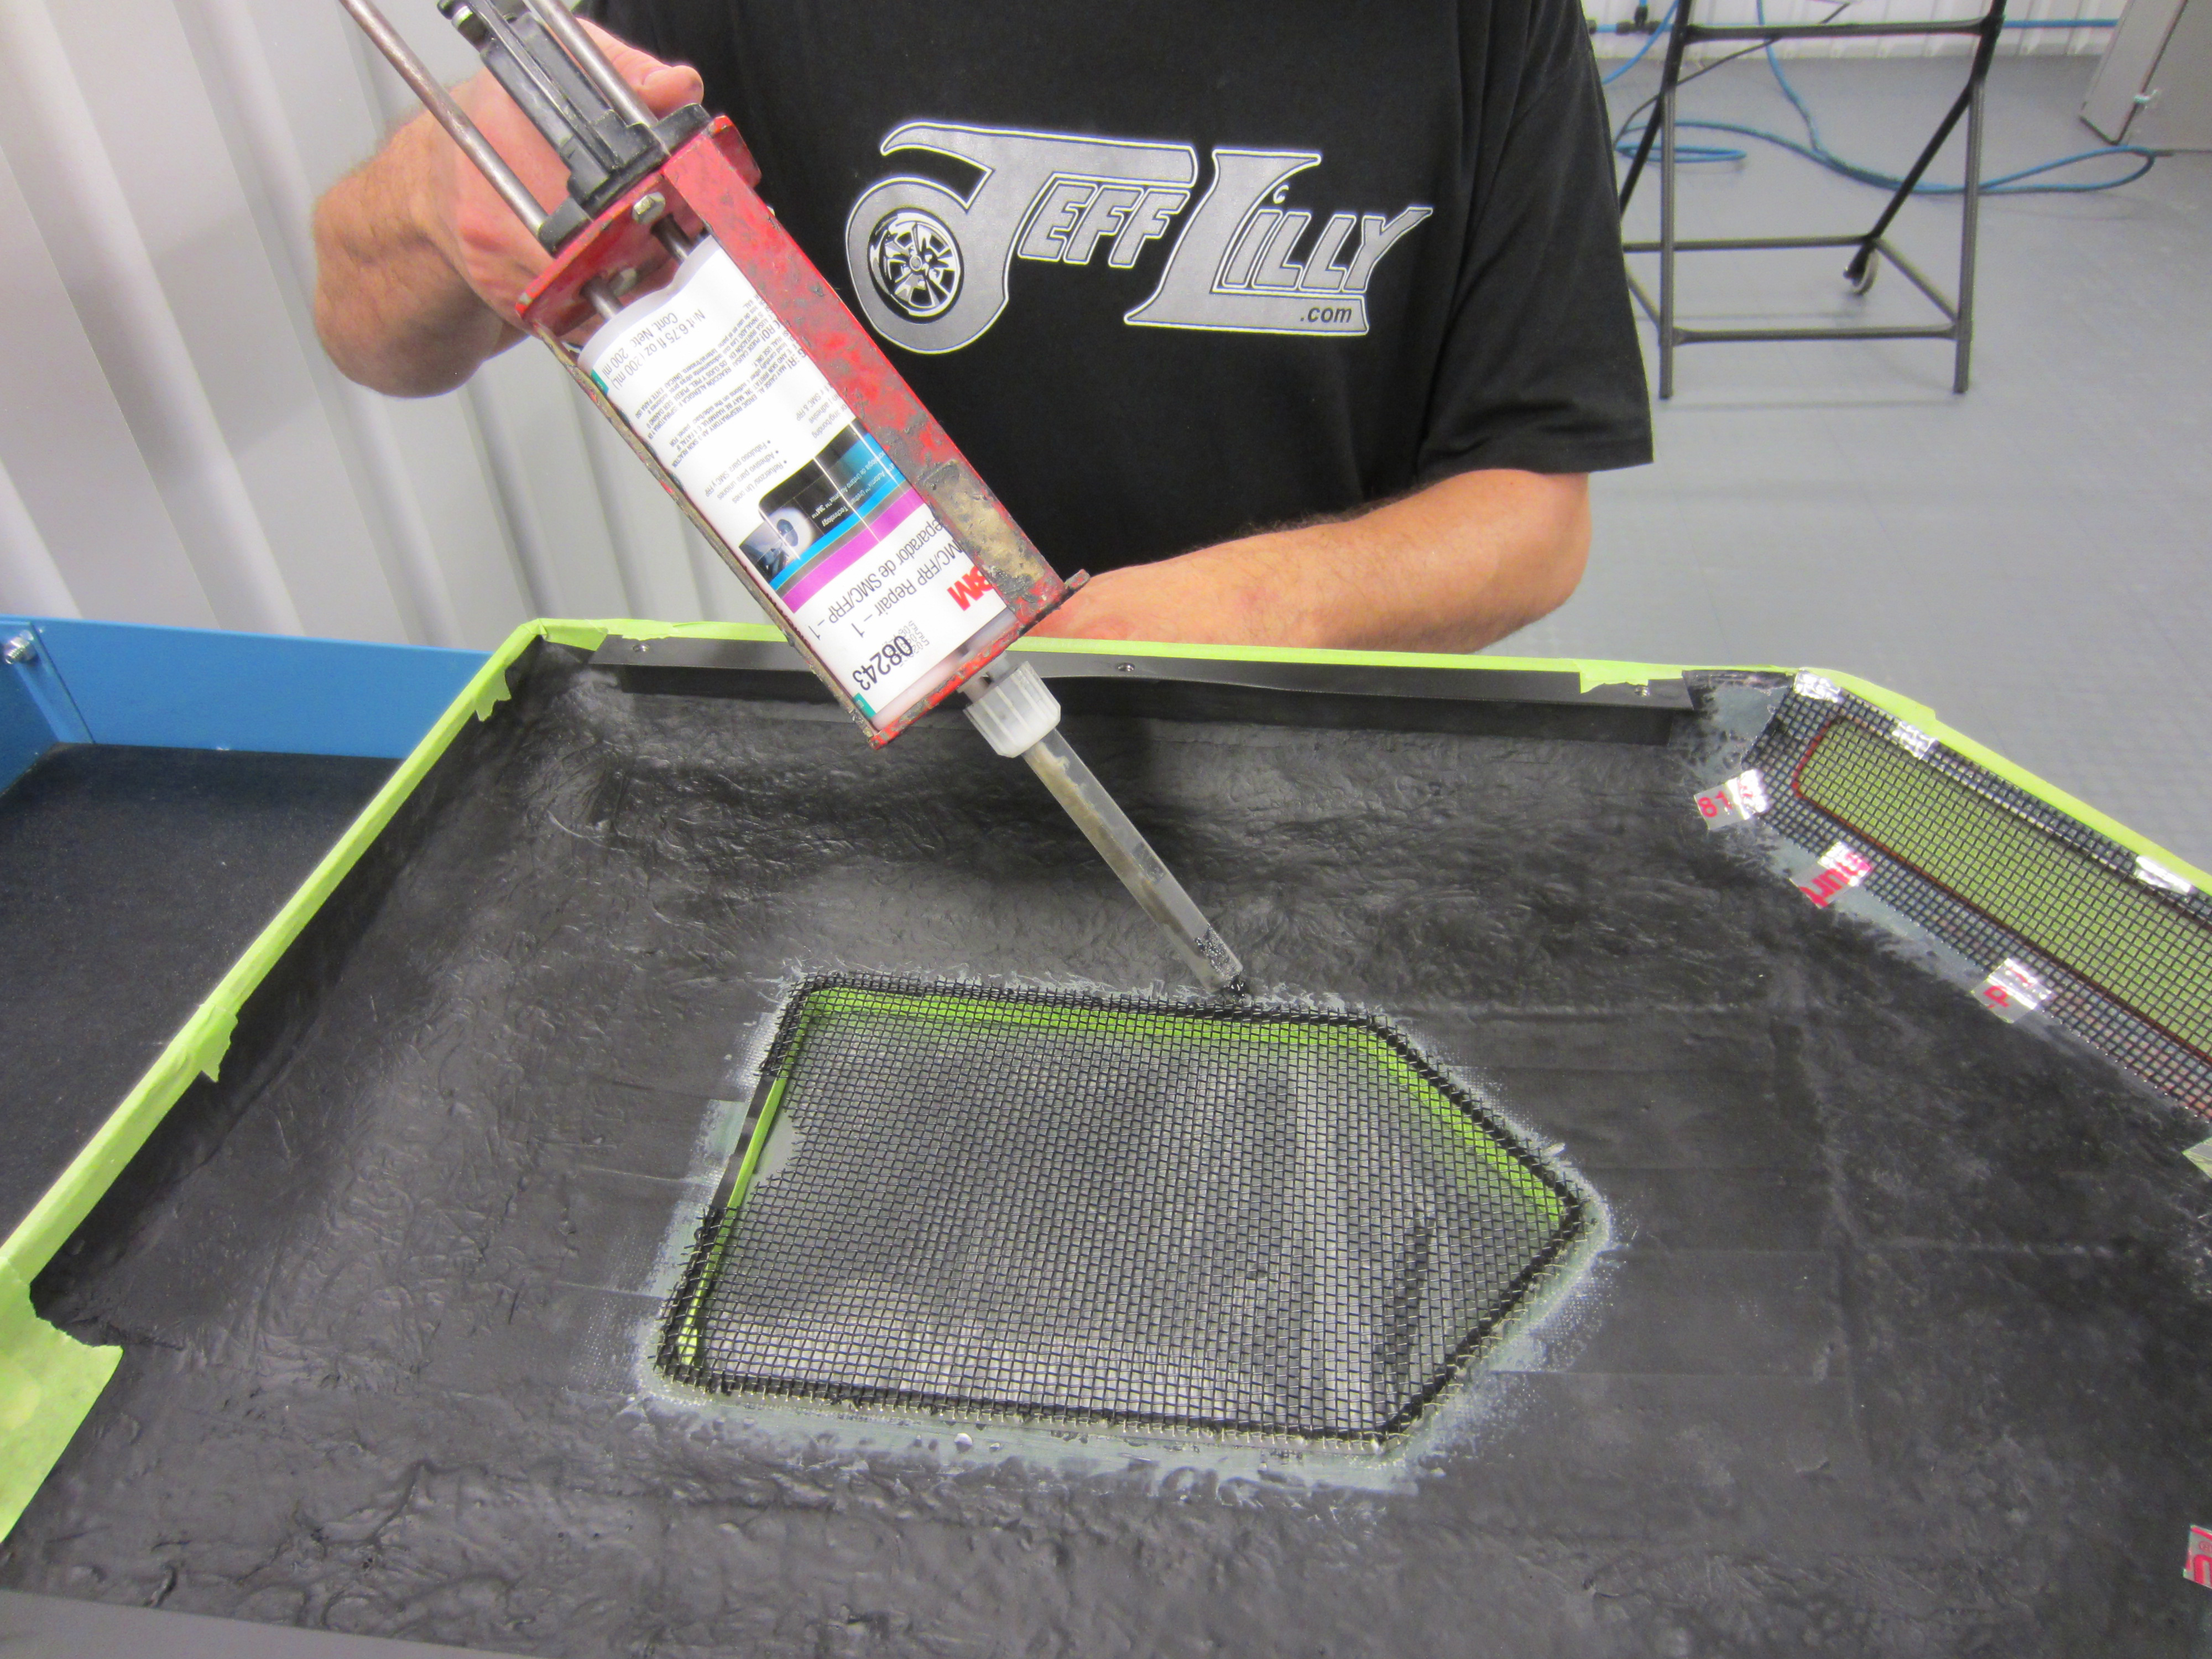
Final step using 3M 8243 epoxy for panel bonding SMC and fiberglass. It adheres to steel and glass so a permanent attachment is done.
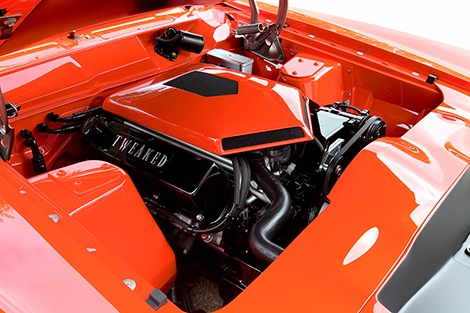
Installed " Tweaked " is looking good. She came out nice and is ready for some cruising.