

Build Tips
Fender Re-vamp
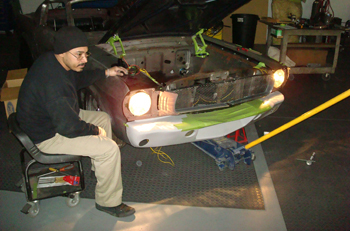
In this tech article we will revamp the front fender / head light extension area to a smoother more stream-lined look. We start by leveling the Fastbacks body front and rear and then adjust the head lights to a drive ready setting. As we proceed on to these modifications you will see where this enables us to achieve a tighter gap between the head light ring and our newly formed sheet metal in comparison to what Ford originally had.
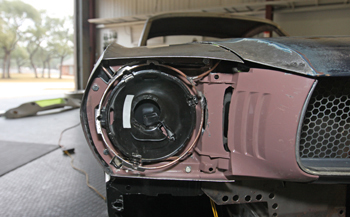
As seen the lights are aligned correctly so we can start the build.
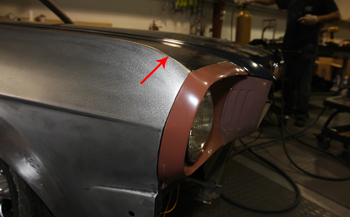
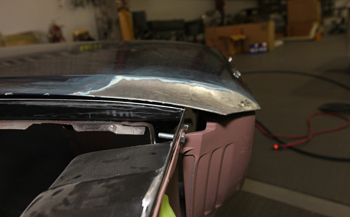
Lets take a look at some of the original factory shapes versus our desired changes and what we aim to do about it. As seen at the red arrow the slope at the end of the fender drops off quickly just before the head light extension. In our opinion the fender needs more time to make this transition which will allow a stream-lined look.
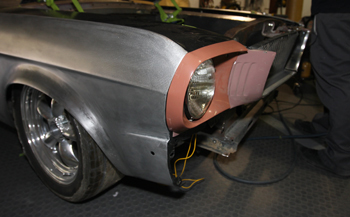
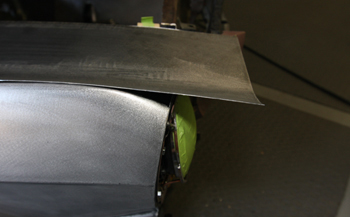
This angle shows how the fender tends to look forced or squeezed in to the head light extension.
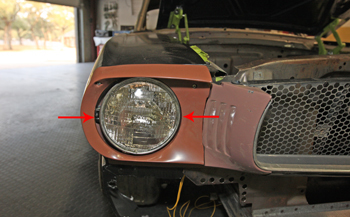
As mentioned in the beginning Ford made the cover with extra space between the head light ring and the pot metal cover for easy adjustment see " red arrow ". After the lights were adjusted correctly you can see the large gap toward the out side and tight toward the inside for an inconsistent look. We can build it with a smaller consistent gap now that we know our adjustment is dead on.
This view shows how the fender drops off so quickly it could almost be a water-fall!
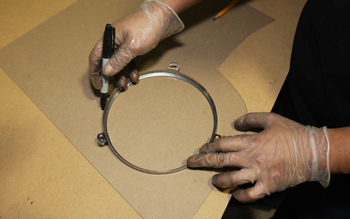
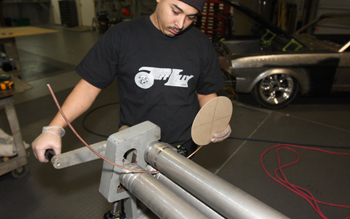
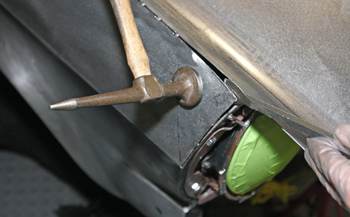
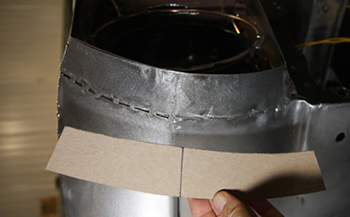
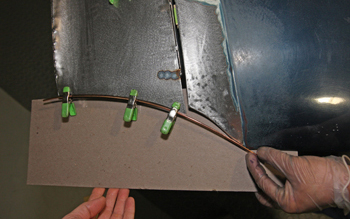
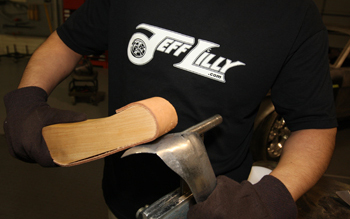
Mani starts by tracing the head light retaining ring on to some chip board for a mock up to build the wire support system that will set our starting point.
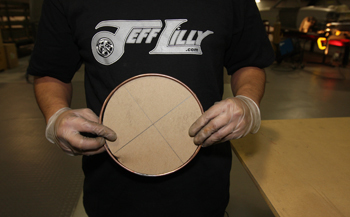
As seen the template has been cut out and matches the ring. On to the next step.
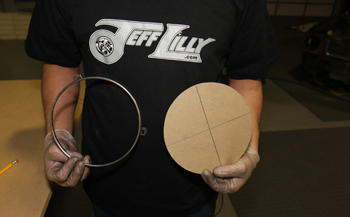
Mani uses our roller tool which features wire grooves in different diameters to roll out circles, but you can use a piece of large tubing to form the ring if need be.
Matched against the template our wire ring is coming together.

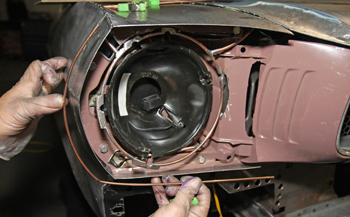
As seen we have installed the ring. Using a few pieces of straight and curved wire we tack welded the ring to the fender centered in place around the retainer trim.

This angle shows the attachment rods Mani welded in to hold the ring in place. Notice the small grooves he cut out on the extra rod he welded to the main ring. These grooves will allow a small Phillips screw driver to fit through the opening for removal and replacement of the head-light and to adjust it if ever needed. Note the consistent gap between the wire form and the stainless ring.
Now that the head light ring is roughed out it is time to figure the sheet metal pieces and get our desired shapes. As seen we are changing the arc at the top of the fender. The hood will also need some fabrication to match it.
The first step in this phase is to cut off the fenders top section about 3/4 ths of the way back to the door.
In addition the hood edge needed some flattening to allow it to flow to our desires. We simply hammer and dollied the edge down.
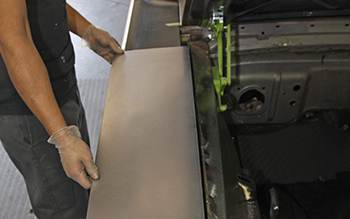
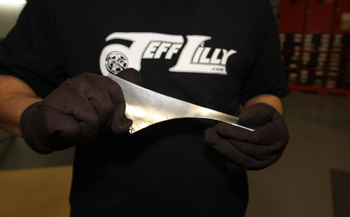
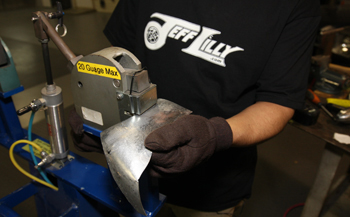
Mani cut some 18 gauge sheet and lined it up to the factory fender to mark the points.
After he marked the points he went over to the English wheel and started wheeling some shape in to the panel.
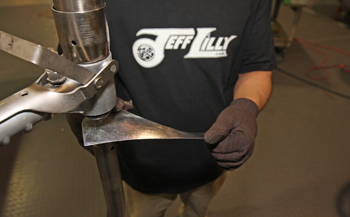
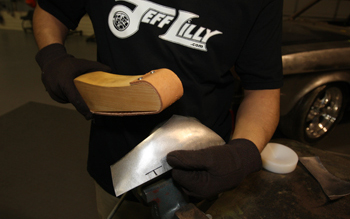
Laid on top of the old fender she matches well.
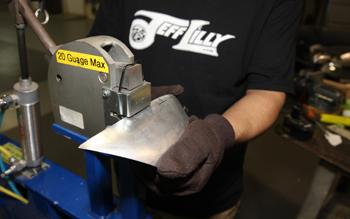
She looks pretty good but needs some shrinking.
As seen she needs to taper down at the end. We will take care of that later on as the panel progresses.
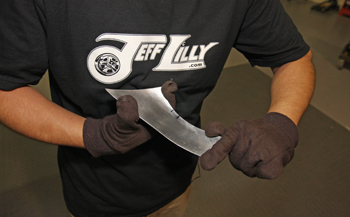
We mark the center of the convex shape so we can run it through the English wheel and true up the line as the stretching and shrinking procedures tend to bend the center line a bit. A few passes with the right wheel on this line will define the concave shape to flow from the back of the car to the very front in one precise matching line.
As seen the mark runs straight down the center of the concave shape. Mani will now run it on the wheel a few times to perfect the flow.
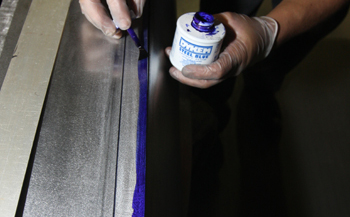
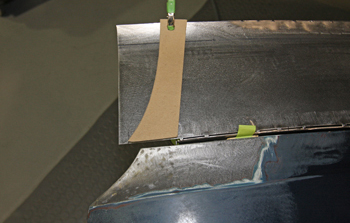
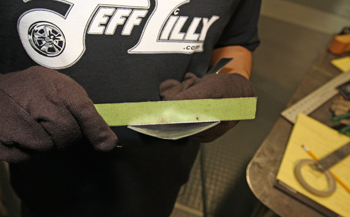
After he ran it through the wheel he reattached it and is applying blue dykem to get a precise scribe line on the outer edge where it will meet up against the side of the fender.
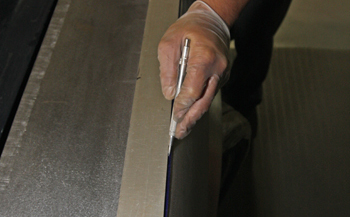
Time to scribe the edge for a final trim where the side of the fender meets the top. We simply hold a straight edge on our marks then using a carbide scribe we make our line to trim.
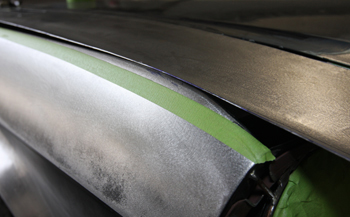
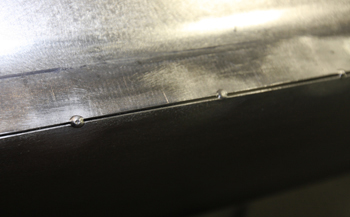
As seen the side of the fender has been taped off with our desired shape. It really shows how peaked this fender is. We will now slice away the metal right on the very top of the tape line for a smoother, more subtle transition. As seen at the very end or last 3 inches we still need to bring it down some to fit the tape line, so a bit of shrinking will be needed.

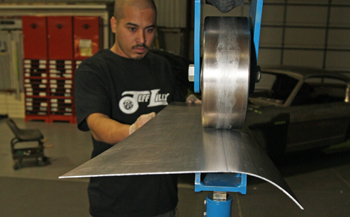
After trimming off the side panel at the tape line Mani runs the panel through the Mittler Power stretcher / shrinker just a bit to taper the front area down.
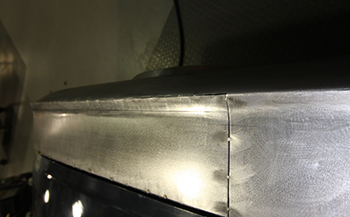
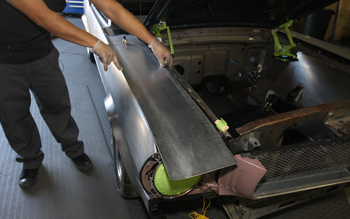
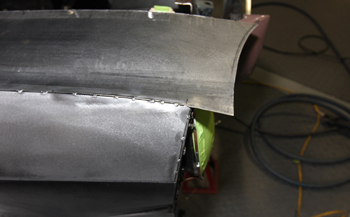
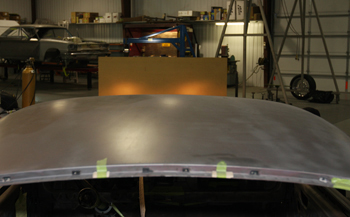
Installed the new top fits and looks great.
A close up shows the tack welds. We will weld it in solid after all the other fabrication is done.

At the very front we sliced a bit off the edge to enable us to push in the side to meet the new top section.
Next we slightly pry the top tip out while hammering the side to flatten it out a bit.
Slowly but surely we push it down on the top and tack weld it to the side in one inch increments.
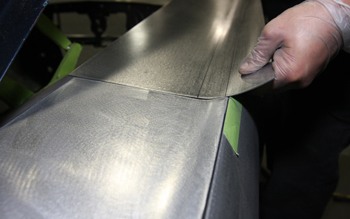
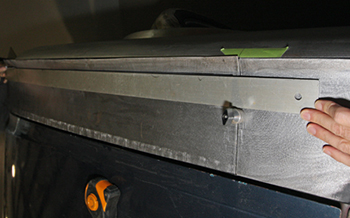
As seen we have it trimmed and fitted. What a difference compared to the stock fender. No more water falls or drop offs.
Now that we have the sides tacked in to the top and have achieved our transition it is time to trim back the top to our desired shape. Mani pulls out the template and starts to position it before marking.
Now that we have our fender edge trimmed to flow to the hood it is time to attach the sides.
We made paper board mock-ups then cut out the pieces and are attaching them. We only tack weld them in at first then after all is "dead on" we will fully weld them in.
The under side section gets the same treatment.
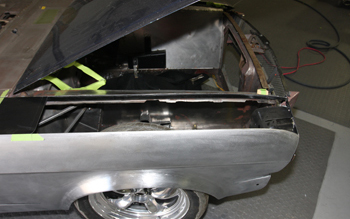
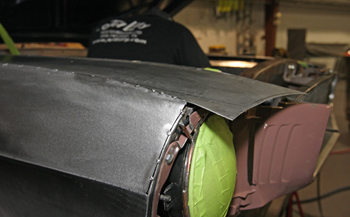
This view shows the new enclosure starting to come together.
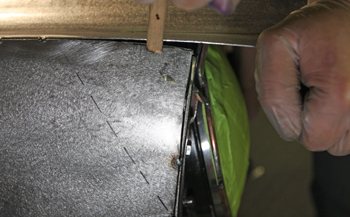
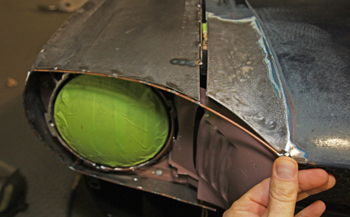
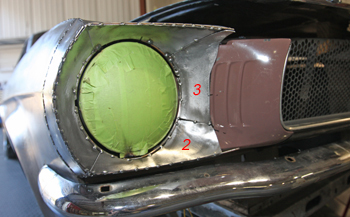
The next step is to run some strengthening wire on the out side edges before we add the pieces down to the head light ring as shown in Caption 11 and 12.
Hand bending the inner wire is the only way to go.
Tacked in and looking good. We used 1/8th diameter wire as it is easy to bend but weldable with out distorting. Once welded it provides a very rigid base.
Being that we are completely changing the transition it once had we will also be adding a small piece on to the edge of the hood to finish off the flow.
Tacked in place, she is coming together.
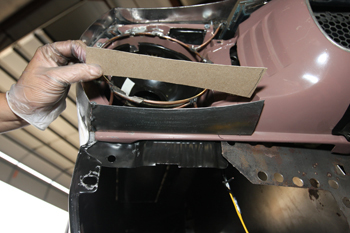
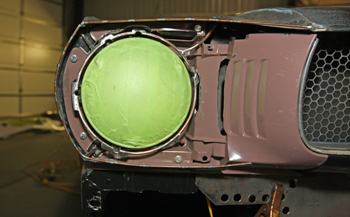
These inside mock ups are actually the hardest to build with all the convex and concave shapes. We will break it down in to four separate pieces.
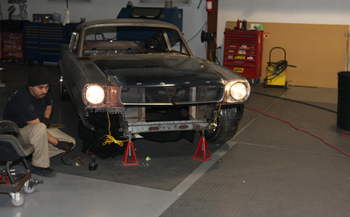
Time to check our head-light adjustment again. We want to be sure the heat from welding has not moved any thing as this is our final time to adjust if needed.
Standing behind the car we can see they are still "dead on " so we are ready to continue.
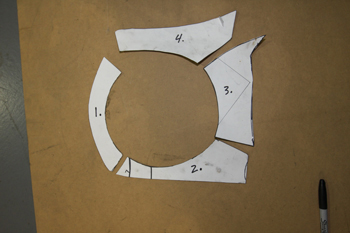
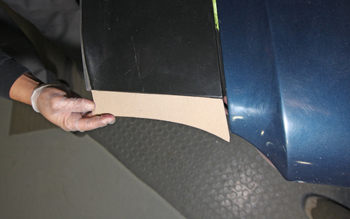
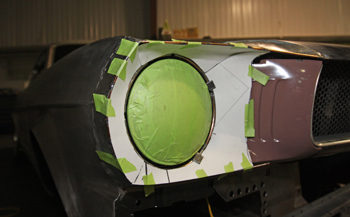
Our patterns are marked and we are ready to make the metal pieces to match.
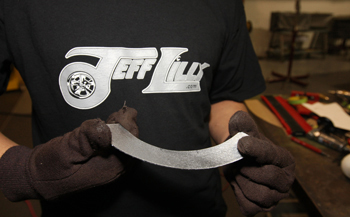
Mani marked his metal from the templates then cut them out. Starting with the #1 outside piece he hand tweaked it in to shape by twisting the part in to submission.
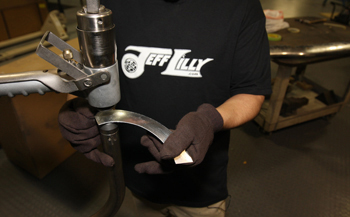
Next he runs part #1 on the planishing hammer to give it a more inside or convex shape then he is able to do with his hands. Using a shot bag and the right hammer will suffice.
On part # 2 he does the same thing, a bit of hand tweaking and twisting to persuade the part to " listen up" !
The next step on #2 he changes the die to a bit larger dome then used on the #1 part for a wider transition or convex dipped shape to get it to flow a bit more gradual.
As seen the concave part is dipped quite a bit more on #2 to our liking.
On the #3 part which is the hardest one to fab he uses a T-Dolly and gives it a few whacks with the leather wrapped hammer. Getting the part to flow in the proper direction as soon as possible is the key.
A little shrink a little stretch, bit by bit till he is happy with # 3 . He then planishes it with the same die used on #2
After some planishing you can see the nice curve she has taken on. He then proceeds to whack it a bit more with the leather wrapped hammer on the outside edges to finish it off. She fits good so off to the next part.
On the # 4 part we shrank the whole outer edge. This part is done much faster then the others. Keep in mind that he has been fitting these parts regularly to the car after each phase to know how much more adjustment and which direction tweaking is needed.
A final hand tweak, she is then fit to the car and is ready to tack weld on.
These panels are only tacked in place, specifically #2 and #3 because once we get to the grill modifications we will re-make them longer. By roughing #2 and #3 out we got our technique down to use on our final pieces.
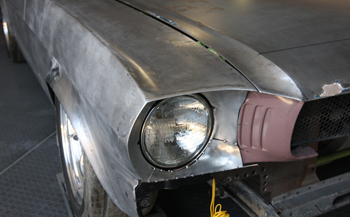
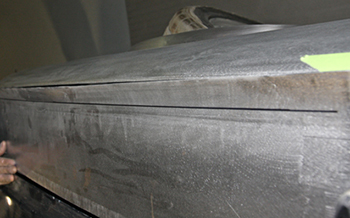
This view shows how nice the fender flows from front to back.