

Build Tips
Door Handle
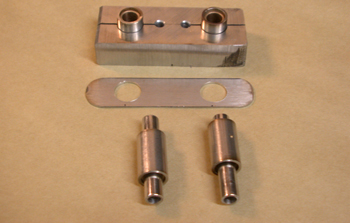
We started off by making a buck that will hold the bushing-sliders in place for a matching right and left door. We used 1/2 o.d. thin wall stainless tubing and installed bronze bushings. We made our bottom plate from 16 gauge stainless sheet to keep them in place. We will now silver solder them together.
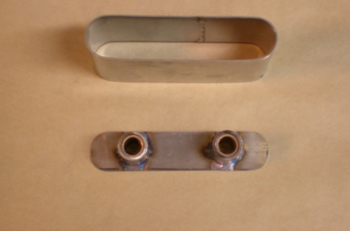
We soldered the bushing sliders to the plate and then took 20 gauge stainless sheet and bent our outer door handle body to match our slider plate - shape. We then welded the seam on the body.
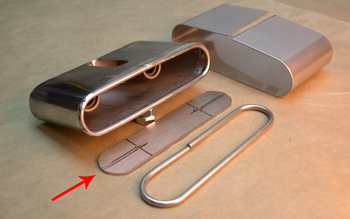
As seen we have one half together to show how it was designed. We show another plate “red arrow” that will be used for our top section push plate. This is 1/8th smaller on the outer perimeter than our bushing plate to allow smooth movement inside the body shell. The 1/8th stainless wire rod was bent to our shape and soldered on to the handle body, this adds rigidity and keep the owners fingers from getting scraped during operation.
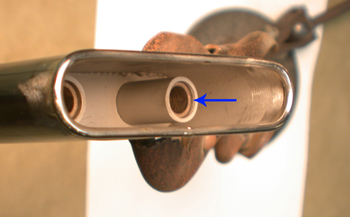
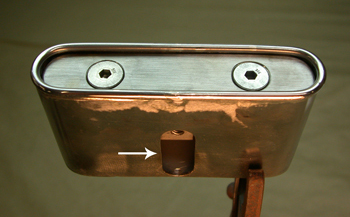
This shows a close up of the inside of our hidden handle, notice the step where the bronze bushing is below the edge of our stainless tubing “blue arrow” this step down allows the spring shown in “caption 5” to stay in place under pressure.
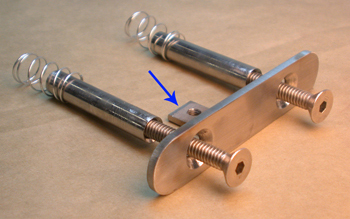
We added a threaded tab “blue arrow” to hold a linkage rod and counter sunk our stainless push plate for our retainer screws. We gathered some ¼ I.D. springs to fit over thin wall tubing which fit over the ¼- 20 screws. This will allow a plunger action for the slider mechanism. Pretty basic but it will stand up to repeated openings of our door.
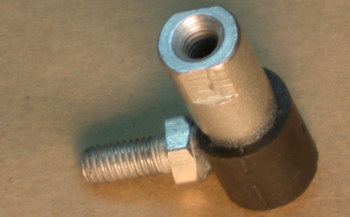
A rod retainer, This is the bottom of a 10/24 rod end cut off with a small ½ long ¼ bolt welded to it. This will be screwed in to the tab we showed you in caption 5, after the push plate is installed in to the handle body.
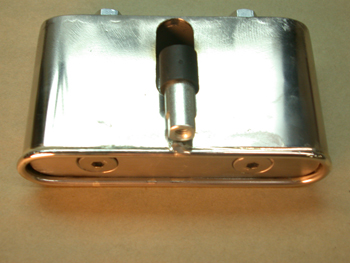
We installed the push plate in to the handle body and you can see the plate is flush with the wire rod. Notice the slot on the bottom of the handle body “white arrow” this allows ample movement for the linkage. In addition the threaded tab as shown in caption 5 is where our rod retainer will bolt to.
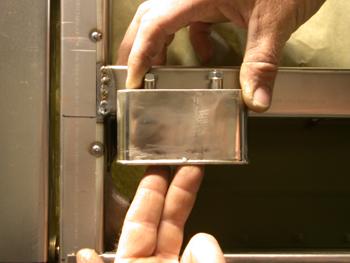
We attached our rod retainer and are now ready to install her on the door.
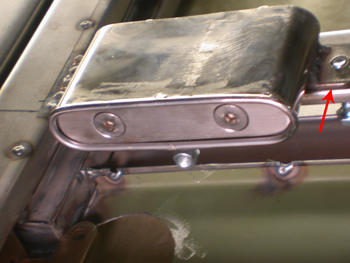
We added a tab to one side, “red arrow” and simply welded the opposite side to the door channel to secure the body, being that the internal slide parts are the only pieces that may ever need servicing. We are now ready to attach the linkage and see how she works on her maiden voyage.
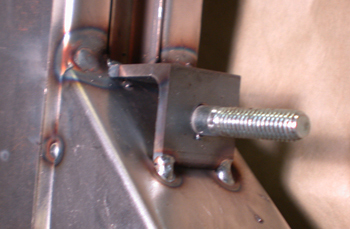
We attached a small angle bracket with a stud at the bottom of the door beam for our linkage wheel to mount to.

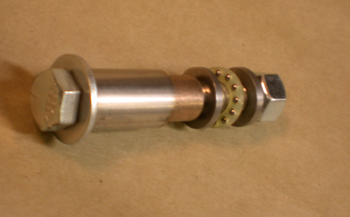
We installed a linkage wheel and included a set of thrust washer style bearings see caption 11B.
We then installed two more rod retainers.
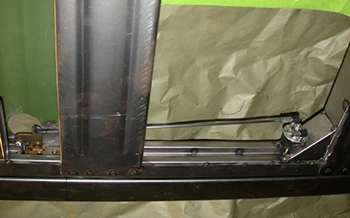
We fabricated stainless rods which we cut to length and ran a thread die over. This allows adjustment.
She works great with the push of one finger. After primer and paint we will mount the wood over the door and we will have a functioning hidden door handle.