

Build Tips
Bumper End Add-on
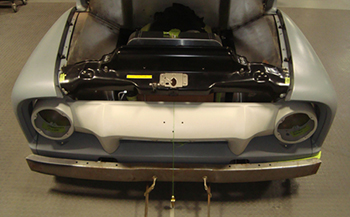
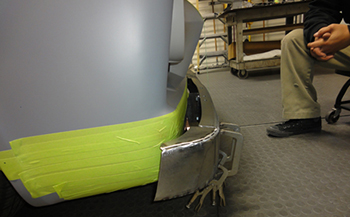
Let's face it most original bumpers from the factory were not shaped that well especially on the fat fendered 50's trucks. As seen on this 1954 Ford the ends shut down as if they whacked them off. We will show you how to make it fit with a more realistic style in keeping with the body.
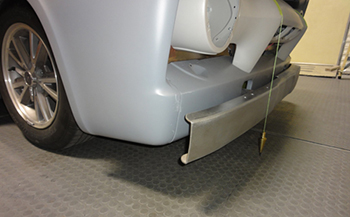
Another angle shows it even better, As seen the centerline has been found and we hung a plumb bob to keep us on track.
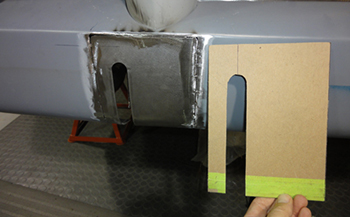
The first step is a mockup. We use chip board which is available at your local art store. I purchase it in bulk from Dick Blick.com for the best pricing per sheet. I personally like to do quick mock ups to save the clients time and then look at it through out the day to be sure I like it. I also like to look at it from different angles and distances. If all is acceptable after that I go with it .
To start the process we will go back about 4 inches or so from the end so we have enough room to make the transition smooth and precise.
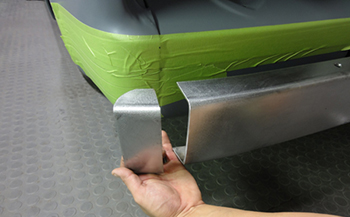
Mani cut it off using a Chicago Pneumatic 861 and then deburred the edge to have a clean starting point.
Mani cut some chip board and fit it around the corner to make the transition.
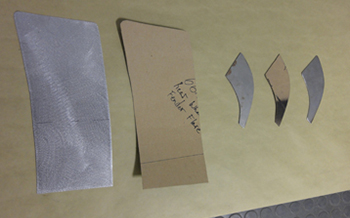
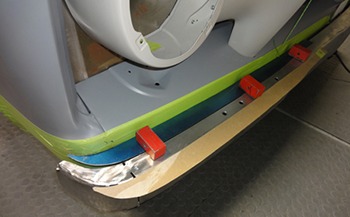
Using our mockup as a template we laid out the pieces and transferred them to 16 gauge sheet metal. The more precise you can make the template the better your finished parts will come out. We used 16 gauge as the bumper is thicker then the average 20 gauge body panel. Remember, good fit, good weld, bad fit, bad weld, the choice is up to you. Take the time to do it right and you will be happy with the results.
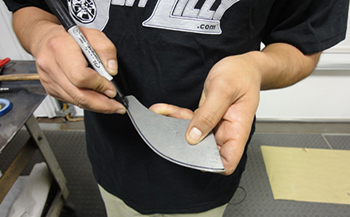
Mani uses a regular sharpie to mark this bumper end as a guide to tweak the edge. On some pieces we use fine line sharpies for precise marking and or miko blueing spray while using a carbide tip scribe for a fine silver line.
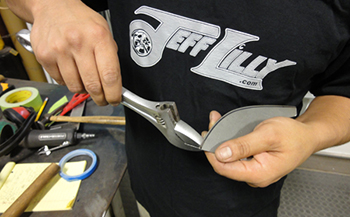
Simple tools can be used such as an adjustable wrench to enable a small bend of 1/8th to1/4 inch. This makes a nice rounded edge like our bumper top will have.
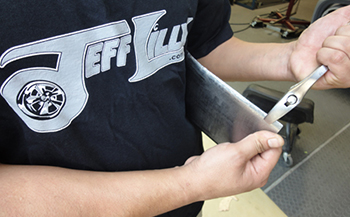
Same goes for the side piece as seen it is coming around as he works it bit by bit until it is formed to his liking.
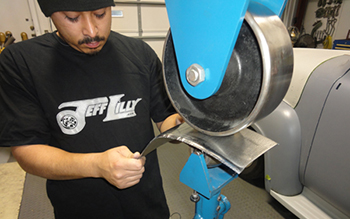
You can hammer and dolly it the same way at this point but we use a planishing hammer because we need to be maximally efficient for our customers sake. Mani works the edge using a small radius die to take out any waves or irregularity’s that the adjustable wrench made while he was tweaking the radius with the adjustable wrench.
A close up shows how effective it is with this tool as it makes it a snap to roll it to the final shape.
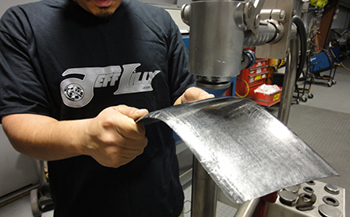
The center of the bumper end gets dipped a bit when the edge is being formed so the english wheel will smooth and stretch it back out to a consistent shape in keeping with the bumpers radius.
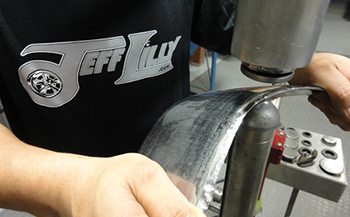
She fits pretty good first time around so we are well on our way with the center section. Time to get on to the top section.

Mani uses a square for a straight edge as he places the top section on the driver side and tack welds it in place.
As seen both top and bottom corners are level and tacked in place as she is starting to come around. We are going from one side of the bumper to the other for photographic purposes but it really does not matter if you do the top/ bottom or side pieces first.
The center sections that Mani made first are now fitted in place. Being that we want a subtle radius on all edges and given the fact that this gauge of metal will expand more then a thinner gauge because of the heat level required during welding, we took this in to consideration and left a 1/8th gap for optimum results. As seen we have it tack weld in place.
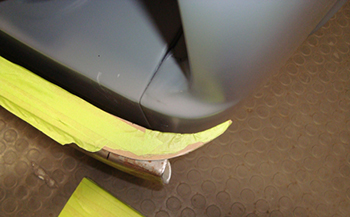
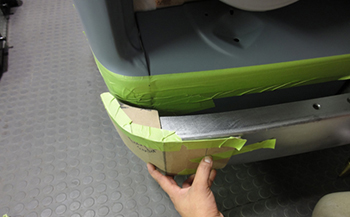
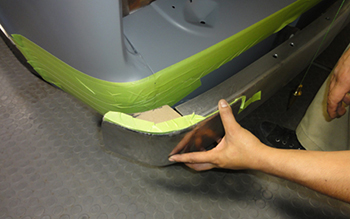
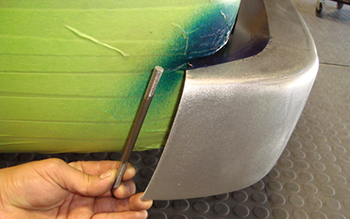
On the passenger side we are looking over the bumpers edge to decide where we want to trim it for the best look. In addition we are deciding how much we want to add to the top to make it closer to the body for a snug fit.
Mani made a temple and cut out some metal and has it laid out on top of the bumper so we can fill the void. We will then trim it back until there is a ½ inch gap between the body and bumpers edge.
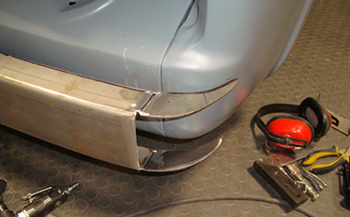
After we cut it at the correct angle it is time to add a 3/16th wire to round off the edge.
Welded then ground smooth she looks great.
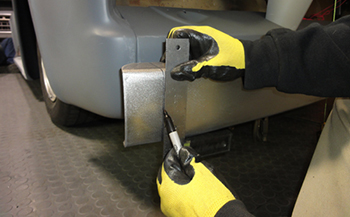
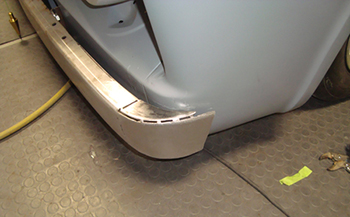
In order to keep from seeing the bumper bracket we added a bit of metal to close up the large gap the factory had on the splash pan behind the bumper. Time to finish it off.
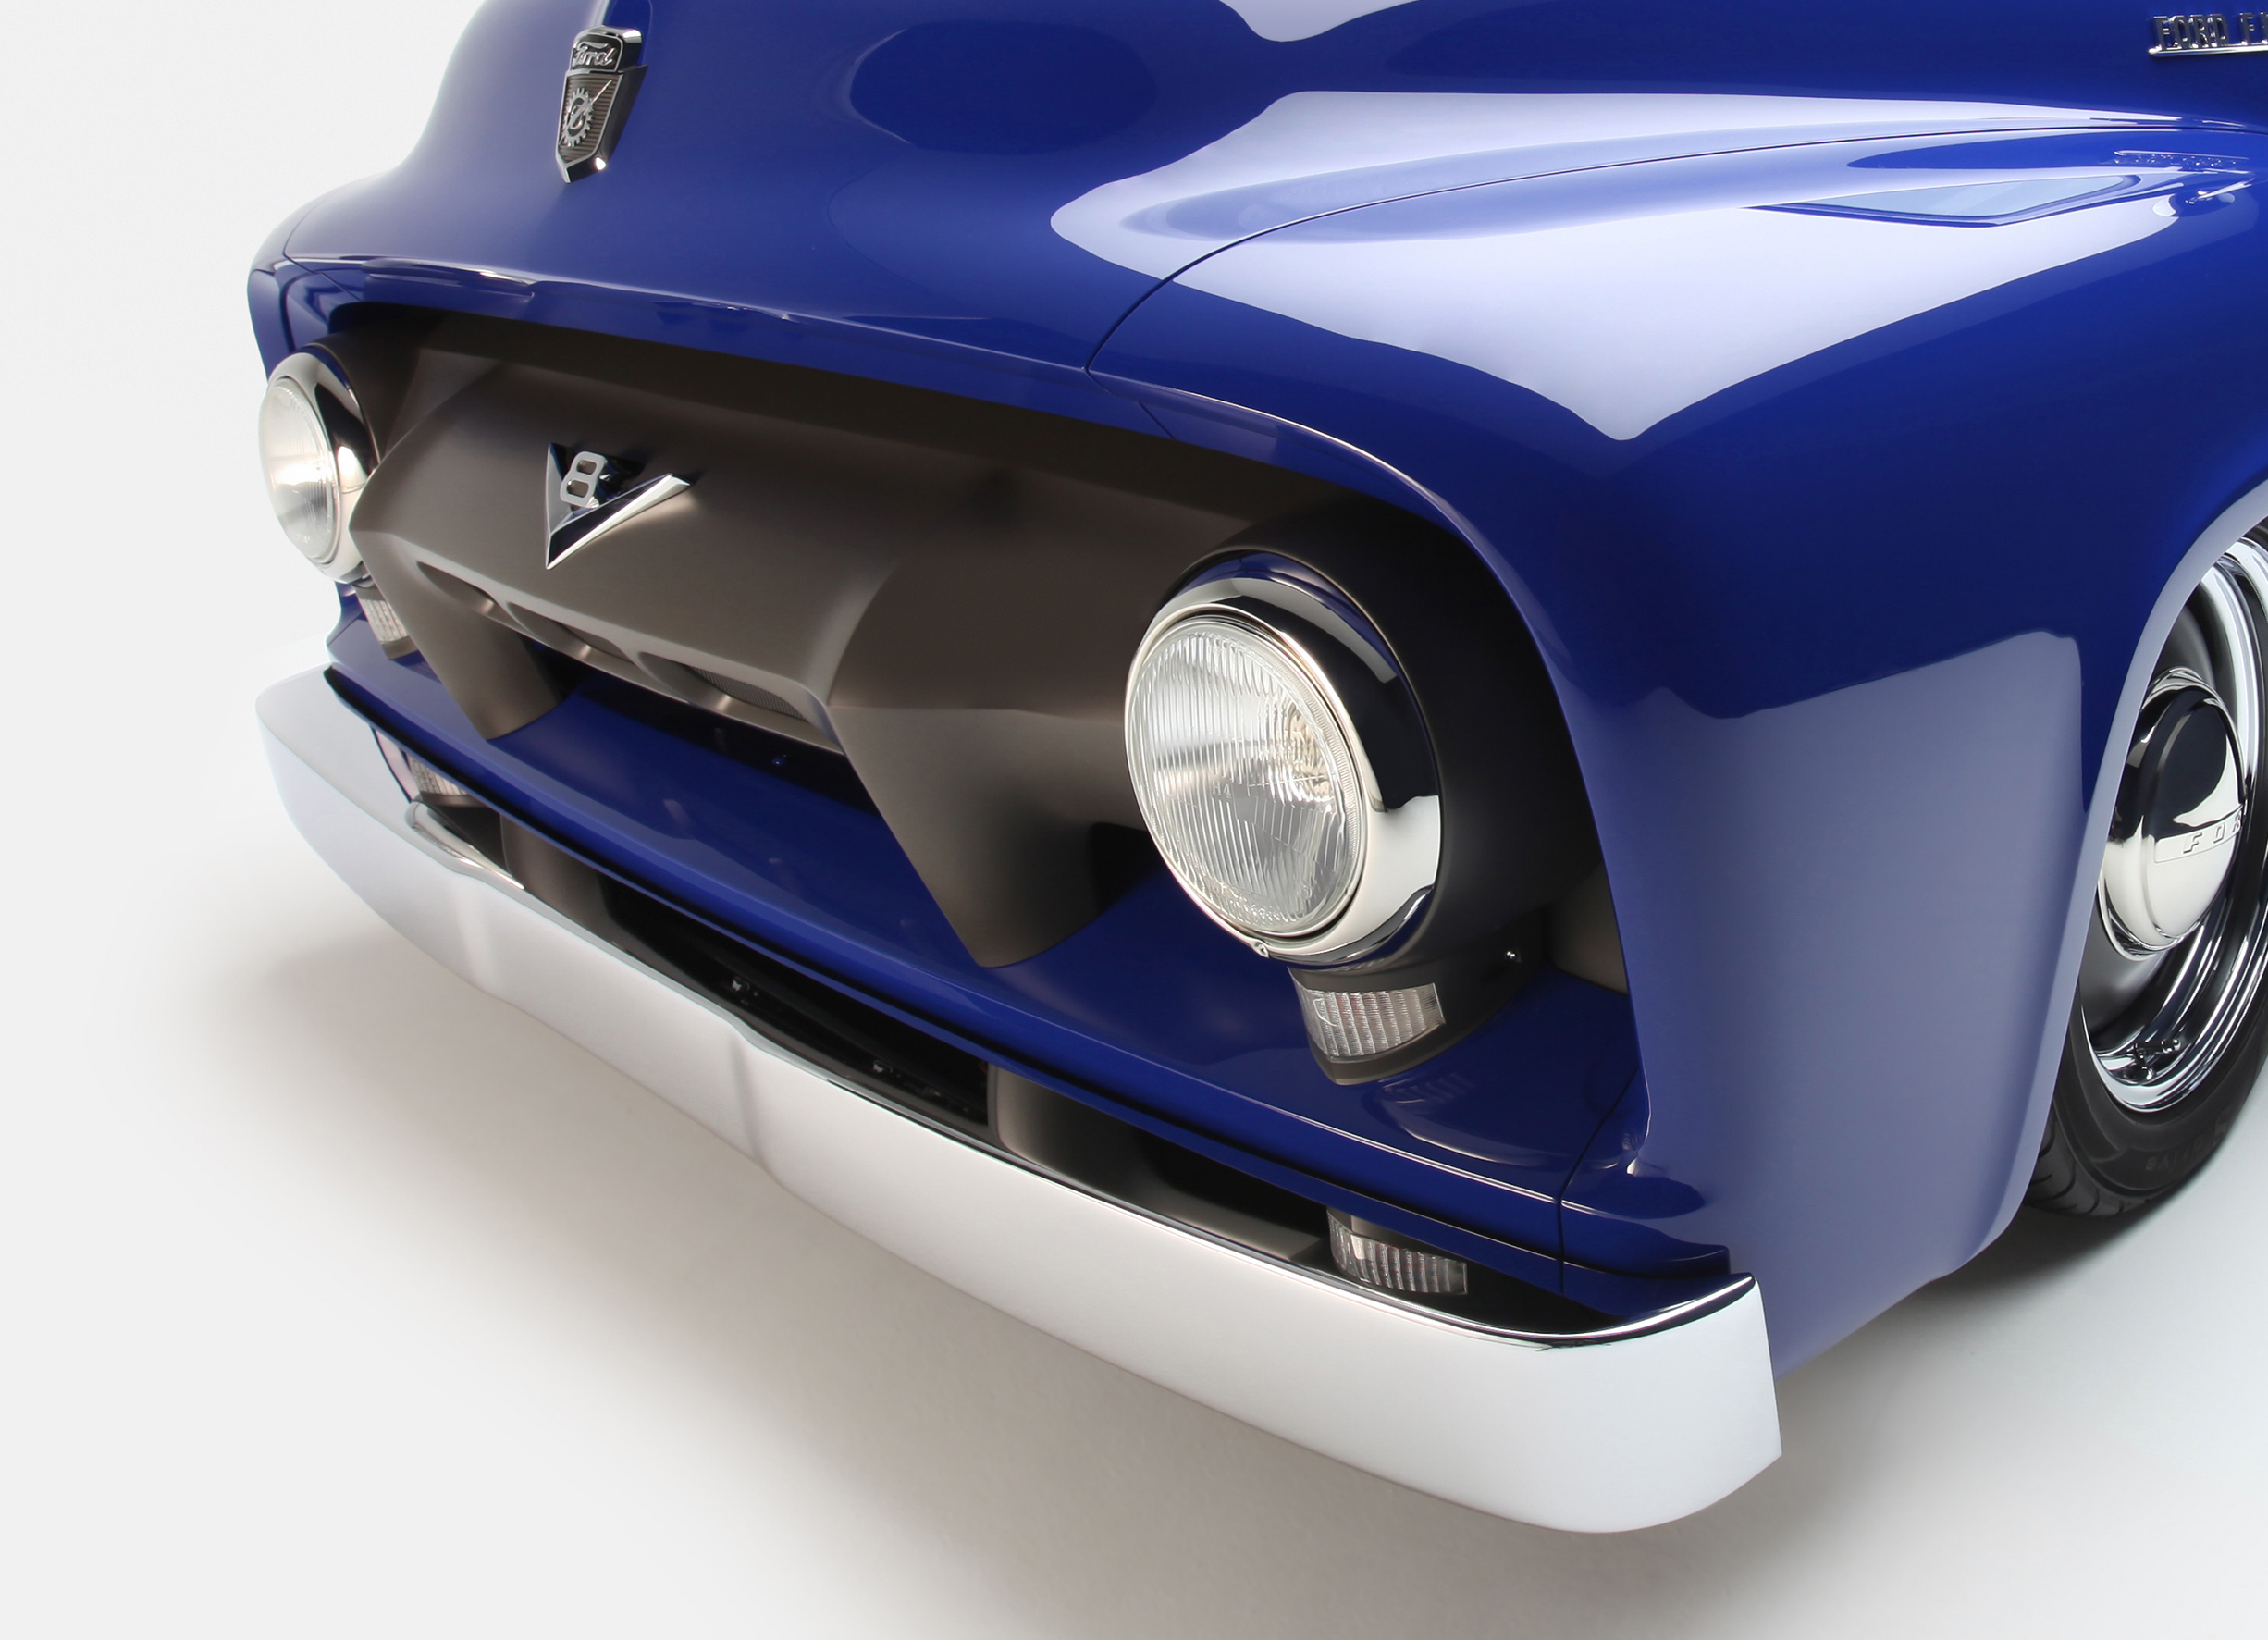
The bumper looks fantastic on the completed truck.
Click here to see completed project photos.