Jeff Lilly
  • Home
  • Shops
    • Mechanical Shop
    • Media Blasting
    • Body Shop
    • Block Sanding
    • Wood Work
    • Paint Shop
    • Upholstery Shop
    • Assembly Shop
  • Gallery
    • Restomods
    • Hot Rods
    • Muscle Cars
    • Pro Touring
    • Trucks
    • Corvettes
    • Classic Cars
    • Frame Off
    • Pre-War
  • Why Us ?
    • Why Choose Us
    • Build Process
    • Beginnings
  • Cost
  • Contact
  • Recognition
    • Endorse
    • media
  • Build Tips
  • Employment

Build Tips

69 Camaro Seat Wire #1

1
Click to enlarge

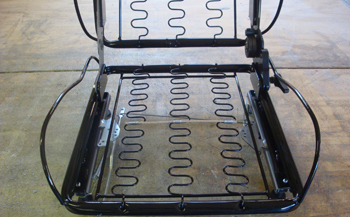
Dead On is being built to a " whole nuther level " so we need radical bucket seats for an interior that goes along in keeping with our theme. We start by selecting some standard bucket seat frames from Glide to get the ball rolling.

2
Click to enlarge

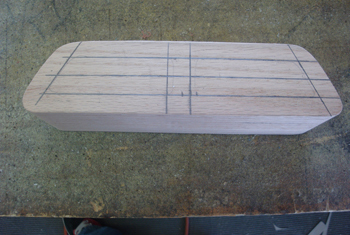
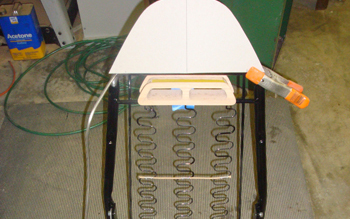
One of the first things I decided on was inserting a double seat belt tunnel in the headrest section so Jan drew up a design on wood and is ready to carve it out.

3
Click to enlarge

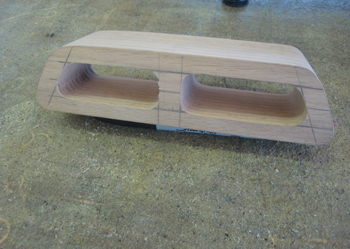
The trim will actually go around the perimeter of the opening about 3/8 of an inch to achieve the look I want.

4
Click to enlarge

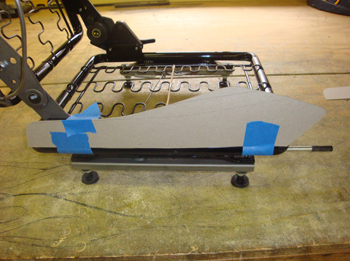
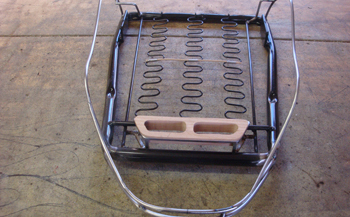
Jan is laying out the lower seat section side bolster with chip board to determine the look we are after.

5
Click to enlarge

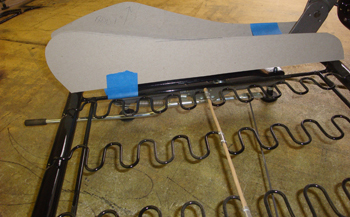
On the inside we have a different shape as it starts to come down to where the actual seat section will be.

6
Click to enlarge

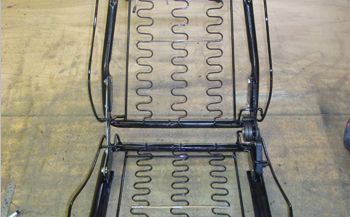
The upper section receives a different shaped wire for the side bolster in keeping with our radical dead On theme.

7
Click to enlarge

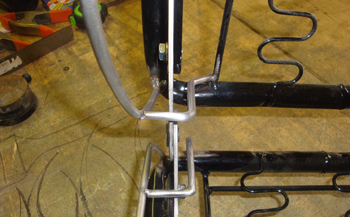
Small wires are formed to go around the hinges to support the foam while hiding the mechanisms as much as possible.

8
Click to enlarge

Rear view.

9
Click to enlarge

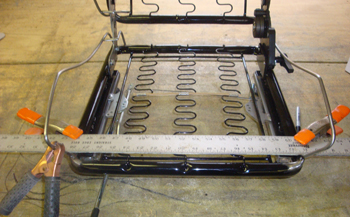
Measuring to be sure the wires are exact side to side.

10
Click to enlarge

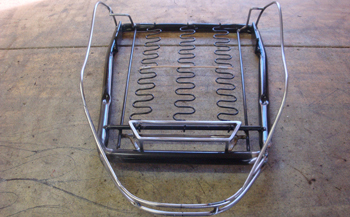
Jan brought the wires all the way around the top and back down with a smooth transition for a free flowing seat just like the rest of the car is being built.

11
Click to enlarge

The seat belt wood buck is inserted to check fit.

12
Click to enlarge

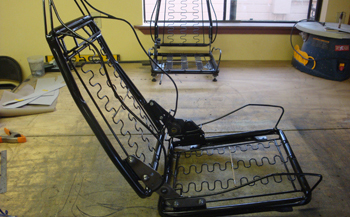
Side angle shows the aggressive stance of the seat. We are talking the Ultimate in Luxurious Muscle comfort.

13
Click to enlarge

Front view shows a very symmetrical flow of the upper frame to the bottom.

14
Click to enlarge

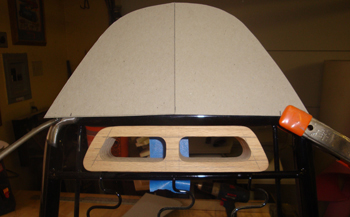
The chip board mock up of the upper headrest is next then Jan can figure the foam.

Jeff Lilly Restorations

11125 FM 1560 N San Antonio, TX 78023

210-695-5151 - FACILITY TOURS BY APPOINTMENT ONLY

Mon- Fri 8:00 - 5:00

The look, feel and sound, you've seen it finished in your minds eye a thousand times. The years go by, as time slips away with the old enemy "procrastination". If it is time to get it done, contact us today to get your machine rolling down the road in style. Please take the time to read the Cost / Faq section by clicking HERE This section will help inform you about the car building process to help you make your best decisions.

Thank You! To contact us with your questions call 210-695-5151 and to send photos or information about your project email us by clicking here.

Follow Us For More

© 2023 Jeff Lilly Restorations