1965 Mustang - Body Work
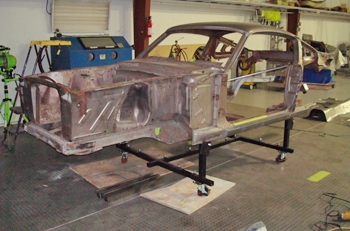
This 1965 Fastback GT Mustang came to us in a basket case state. As seen she is a bare shell with the roof and a few frame rails sticking out the back.
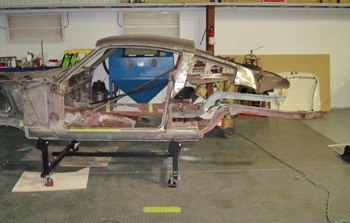
Oh yes the rockers are still there, Sorry I forgot to mention that.
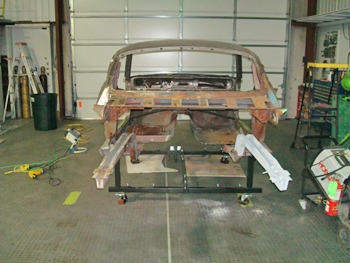
Customer wants the dream to live so he did his research and chose us to get it done.
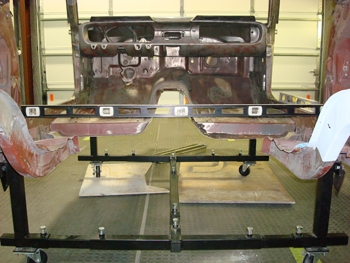
We start off by leveling the Mustang as we want the body to be built dead on. Proper leveling also allows us to see if the frame rails have moved around since all the sheet metal was removed.
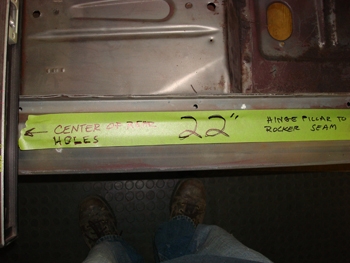
Measuring factory holes and the distances, heights etc allow us to compare to our factory manuals and frame datum numbers. This way we know if something has moved and what needs to be corrected.
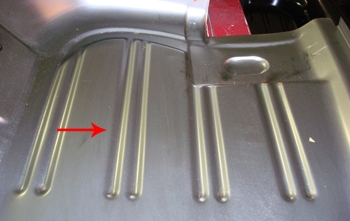
Looking at some of the repro sheet metal we have a few floors that look good. As seen the floor grooves are nice and straight, stamped in the right locations as per the factory.
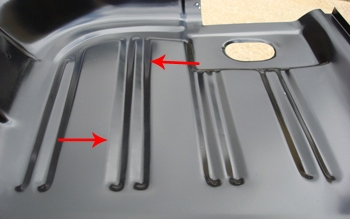
This is a bad repro, look at the lines, crooked etc and not usable. We will toss them out as they are not fit for any Mustang Restoration we build. I am not naming any names but these are sold by a major Dist/MFG with full page ads in all the magazines etc.
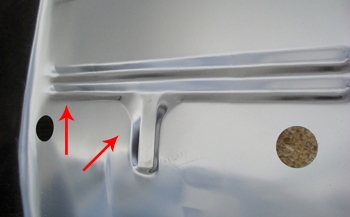
Here is another bogus repro which looks like Fred Flint Stone pounded out the grooves with his stone hammer, talk about cave man quality.
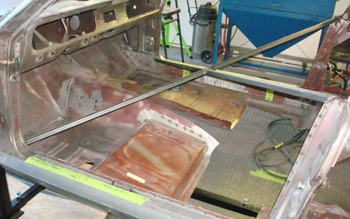
After some preliminary frame straightening we installed an X brace to keep the door jambs to rockers from moving, as we have to cut out more of the floor because it is rotted.
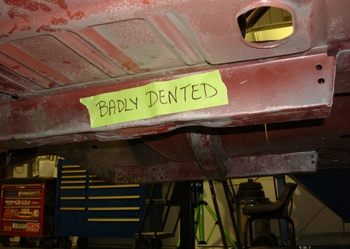
Not to mention the frame rails are dented up, from floor jacking improperly during a 40+ year span.
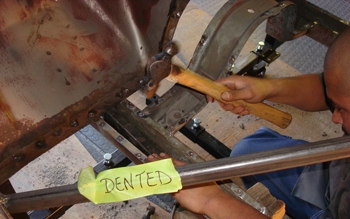
Mani removed the rotten metal and is straightening the frame rail dents while they are out.
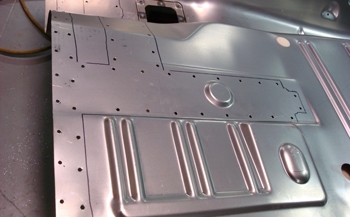
We line up the floors, trimmed them to fit and marked all the braces where the welds will take place. We simply measure 3/8ths of inch inside of the edge to place the weld dead center on the frame and drill them out to prep them for the welding process.
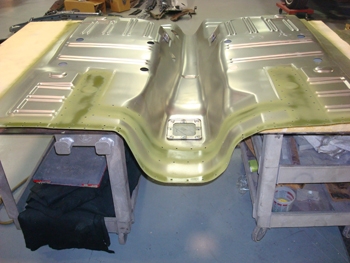
We flip it over to the bottom side and spray zinc chromate primer on the areas that the frame will cover to prevent corrosion in the future even though this Mustang will probably never see rain again.
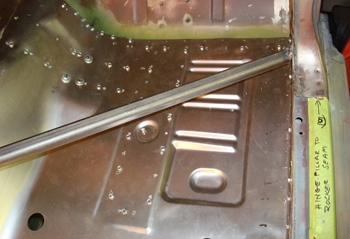
We installed it and using self tapping screws to keep it flat against the frame rails we check the final fit. If all goes well we can then weld it in place after we fit the entire body. Nothing gets welded until the whole body is fitted and screwed down in place.
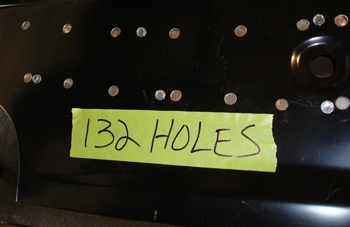
The shear number of holes to be drilled for welding is incredible. 132 holes on each frame rail alone.
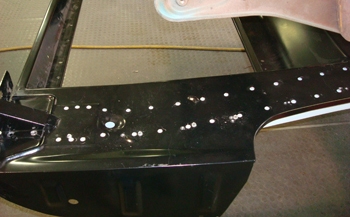
This rear frame rail/trunk drop off lines up and is in place. We also had to install the qter panel and tail light panel to determine if this was correct.
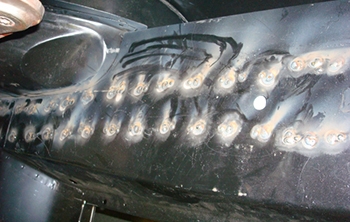
All looked well so we weld her up and will now grind her smooth.
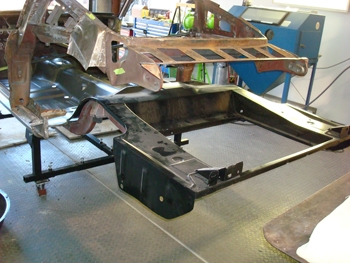
Frame system is looking good. Lets move on to the next step in the restoration process.
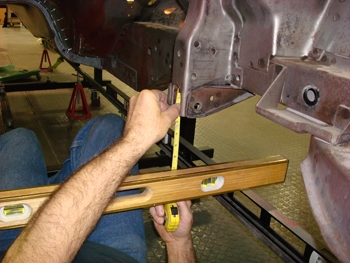
Bob checks the measurements again to be sure nothing is moving.
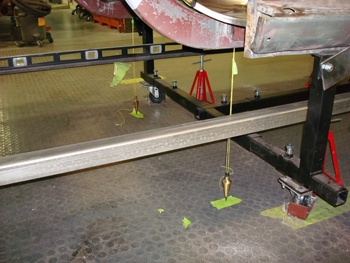
Hanging plum bobs from the Mustang's chassis point also assures us that the frame is square, so the car will handle and accelerate straight.
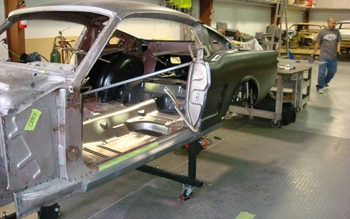
We then re hung the qters to check the door openings etc.
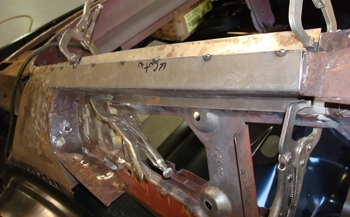
As seen under the side qter window we have some metal that needed replacing, Some parts like this one can not be purchased therefore fabrication is mandatory.
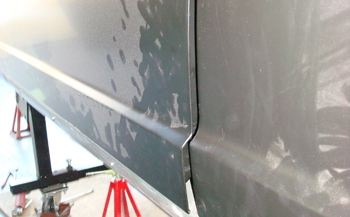
We informed the customer that more then likely the repro doors would not fit but we have to prove it to calm any concerns, as seen the repro doors fit terrible. The original Mustang doors are rusty but fit 100 % better. The time to fit a door and gap it properly is much more time consuming then panel patching rust repairs on restoration projects.
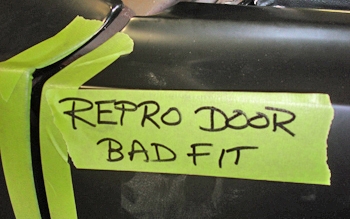
This shot shows the door to fender, You could jump a cat between this gap. As mentioned before, if you choose the wrong parts it will cost you in labor big time not to mention quality. Let's face it you can not turn a limestone in to a diamond so start with the best parts possible to save on labor and get the best quality. Penny wise nickel foolish is not the way to go.
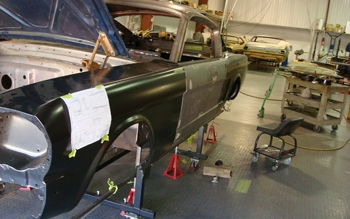
We installed the original Ford Mustang doors and sure enough they fit 100 times better.
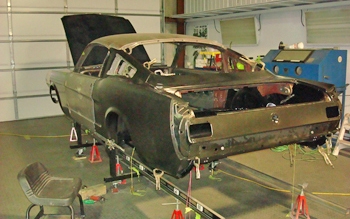
Lined up and plumb bobbed all around she is looking good.
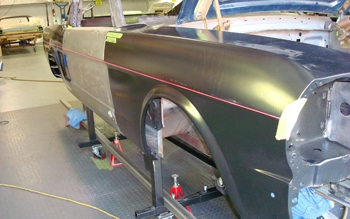
The string test shows our main points line up, down the side as this is vital.. Dead On!
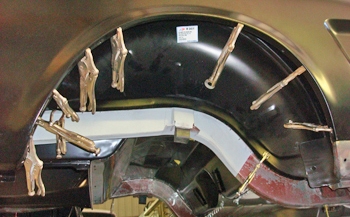
Clamp up the outside wheel well so we can mark then drill all the spot weld holes, then we weld the qters. We will not be installing the inner wheel houses as we are going to narrow/modify the frame rail to accept wider tires. This car will be receiving an all Aluminum Ford GT FORD motor with super charger and we need all the tire we can get. We will add to the inner wheel house to extend it over once the frame is modified and then weld them in later.
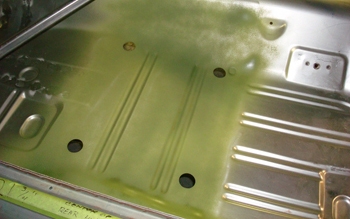
The floors are in and we checked the seat risers for location and made sure the mounting holes are square so the seats sit perfectly in the car, We primed where the riser will cover
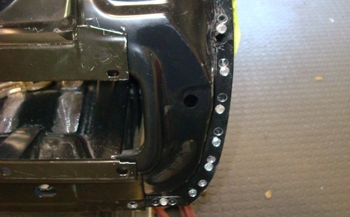
The back end of qter panels are prepped for welding.
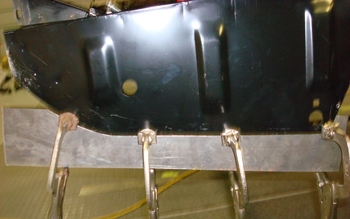
The trunk drop offs need metal added to them to reach the qter flange, This is the best repro panel available and original Ford drop offs from a salvage yard are almost always rusted out so we have to extend them. This is reality when building cars, Parts Do Not Fit. Even thought they are sold as new.
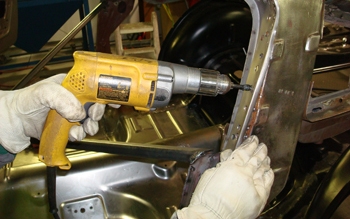
We also are removing the drip edge which is unsightly for a smoother looking roof line.
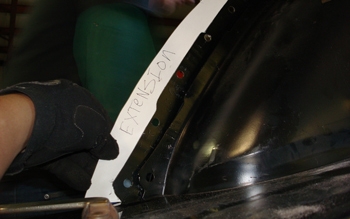
The top inside part of the outer wheel house also needs an extension to match the inside wheel house lip once we install it at a later date as mentioned earlier.
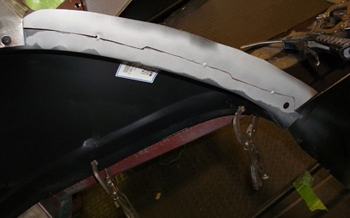
Ready to weld up.
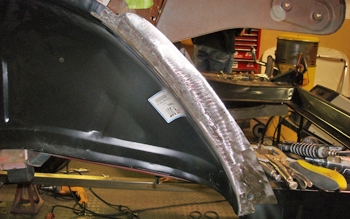
Ground smooth and primer ready.
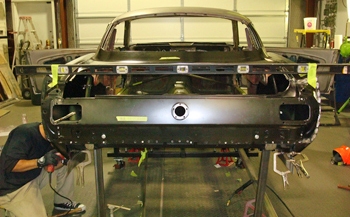
It is leveled out on the frame and also the qter edge points are the same.
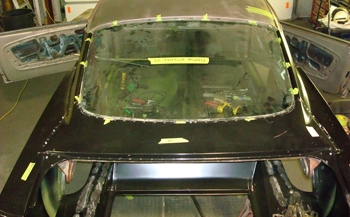
Rear glass deck panel is installed, as seen we had to install the rear glass to be sure everything fit exact before any welding.
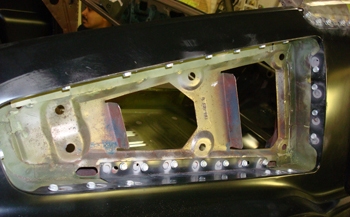
Same goes for the roof line cut outs prepped and ready.
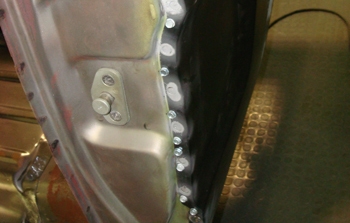
Qters to door jambs are also screwed down and ready to weld. Notice the spot blasting on each hole. This really helps the weld penetrate and lay as flat as possible, this also minimizes the grinding time that will need to be done.
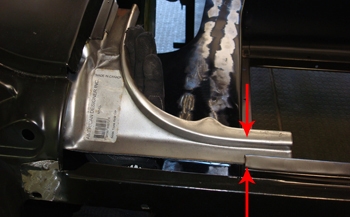
Another example of repro madness, the qter to tail panel extensions do not line up, so a bit of slicing and dicing is needed. This is important as the rubber trunk seals rests on this and any uneven contact will not seal and also hurt the fit of the trunk to the qters.
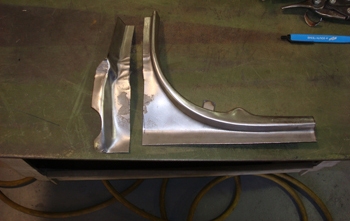
Time to slice and dice.
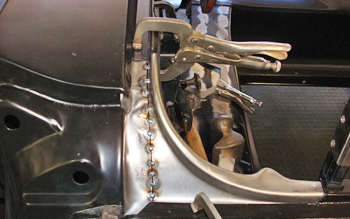
To modify is the only way.
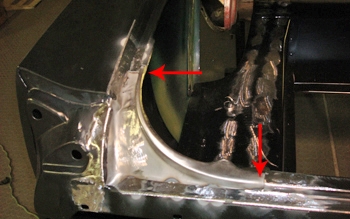
Now it fits.
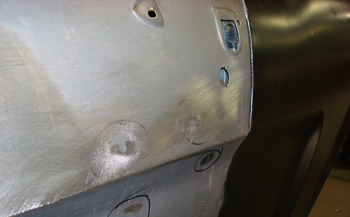
Dents and more dents abound, easy removal for us.
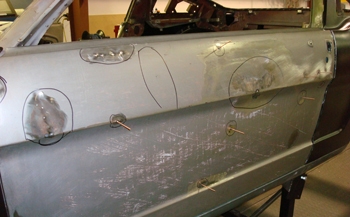
There are many dented spots, as seen Bob is using a stud gun then pulling the dents out using a small slide hammer.
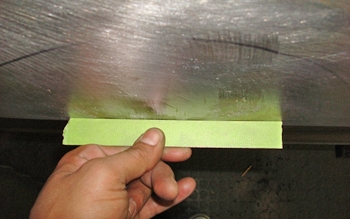
When done and filed the dents are gone and barely noticeable.
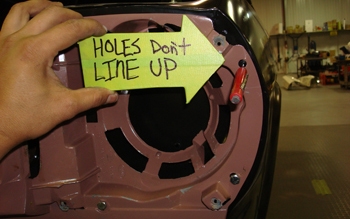
AH, OH genuine Ford Mustang repro parts do not fit either as evident these non these head light housings.
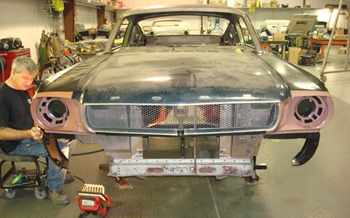
They all look good from 40 foot away but eagle eye mcfleagal AKA the guys from Jeff Lilly Restorations will find the flaws and correct them.
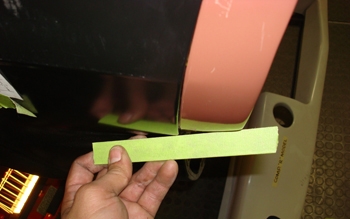
As seen the straight edge tells the story. The headlight cover is inside the fender over 1/8th of an inch . This is why they call them " production" cars.
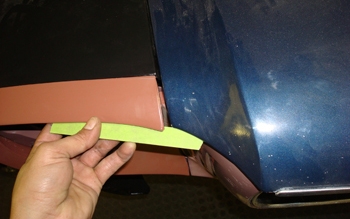
The hood fits at the drain cowl but the cover sticks past the hood, Ford did not have a better idea on this one.
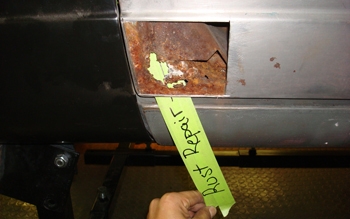
As we said rusted doors on the corners are a given but because they fit well it is still better and faster then using bogus repro doors. Not naming any MFG names but do you really like to eat " CORN " hint hint hint.
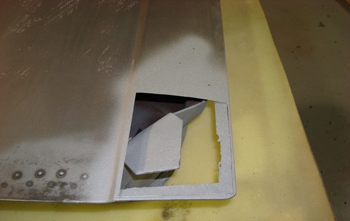
Blast it all out white metal clean and lets get started.
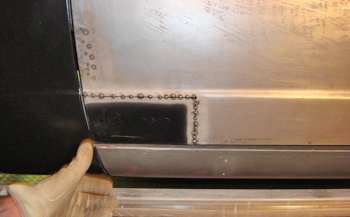
Fit and tack, straight edge true lets finish.
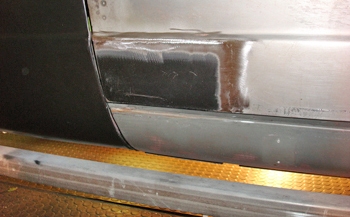
Welded solid and ground smooth for a perfect patch.
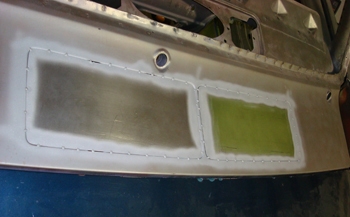
We also sealed over the drain cowl, we do not need fresh or stinky air for vents with A/C and it looks smoother and better. Tacked and ready to finish off.
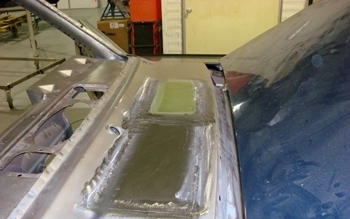
We welded her up and she is looking good no more water leaks either as Mustangs are notorious for below this cowl.
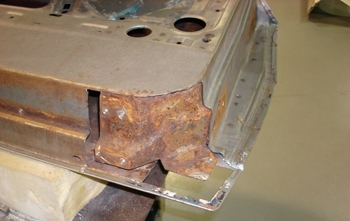
On the back side of the other door we show you our Mustang restoration methods.
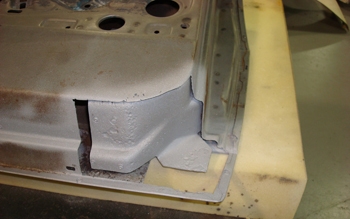
Blasted and ready.
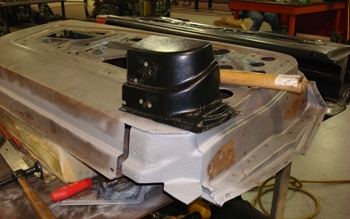
On most cars we would have to fabricate from scratch in this area but the Bogus repro doors actually fit this area decent with a bit of tweaking. Being that we, nor the customer could bear to sell the bogus repro to another Stang Enthusiast we decide to cut off the bogus doors and repair our doors with the section.
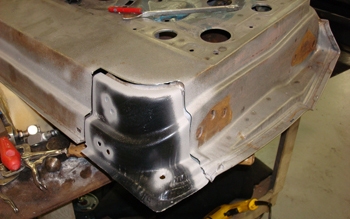
As seen they fit good after a bit of tweaking.
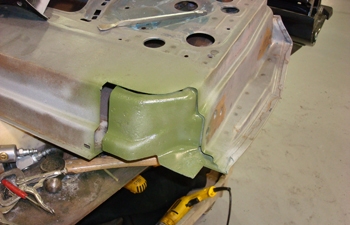
Zinc chromate protection on the inner support.
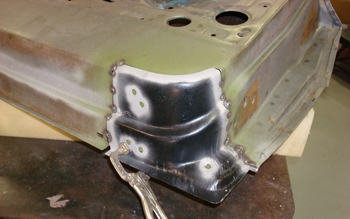
Tack welded on and ready to go.
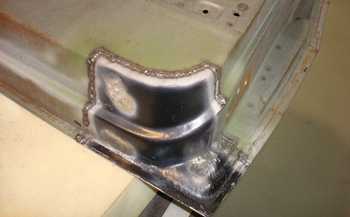
Fully welded no pin holes.
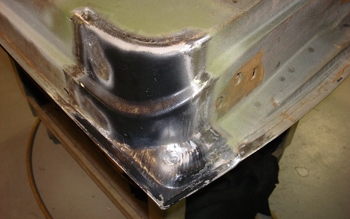
Ground smooth ready for primer and paint.
